Leah Tackles

  • Home
  • About
  • Policy
  • Beauty
  • Fashion
  • Cooking
  • Exercise
  • DIY Projects
  • Decor
  • Book Club
  • Family

Kat Von D Alchemist Holographic Palette Review

December 26, 2016 & Leave a Comment

Hi there! Happy Monday!

I hope that all of you had a wonderful weekend, and if you celebrate, a very Merry Christmas! I had a wonderful Christmas with my family, and ate WAY too many cookies ; ) Today I am so excited to be sharing the *highly* anticipated Alchemist Holographic Palette from Kat Von D.


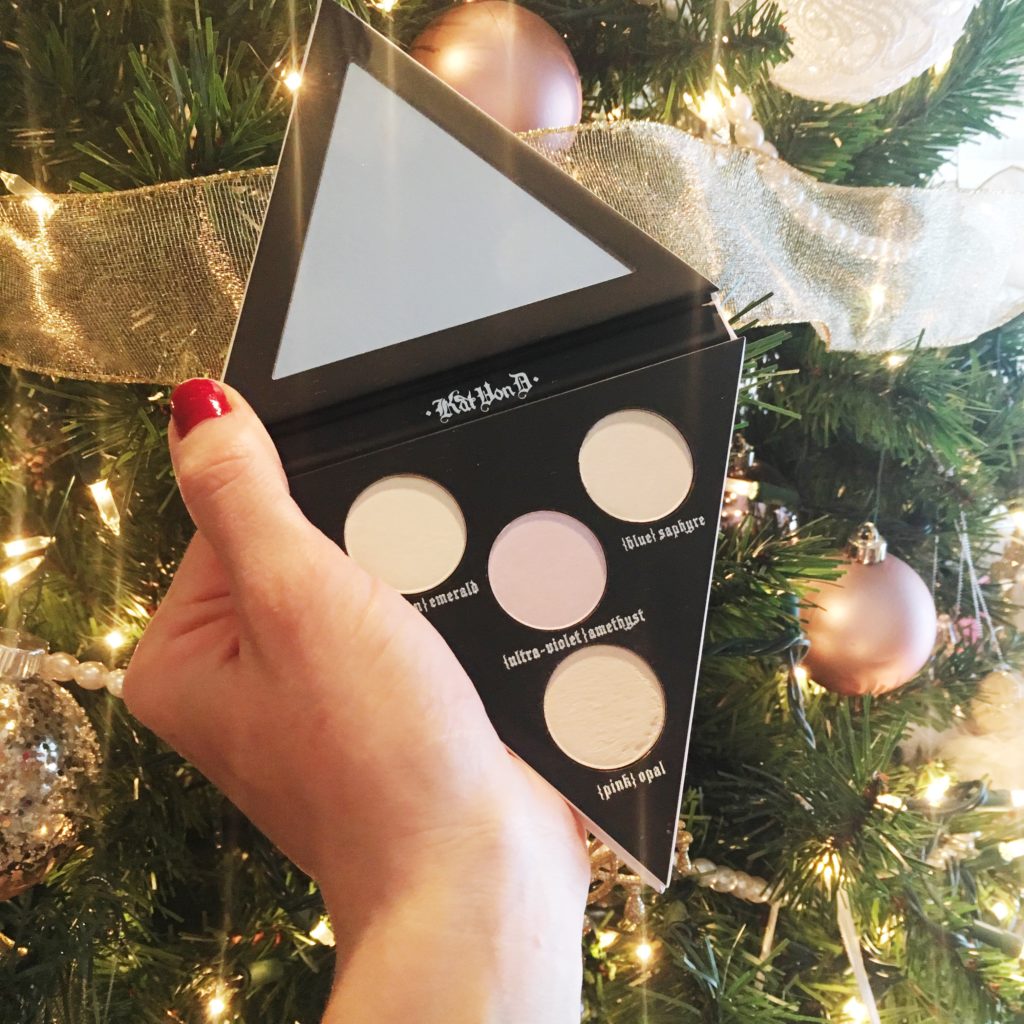
Kat Von D Alchemist Holographic Palette

katvond-alchemist-review-leahtackles.jpeg

katvondalchemsit-leahtackles.jpeg

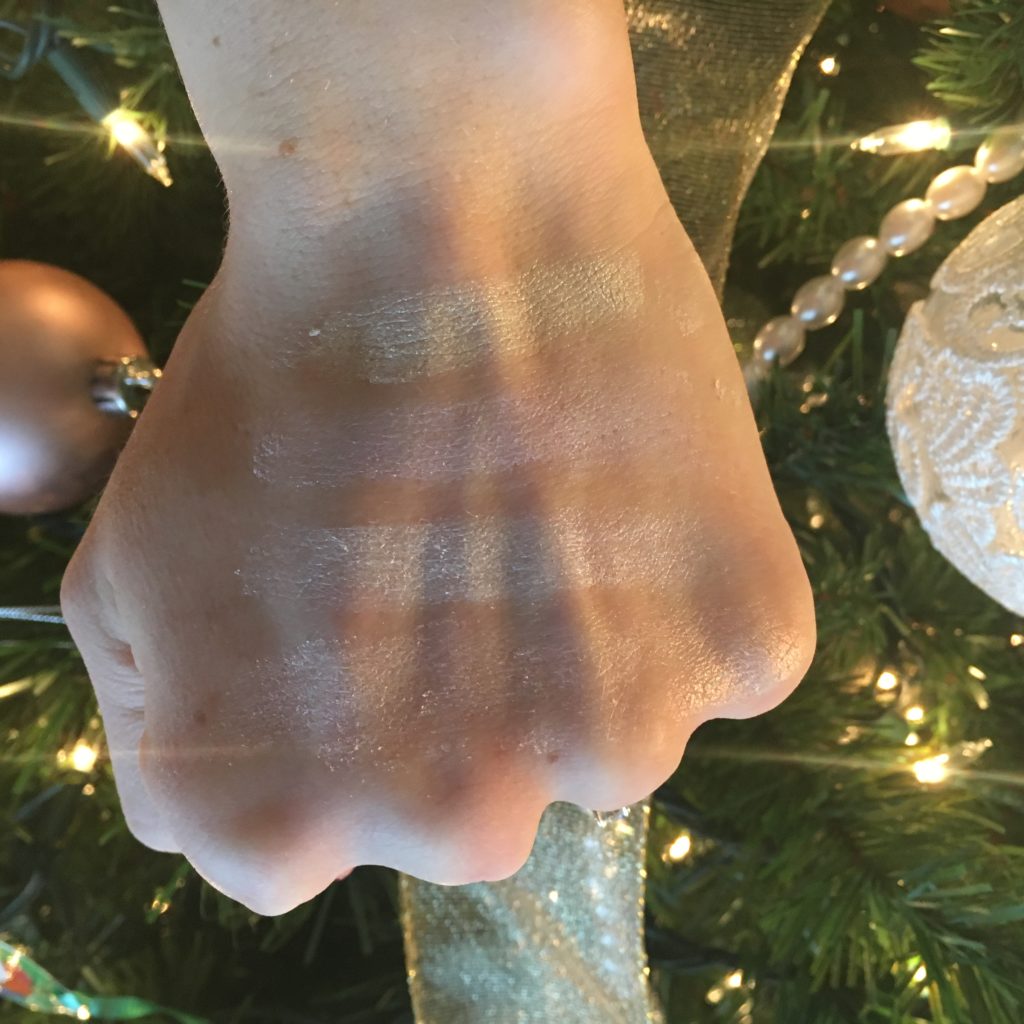
Without Flash:

katvondalchemist-review-leahtackles.jpeg

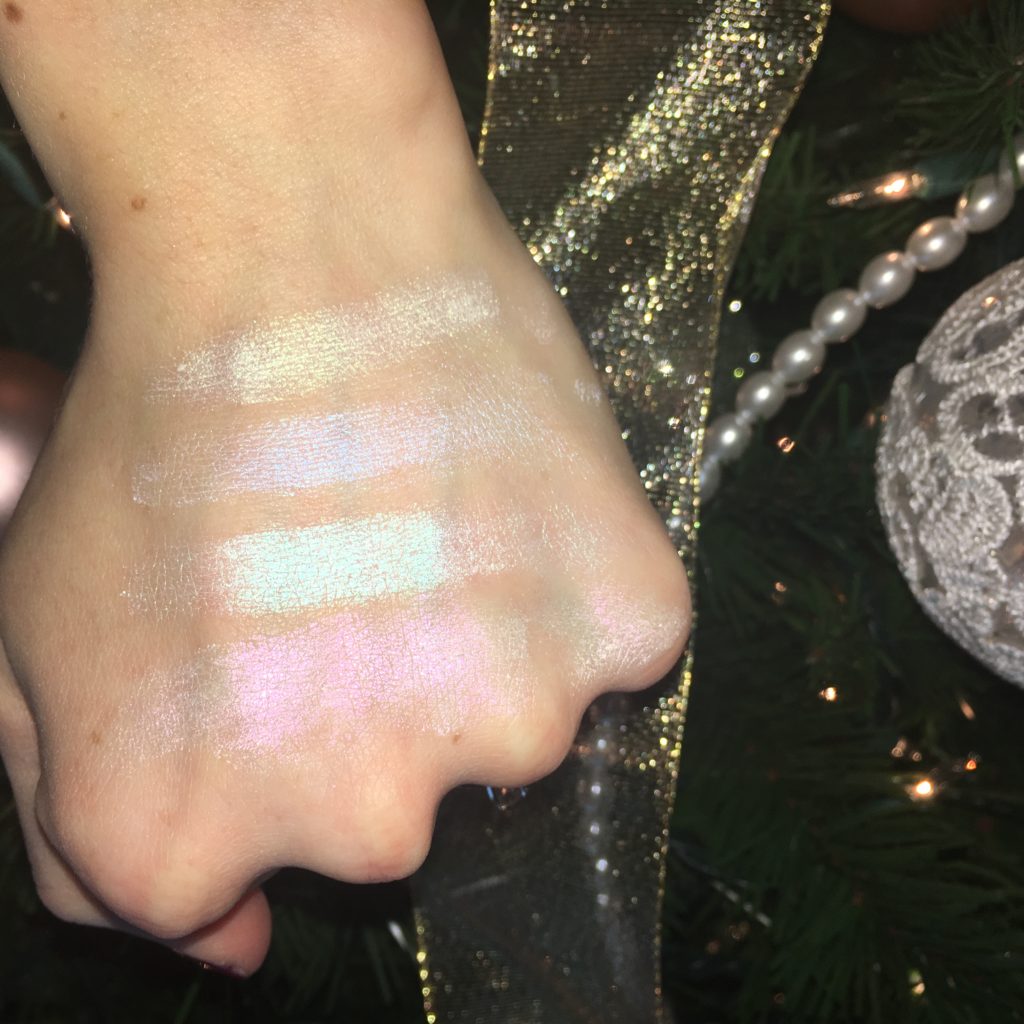
With Flash:

katvondalchemist-leahtackles.jepg

katvondalchemist-holographichighlight-leahtackles.jpeg

katvondalchemistreview-swatches-leahtackles.jpeg

What It Is:

This palette is being called a “transformer” palette because it can be worn as a highlighter, or as a topper for eye shadows and even lipsticks.  Each of the four shades are formulated with “Double Dimension Technology” which catches the light from every angle, given a holographic effect.

My Thoughts:

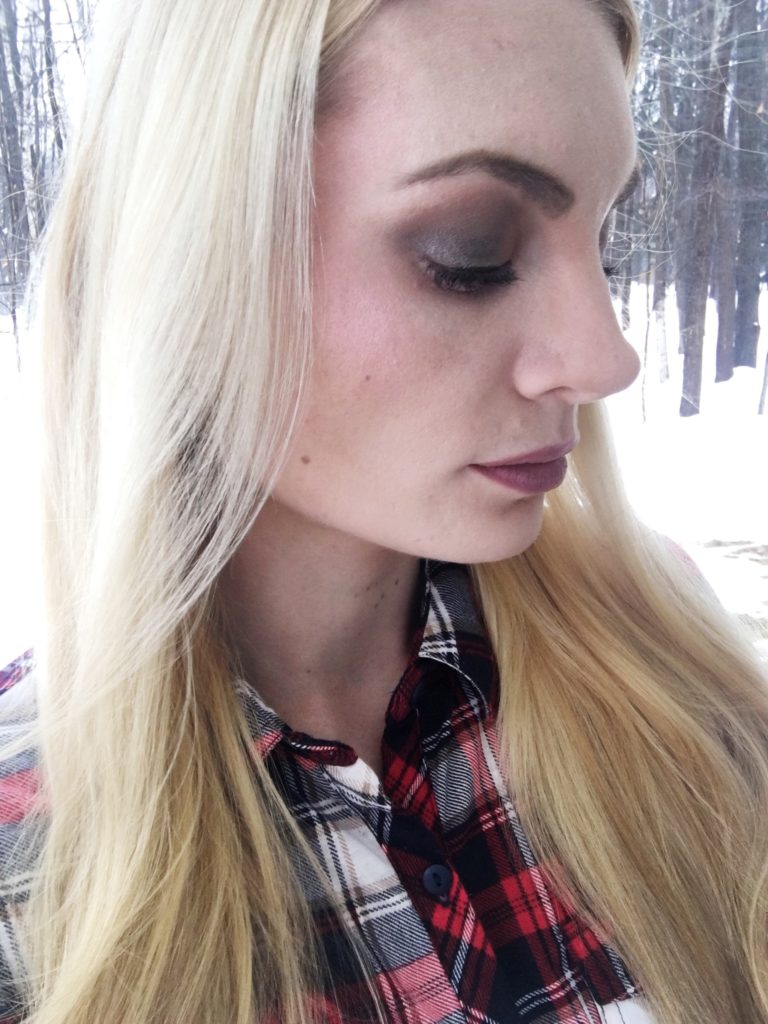
I was intrigued by this palette because I have been watching Kat Von D slowly share sneaks on her Instagram account. Kat Von D has spent years working on these formulas and has called this palette one of her passion projects. Being a beauty lover, I knew that this was something I wanted to try for myself right away! I have worn two of the shades so far as a cheekbone highlight and it is stunning! A little bit goes a LONG way, but I absolutely loved the way it caught the light. I am excited to try this as an eye shadow topper, and think it would be a gorgeous look over a simple look to amp it up to something a lot more special.

Do I Need It?

I think that this is a must have for the makeup junkie who loves to try new things, play with makeup, and collect makeup. I think that this is beautiful for those looking for something new. I have noticed the similarities between this and the Anastasia Beverly Hills Moonchild highlighters, and after comparing swatches online they do look similar though not exactly the same. I think that if you have Moonchild you don’t need the Alchemist, but Alchemist seems more holographic and Moonchild seems to be more metallic or duochrome to me.

Do you have this? Are you planning to get it? I was able to pick it up on Sephora.com during the VIB pre-launch, but it is now available to everyone. Thank you, as always, for reading! I hope that you have a fantastic rest of your day : )

FacebookTwitterEmailPinterestShare

Filed Under: Beauty Tagged With: Alchemist Palette, B Blogger, beauty blog, Beauty Reviews, beauty tips, beauty youtuber, duochrome highlighter, holographic highlighter review, Kat Von D Alchemist, Kat Von D Alchemist Palette, Kat Von D Beauty, Kat Von D Instagram, leahtackles, LeahTackles Beauty, makeup blog, makeup blogger, makeup tips, Makeup Tutorials, sephora

TOO FACED SNOW BUNNY BRONZER REVIEW

December 14, 2016 & 1 Comment

Hi there! Happy Wednesday!

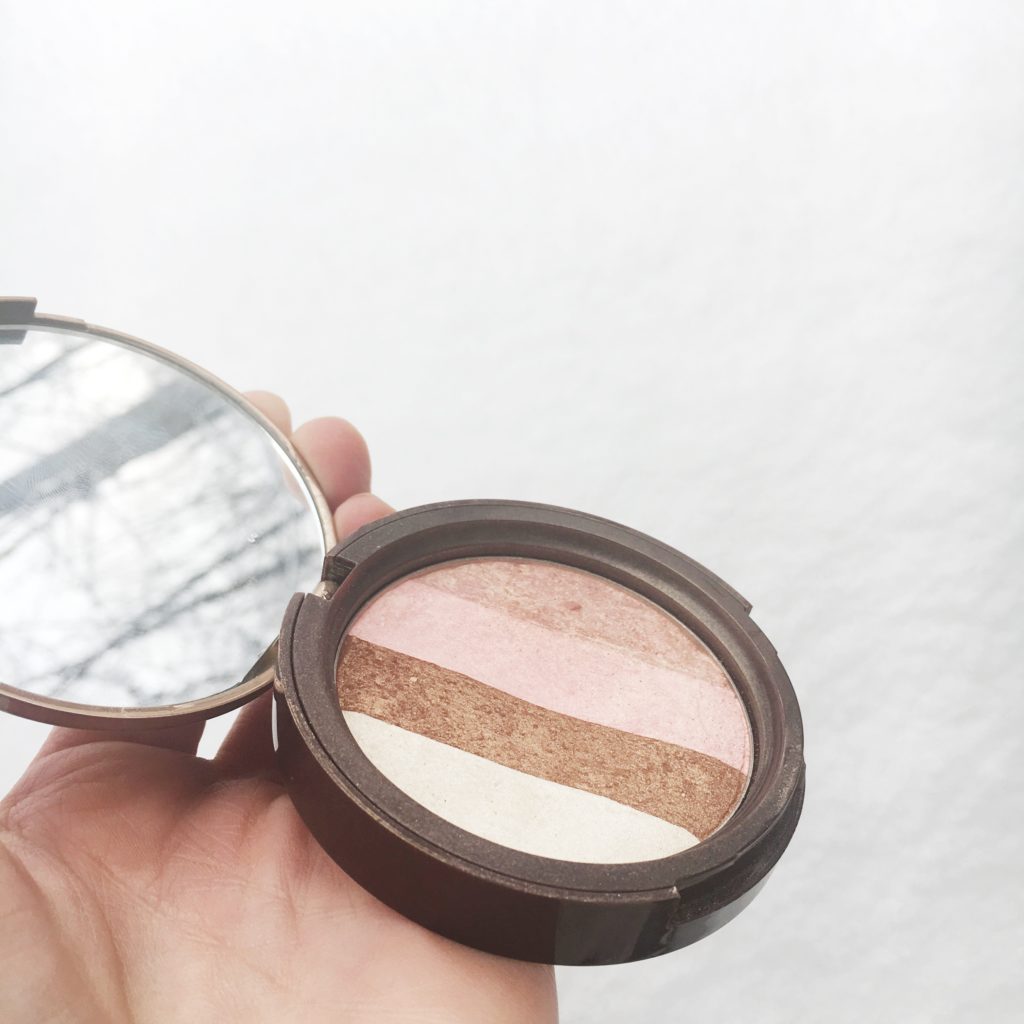
I hope that you have been having a fantastic week so far! Today is my middle little loves birthday! Happy 4th Birthday Connor David! I love you so! Today I want to talk about a bronzer that I used years ago and loved but somewhere along that way got lost in my drawers of makeup. A few weeks ago while decluttering my makeup collection, I pulled out a few products I wanted to try using again and the Too Faced Snow Bunny Perfecting Bronzing Powder has become a rediscovered favorite that I want to share with you today.


Too Faced Snow Bunny Bronzer

toofacedsnowbunnybronzer-leahtackles-review.jpeg

First of all this packaging is absolutely beautiful! I actually have the older packaging, but both the new and older packaging is beautiful with simple details. This one of those products that makes me happy just looking inside the compact because the beautiful shimmery shades are stunning. The bronzer is made up of four strips of color in a white highlight, a bronze, a very pale pink, and a light tan. I think that I avoided this because these days I usually use a matte bronzer or at least tend to avoid a lot of shimmer, but this is stunning! You can use this as a blush, a bronzer, or a highlight which is also great. I like that you can use the four colors separately, but I tend to twirl my brush in all four colors and then lightly dust onto my cheeks. Although this has shimmer it is a very subtle highlight and I think it’s perfect in the winter months for a very natural glow. This looks wonderful in the sunlight, especially that snowy sun reflecting light, and lasts on me all day.

Have you tried this bronzer? What bronzers do you like to wear in the winter? Leave a comment to let me know! Have a great day and please subscribe! xx

FacebookTwitterEmailPinterestShare

Filed Under: Beauty Tagged With: beauty blogger, beauty review, Beauty Vlogger, beauty youtuber, Best Winter Bronzer, leahtackles, makeup blogger, makeup review, makeup tips, Pale Skin Bronzer, Shimmering Bronzer, too faced, Too Faced Bronzer, Too Faced Perfecting Bronzing Powder, Too Faced Review, Too Faced Snow Bunny Bronzer, Too Faced Snow Bunny Bronzer Review

REVLON COLORSTAY WHIPPED FOUNDATION YAY OR NAY?

September 21, 2016 & Leave a Comment

Hi there! Happy Wednesday!

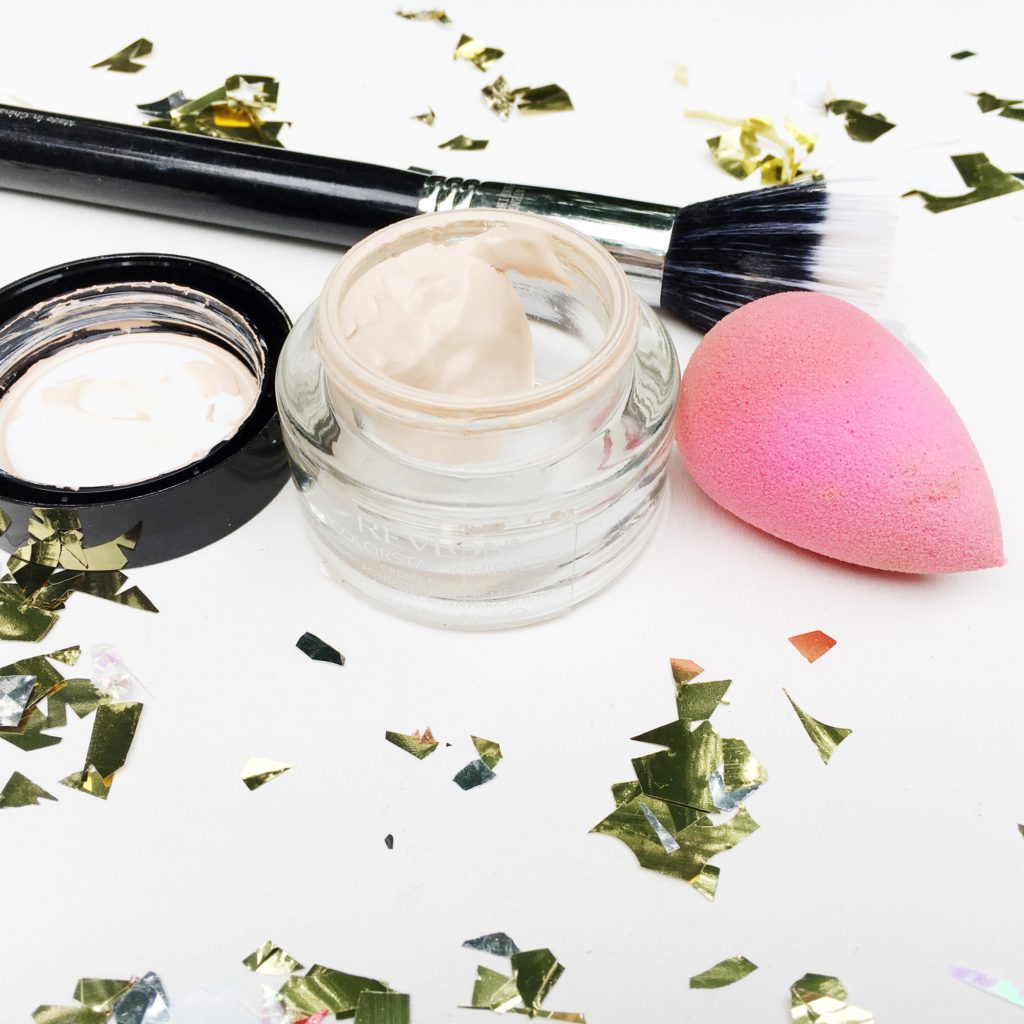
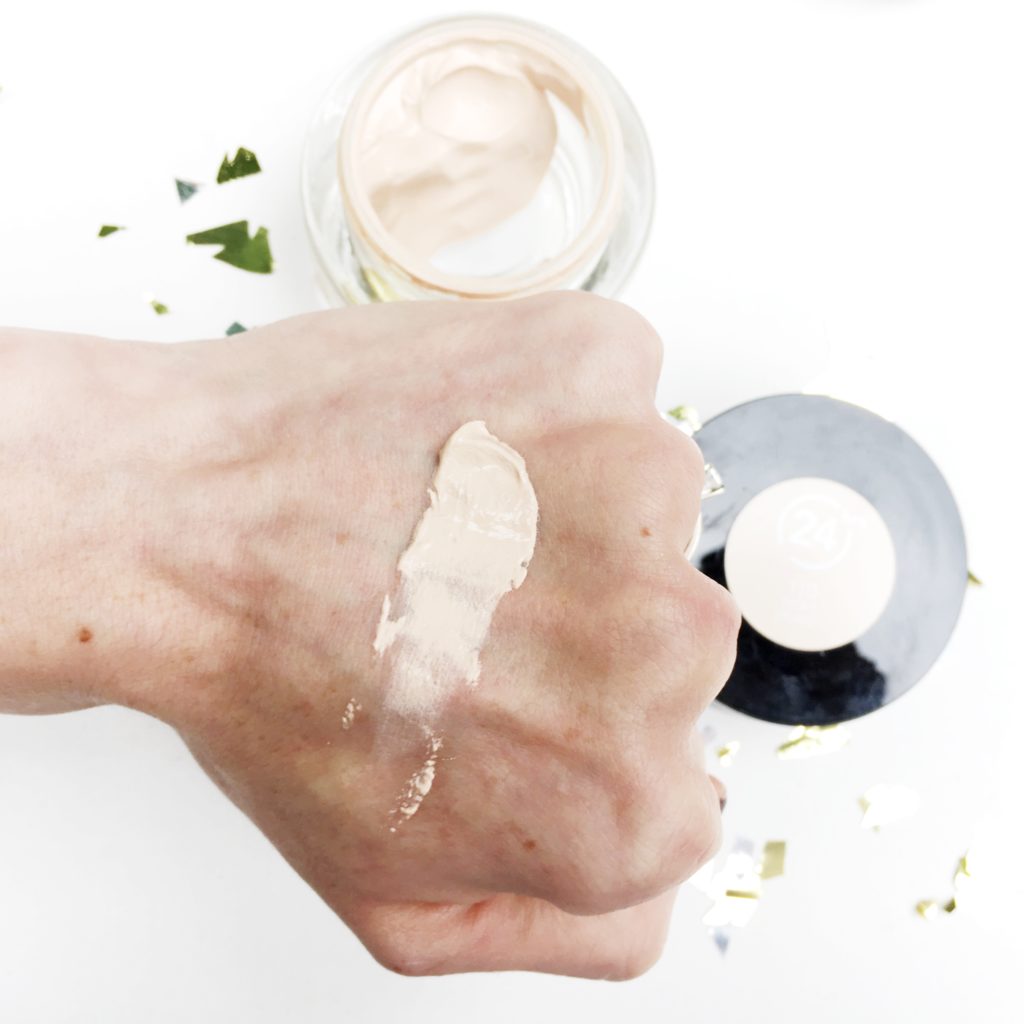
I am constantly on the search for “the perfect foundation” and I have several drugstore foundations as well as high-end foundations that I keep in my rotation. One foundation that I have been reaching for lately is my Revlon ColorStay Whipped foundation and I want to share my thoughts with you today.


Revlon ColorStay Whipped:

revloncolorstaywhipped-leahtackles.jpeg img_1274 img_1273 img_1272

Why I Love It:

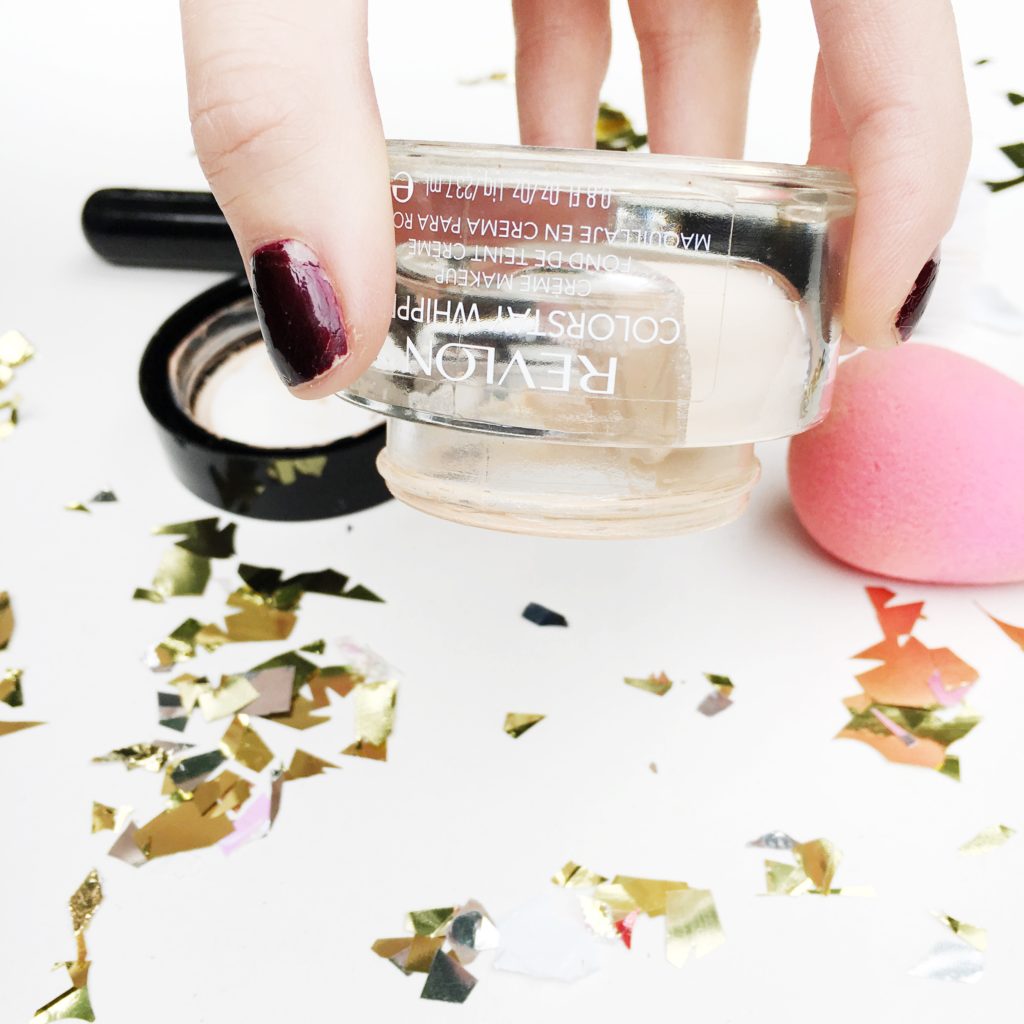
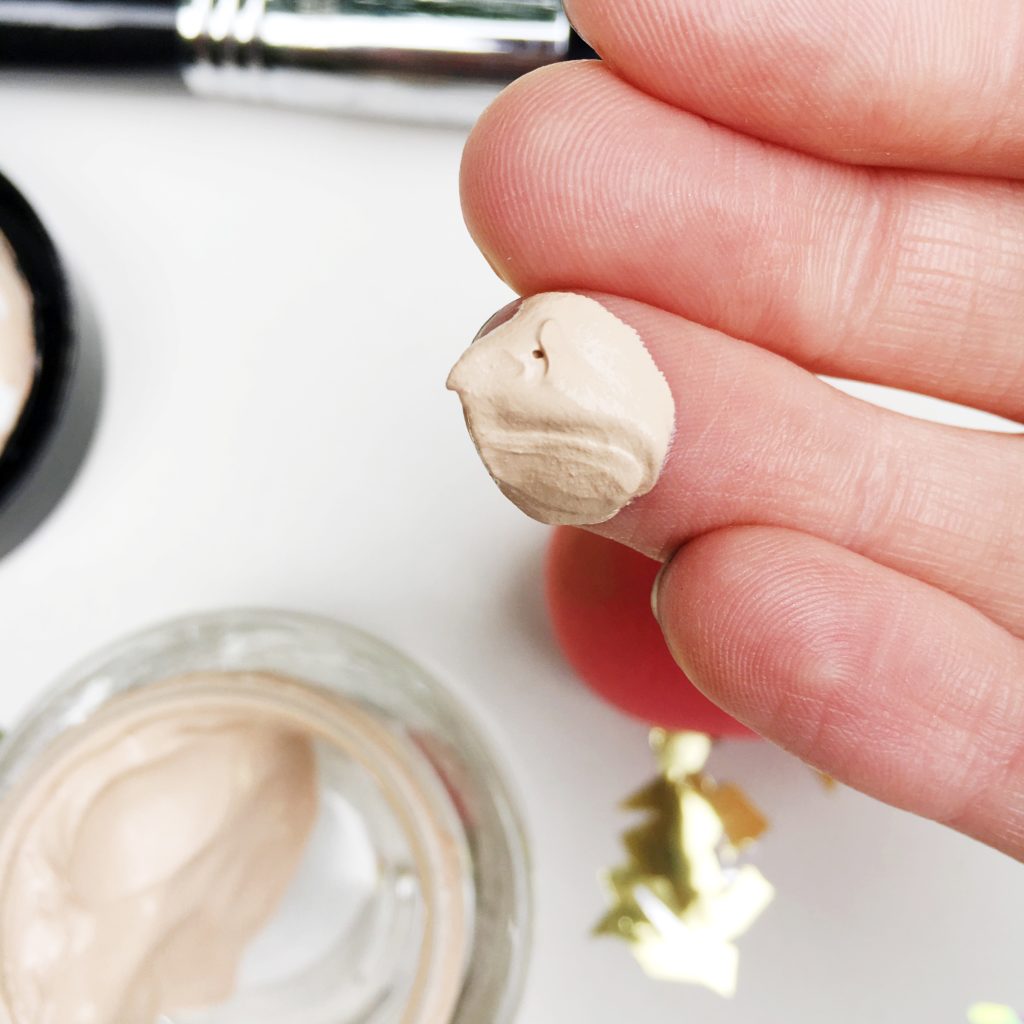
 This foundation can be applied with a makeup brush (*Note: I stipple it on with Sigma F50! You can read about stippling on your foundation here), a makeup sponge like the Beauty Blender, or with your fingers! I actually apply this with my fingers A LOT when I want a full-coverage look but need to be out the door in a hurry! I love the unique “whipped” texture of this product, it is almost like a container of Cool Whip whipping cream in that it feels light but if I turn the container upside down it doesn’t fall out. This is definitely a full-coverage foundation that doesn’t feel cake-y and doesn’t settle into my fine lines or pores.

Claims and Cons:

This foundation claims to be 24 hour wear, and I’ve never attempted to wear this for a full 24 hours, but I do often wear it from 6a.m-8p.m or so and it does wear very well! I do not think expecting it to look the same as when freshly applied 24 hours later is realistic for someone like me with combo/oily skin. I do think the packaging is quite bulky, and that may be because of the unique consistency of the whipped product.

How I Wear It:

I apply it in all of the ways mentioned above. I first apply Benefit PoreFessional Primer, then apply the foundation, set lightly with power, and then give myself a spray of the Urban Decay All Nighter Setting Spray and I’m good to go! I wear this in 101 Ivory.

Yay or Nay?

I say “Yay” all the way ; ) If you have very dry skin I would be cautious and make sure that you buy it from somewhere with a good return policy (luckily a lot of drugstores will let you return makeup now if it doesn’t work for you). I think this is an awesome option for those who want a full-coverage look without too much fuss with application. I can slather this on in a minute and it blends very very easily!

If you enjoyed this post, please share! Thank you for reading and don’t forget to subscribe : ) Have a wonderful weekend my loves!

FacebookTwitterEmailPinterestShare

Filed Under: Beauty Tagged With: beauty blogger, beauty videos, Beauty Vlogger, beauty youtuber, Favorite Drugstore Foundation, Foundation Application Tips, Foundation Review, LeahTackles Foundation, LeahTackles Makeup, makeup blogger, makeup review, Revlon ColorStay Whipped Application Tips, Revlon ColorStay Whipped Foundation, Revlon ColorStay Whipped Review, Revlon Foundation Review

SIMPLIFY YOUR SKINCARE ROUTINE? NIVEA IN-SHOWER BODY LOTION REVIEW

August 31, 2016 & Leave a Comment

Hi there! Happy Wednesday!


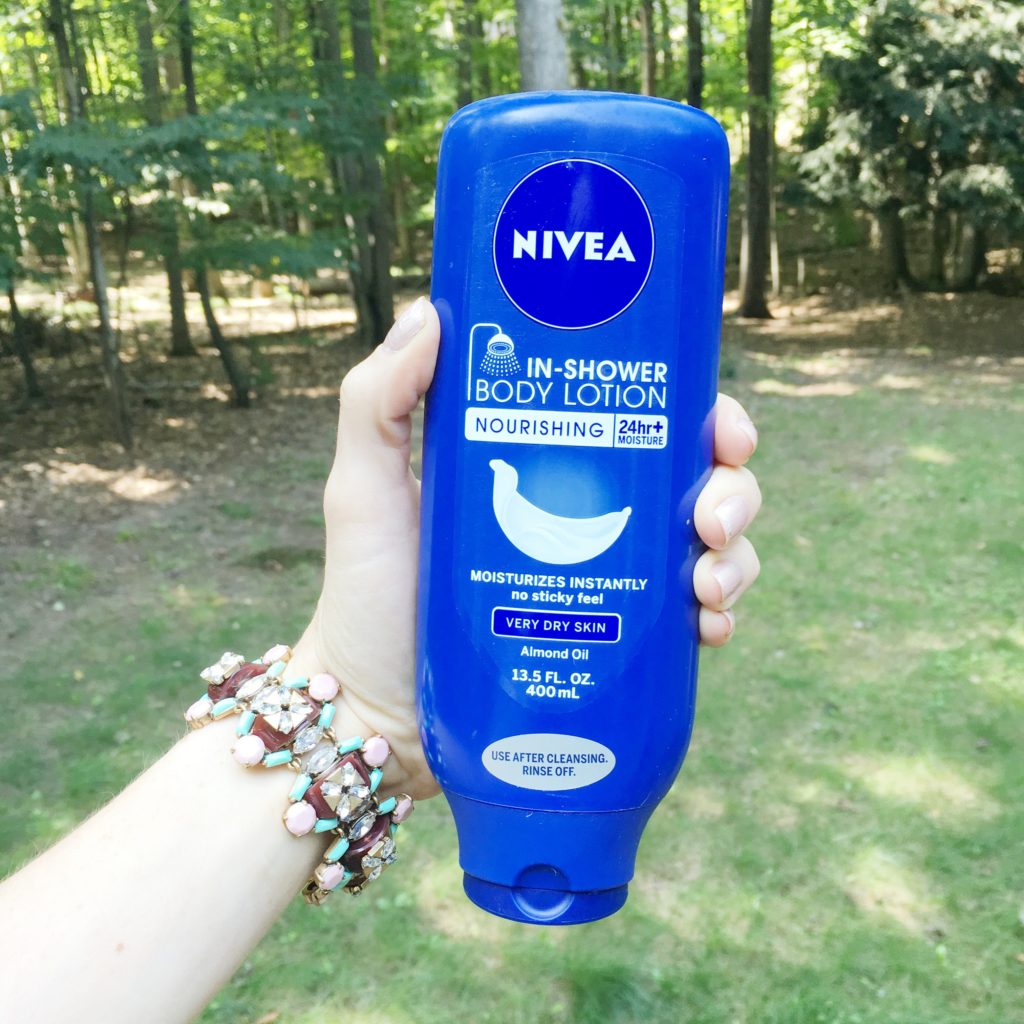
I, like most women I know, have A LOT of skincare products both lining my shower and on my counter and while trying the Nivea In-Shower Body Lotion to my shower rotation increased the number lining on shower (much to my sweet hubs delight I’m sure), I thought it would be worth a try to see if it could eliminate one of the bottles in my bathroom cabinet.

NIVEA IN-SHOWER BODY LOTION:

NiveaInShowerBodyLotion-Review-LeahTackles.jpeg

WHAT IT IS:

This is an in shower body lotion that claims to have 24 hour + moisture with no sticky feel. You apply this, like a lotion, to your skin AFTER you have already used soap or a body wash and then rinse it off before getting out of the shower. This is not a body wash, but only a body lotion, so it isn’t a 2-in-1 product which I think some may think it is without a little investigating!

MY THOUGHTS:

This feels like regular lotion, and so using it in the shower was different because you couldn’t tell for sure where you had applied it and the lotion itself is very thin feeling once you’ve got water in the mix. I wasn’t sure if I had gotten it everywhere and I certainly hadn’t rubbed it in or anything, but sure enough after I rinsed and then toweled off my skin felt very soft! I love the almond oil because it is a light but heavenly scent! They also have cocoa butter and shea butter options available. The fragrance is totally up my alley, and definitely gender neutral. I will say that I felt like I had to use more, because I wasn’t sure where I put it and the water is starts washing it off before I felt like I’ve gotten it everywhere it needs to be, but I don’t mind that on the days where I really don’t have it in me (dramatic, but so true!) to apply lotion after showering.

BOTTOM LINE:

Will this replace my body lotion and give our cabinet some much needed space? Definitely not! What can I say? I love having options! But, I love this for the days when I want a slightly shorter routine.I think this would be a fantastic option for those who really don’t like that lotion-y feel, too.  Overall I love this and I will continue to buy this, especially now that fall is on the way and winter will be following right behind!


I hope that all of you have a wonderful weekend! We are excited to spend one last weekend together as a family before school starts!! Thank you, as always, for reading! Please subscribe! xx

FacebookTwitterEmailPinterestShare

Filed Under: Beauty Tagged With: Dry Skin, fashion blogger, In-Shower Body Lotion, KwapisFamilyTackles, leahtackles, LeahTackles Beauty, LeahTackles Skincare, makeup blogger, mom beauty routine, Mom Makeup, mom skincare, mom vlogger, Nivea, Nivea In-Shower Body Lotion, Simple Skincare, Simplified Shower Routine, Simplified Skincare Routine, Skin Care, skincare blogger

SUNLESS TANNING TIPS TO GIVE YOU A PERFECT APPLICATION EVERY TIME!

August 10, 2016 & Leave a Comment

Hi there! Happy Wednesday!

I have very fair skin, and while I’ve learned to embrace the pale these days I didn’t always feel that way! I started getting spray tans in high school, and I still love a great spray tan but those can be extremely pricy! I also will admit to the fact that I have used tanning beds (very minimally but still it makes me cringe!) in the past but haven’t been in one in about 6 years. Even though I’ve embraced my naturally fair skin, I do love how a bit of a tan makes my skin appear a bit more even, my muscles more defined, and overall just a nice healthy glow.  And my favorite way to get a little glow going? Without any hesitation, at-home sunless tanning! I have been using sunless tanning products at home for about half my life now, and I have made plenty of sunless tanning mistakes along the way, but now I have some tips up my sleeve that really help me get a natural looking tan every time.


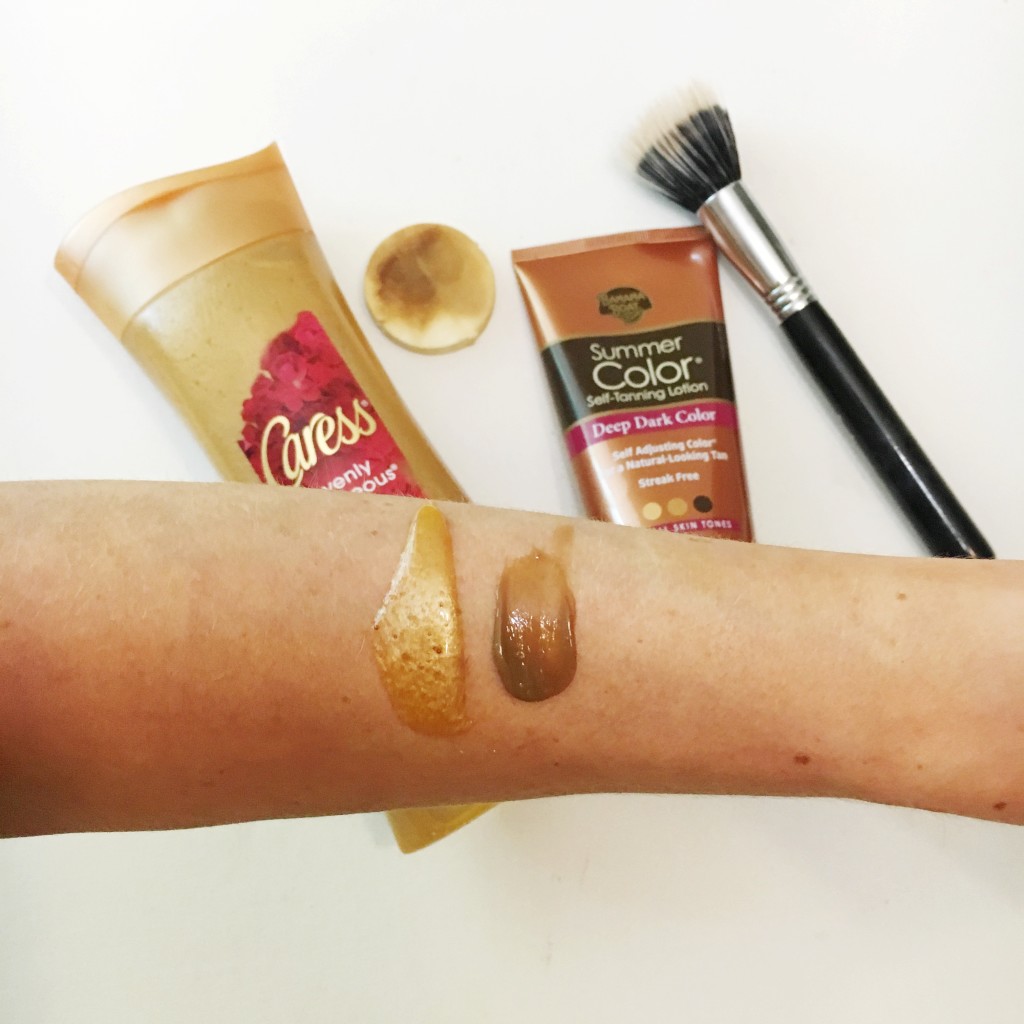
sunlesstanningsecrets-leahtackles.jpeg

Exfoliate:

Okay, I know you’ve probably heard before that it is important to exfoliate before you tan you skin, but I of course have to throw that in because it is an important first step! I love my Caress Evenly Gorgeous Burnt Brown Sugar & Kartie Butter Exfoliating Wash! The name may be a mouthful, but this stuff smells incredible and works as well as higher end exfoliating products for me.

Skip Shaving:

If you shave you legs in the shower and then get out and immediately apply self tanner the tanner will go into the hair follicles you’ve just opened up and then you will have little dark spots visible all over your legs which isn’t as lovely as the slimming, flaw covering tan you can get if you wait 20 minutes or alternate your shaving and sunless tanning days. I like to shower at night, so I usually will shave one night and then the next night apply sunless tanner and just rotate nights to keep up on both my shaving and my summer glow.

Start Down and Work Up:

This sounds simple, but begin with your feet and legs and work your way up so that you’re not behind over to get your legs and creasing the sunless tanner that you’ve already applied to the rest of your body.

How To Apply To Your Back Without Help:

I LOVE using the St. Tropez Applicator Mitt for reaching hard to get places, like my back, and it also helps to get a nice even application without any awkward zebra stripes! You can also, if you’re reasonably flexible, put a little bit of your sunless tanner onto the front and back side of you hand and reach behind to tackle that challenging middle section of back. I also have been known to use a sunless tanning mist for my back, but I actually prefer lotion (loving the Banana Boat Summer Color right now!) for the rest of my body.

Use a Makeup Sponge or Makeup Brush:

This is my BIGGEST TIP! For years and years I always dreaded the telltale sign of a fake tan that stopped at your wrists, or the awful look of sunless tanner all over your fingers, but now I have finally found a way around it! After I’ve finished tanning the rest of my body and washed my hands throughly (get between those fingers!) I use a stippling makeup brush like the Sigma F50 or a cheap makeup sponge to apply a tiny half-of-a-pea-sized amount of sunless tanner to the tops and sides of my hands, fingers, and wrist! You want just the ever so slight amount to help blend some color onto those areas without having horribly obvious self tanner faux pas. Seriously, this is LIFE CHANGING!!

Fix a Goof:

If you get streaky try using a mix of lemon juice and baking soda for a small streak, and if you get a big orange disaster somewhere like your palms or between your fingers try a whitening toothpaste or a little bit of an acetone based nail polish remover.

I hope that you found this post helpful! If you did please considering sharing it using my share buttons below or hovering over the picture to “pin” it to your Pinterest! Thank you! Have a wonderful weekend!! xx

FacebookTwitterEmailPinterestShare

Filed Under: Beauty Tagged With: Banana Boat Summer Color, beauty blog, beauty tips, Caress Evenly Gorgeous, daily vlogger, fashion blogger, Fix Sunless Tanning Mistakes, How-To Sunless Tan Flawlessly, KwapisFamilyTackles, leahtackles, Lifestyle Blogger, makeup blogger, mommy blogger, skincare tips, St Tropez Applicator Mitt, Sunless Tan with makeup brush, Sunless Tan Your Hands, Sunless Tanning Tips, Sunless Tanning with Makeup Sponge, tanning tips

SHOP MY OWN STASH! MAKEUP CHALLENGE!

June 22, 2016 & 1 Comment

Hi there! Happy Wednesday!

If you’re a regular LeahTackles reader or if you watch my YouTube videos, then I don’t even have to say that I own and buy A LOT of makeup! But, lately I’ve been trying to use some of the makeup that I haven’t been giving as much love to lately. It’s fun to rediscover old favorites, or try out things that you might have not given a big chance to when you first used it. I would like to challenge you to dig through your makeup and pull out some of the gems that you already own!! If you really don’t like something, or if it’s really old you can always de-stash it or if it’s in good condition pass it on to a friend.


SHOPPING MY STASH!

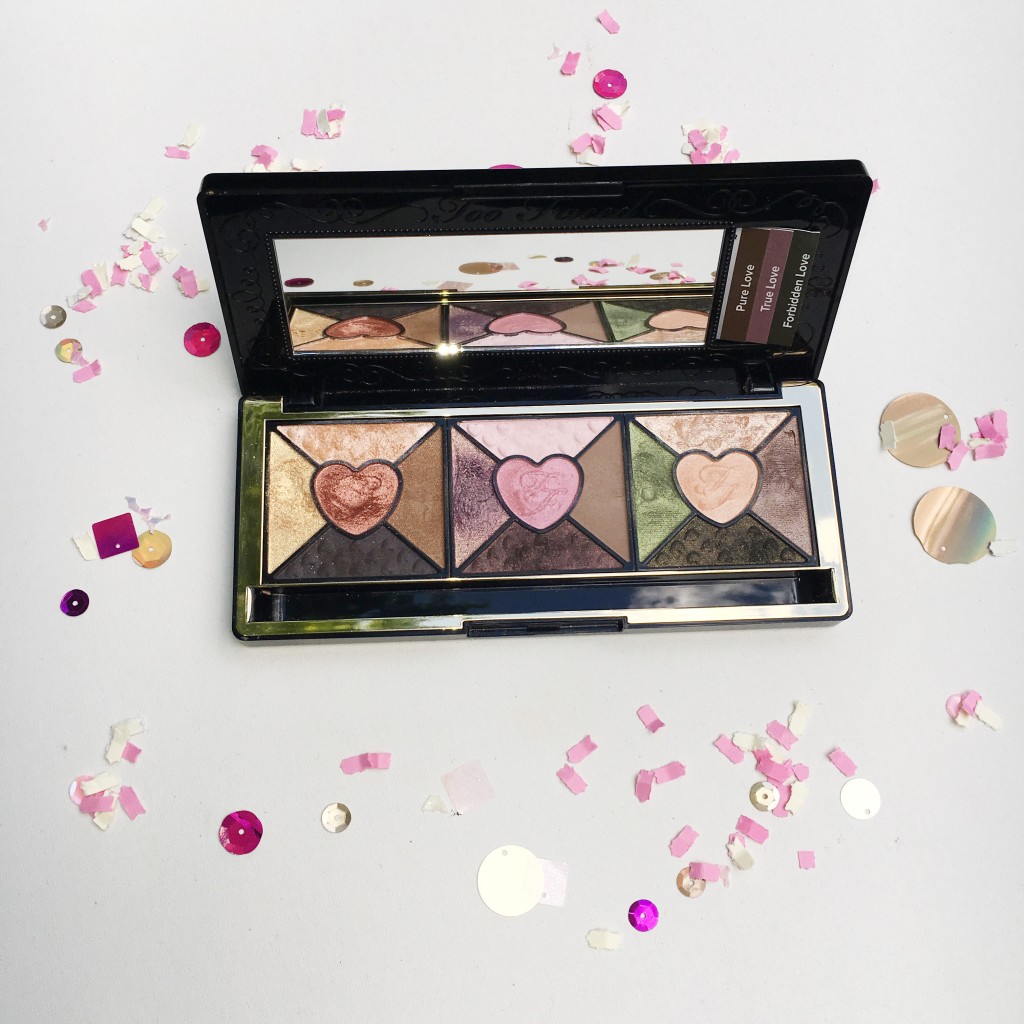
Too Faced Love Palette:

toofacedlovepalette-toofaced-lovepalette-shopmystash-leahtackles.jpeg

I actually did a blog post on the Too Faced Love Palette when it first came out about a year ago and I was OBSESSED with this for weeks! Not only is this a beautiful palette, but I can do full on five color look with it if I want to or I can use just one or two shadows for a super fast look that still looks like I really tried. This palette is definitely a shimmery palette, so you may want to use some mattes along with it, because it really only has a couple of matte shades. However, I do find that I can get looks that I love without having to use any other eye shadows. Because these eye shadows are shimmery, there is fallout and kickback when you put your brush into some of the shades, but they blend beautifully and the pigmentation is excellent. What I love the most about this palette is that the 15 shadows are separated into three sections of five eye shadows each, so it’s not intimidating to put together a look. I also think it’s a great way to enjoy some shimmery eye shadows without having to jump between a bunch of single shadows or palettes to have what you want. This palette also has adorable packaging and comes with example step-by-step look ideas. The palette comes with a full size of the Perfect Eyes Water proof eyeliner. The Perfect Eyes liner is very creamy and comfortable to wear so I find myself reaching for it quite often, but definitely NOT water proof and doesn’t last that long on my waterline. This palette is GORGEOUS for a date night or evening look, and looks stunning in low lighting (i.e: candlelight!) so the “Love” name definitely suits this beauty. This retails for $49 and it’s one of my more unique palettes that I don’t have anything else like it.

If you try this challenge out, let me know what you find and if you rekindle an old makeup love flame or find something new ; ) Have a wonderful weekend!

FacebookTwitterEmailPinterestShare

Filed Under: Beauty Tagged With: beauty blog, beauty blogger, beauty videos, Eye Shadow Favorite, fashion blog, Favorite Eye Shadow Palettes, KwapisFamilyTackles, leahtackles, Lifestyle Blogger, Love Palette, makeup blog, makeup blogger, Makeup Challenge Blog Post, Makeup Tag, Pretty Details, Shop My Stash, Sparkly Eye Shadow, too faced, too faced cosmetics, Too Faced Love Palette, Too Faced Makeup

5 DRUGSTORE PRODUCTS I ALWAYS REPURCHASE

May 23, 2016 & Leave a Comment

Hi there! Happy Monday!

I hope that all of you had a great weekend! I had a very busy, but very fun weekend! My very first post was on shower favorites-drugstore edition and today I decided to share a few of my drugstore staples that I will always repurchase. Please let me know some of your holy grail favorites from the drugstore in the comments : )


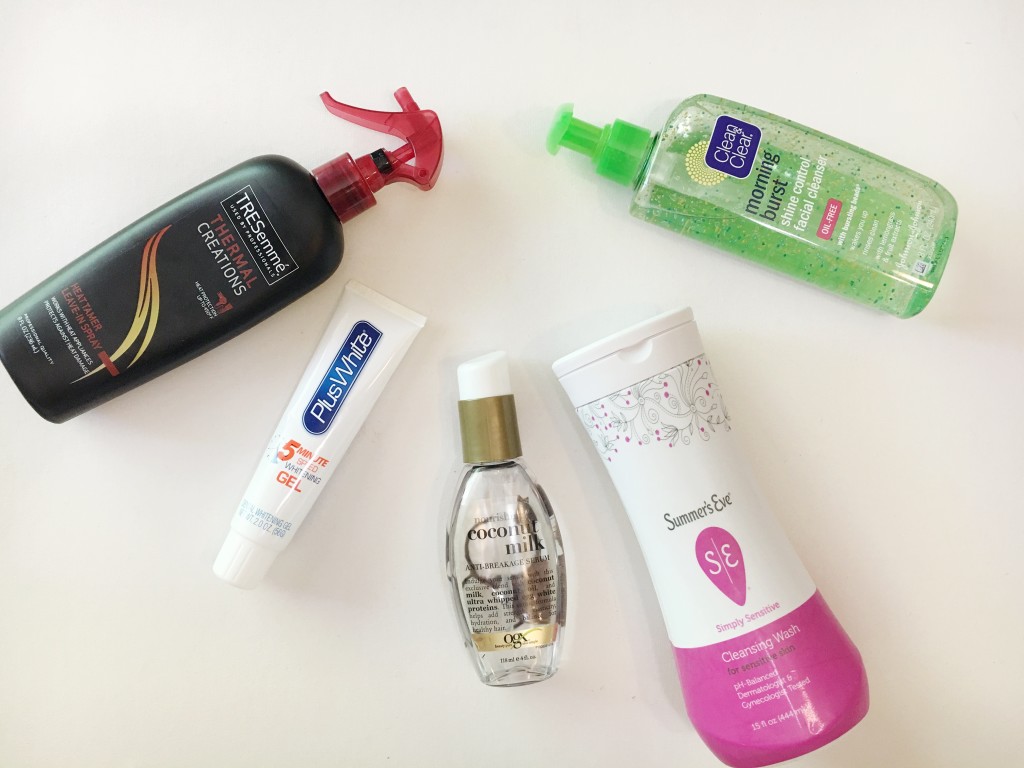
drugstorefavorites-leahtackles.jpeg

TRESemmé Thermal Creations Heat Tamer Leave-In Spray:

This is a great heat protectant that I always have on hand. I buy a pretty equal mix of drugstore and high-end hair products, but this is my go-to thing to spray on my hair before curling or straightening.

Plus White 5 Minute Whitening Gel:

I do like doing more intense whitening kits from time to time, but on an almost daily basis I will use a Q-Tip to apply a little bit of this gel to my teeth after showering and I’ll just leave it on while I finish my nighttime routine and then I’ll rinse it off. I don’t notice a super huge difference, but I do think that it helps them stay white and avoid staining from every day things like coffee or tea. I find this at Walmart for about $5 or you can buy a kit with trays for $20.

OGX Nourishing Coconut Milk Anti-Breakage Serum:

I mentioned this in my April Beauty Favorites post, and it still remains something I use all the time! I love this for working into the ends of my damp hair, but I actually like it even more for apply to the dry ends of my hair after heat styling to help the ends from looking too dry.

Summer’s Eve Simply Sensitive Cleansing Wash:

This has been a favorite of mine for a long time, and maybe it’s T.M.I but I love this stuff! I don’t use it daily because you need to be careful with your p-H levels, but I do like having a wash that’s appropriate for your lady bits. You should NOT use regular body wash down there! They have scented options too, but this is my go-to.

Clean & Clear Morning Burst Shine Control Facial Cleanser:

I love Purity by Philosophy, but this is my favorite drugstore cleanser and I usually use this one in the morning and the Purity by Philosophy at nighttime.

Have a wonderful Monday! Thank you for reading! Be sure to subscribe so that you can be notified whenever I post something new!

FacebookTwitterEmailPinterestShare

Filed Under: Beauty Tagged With: beauty blogger, Beauty Reviews, Beauty Vlogger, beauty youtuber, Clean & Clear Morning Burst Shine Control Facial Cleanser, Drugstore Beauty Favorites, drugstore favorites 2016, Drugstore Skincare Favorites, leahtackles, LeahTackles Beauty, LeahTackles Skincare, makeup blogger, Makeup Reviews, OGX Nourishing Coconut Milk Anti Breakage Serum, Plus White 5 Minute WHitening Gel, skincare, Skincare Reviews, Summer's Eve SImply Sensitive Cleansing Wash, Tresseme Thermal Creations Heat Tamer Heat Protectant

LIPSTICK & EYE SHADOW TIPS & PICKS FOR BEGINNERS

May 11, 2016 & 2 Comments

Hi there! Happy Wednesday!

This week I have had two friends ask me on my personal Facebook page beauty related questions that I get asked on a fairly regular basis. First of all, I want to say THANK YOU FOR ASKING! There is not much more flattering to me than people asking me questions about makeup because it is a huge passion of mine. And second, today I have decided to share the information that I was gathering for them with all of you incase any of you have similar questions. If you find this post helpful, please share it or “pin” it to your Pinterest!

Housekeeping Note and Helpful Tip!

I have had two other friends recently tell me that they aren’t subscribed to KwapisFamilyTackles on YouTube or LeahTackles on YouTube because they don’t have a YouTube account but you actually DO NOT NEED A YOUTUBE ACCOUNT TO SUBSCRIBE, COMMENT, OR LIKE A VIDEO! Your log-in is actually your Gmail log-in because Google owns YouTube! I hope that is helpful information! I appreciate every person who reads or watches my content, whether or not you’re subscribed, but if you want to get notified whenever I upload something new please subscribe! And I love subscribers ; )  I am doing a HUGE GIVEAWAY at 1,000 subscribers so be sure to subscribe for that too!

What are good lipsticks for someone who has never worn lipstick but would like to try? Something that isn’t “clown like”?

I was a lip gloss girl for years and the only time I had ever worn lipstick was for dance performances, but now I wear lipstick almost every single day. I think that the best way to start would be to try a couple of shades that I consider to be “your lips but better” which means they aren’t very different from your natural lip color. You can also try a tinted lip balm that gives a sheer wash of color. I would suggest grabbing a few lipsticks at the drugstore so that you can figure out what colors you like before you commit to something more expensive. Or, go to Sephora, Ulta, or the makeup counter at a department store and ask for help so that you can wear the lipsticks! Don’t be afraid to ask for help!! You can walk into a department store, try on a lipstick, and then do you shopping so you can wear it for awhile to see how you feel in it.

Lip Products I Suggest Trying:

 IMG_3256 (1)

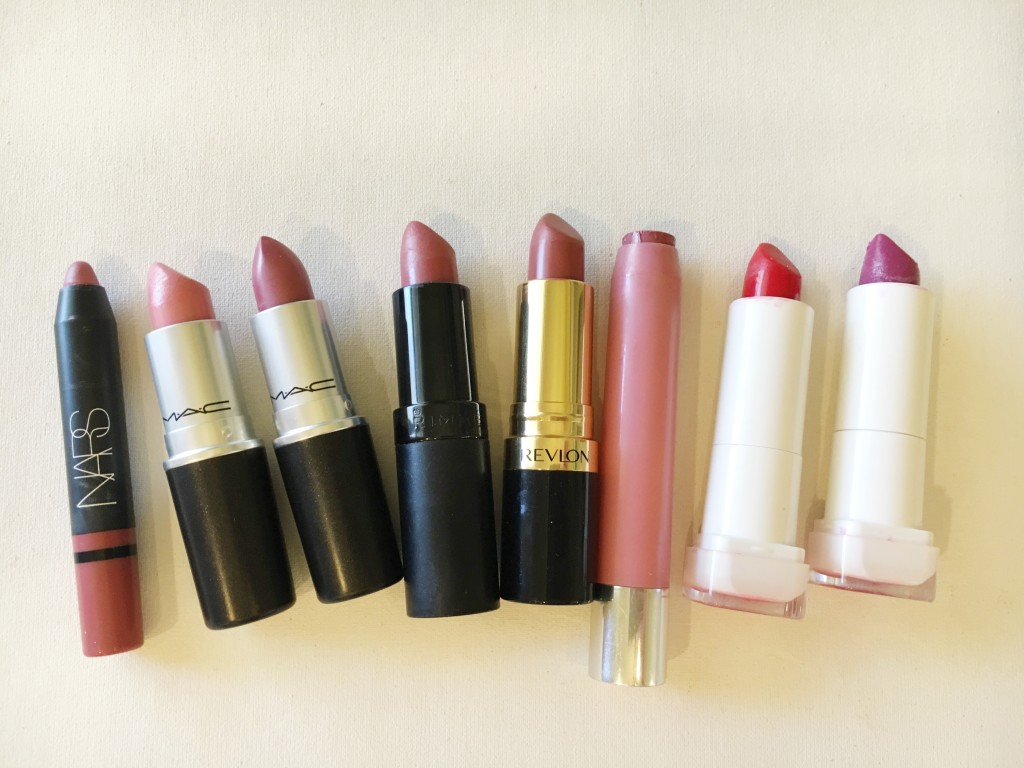
lipstickforbeginners-leahtackles.jpeg

Here are some of my favorite lip products that I think are great “starter” lipsticks!

*Note: listed left to right

Nars Satin Lip Pencil in Rikugien

M.A.C Cremesheen in Creme Cup

M.A.C Lustre in Syrup

Rimmel Lasting Finish by Kate in 08

Revlon Super Lustrous Lipstick in 130 Rose Velvet

Revlon Just Bitten Kissable Balm Stain in 001 Honey (my top pick!)

Covergirl Oh Sugar! in 6 Punch

Covergirl Oh Sugar! in 9 Jelly

What eye shadows should I buy? I have no idea where to begin? What about eye shadow brushes?

I suggest started with a neutral eye shadow palette or even a small trio or quad to start out. There are a lot of fantastic drugstore eye shadow options, which I will link, but also don’t be afraid to go play with the makeup at Sephora, Ulta, or a department store! You can also get a cream eye shadow or eye shadow base like the Maybelline Color Tattoos I will link below. I often apply these with my fingers all over my lid and then just apply mascara and eye liner! They’re easy and beautiful! They also make a fantastic base to put on before applying your other eye shadows. As far as brushes go, you can start simple by grabbing two or three brushes for $1-$3 each from E.l.f cosmetics. The backs of a lot of drugstore palettes like the ones mentioned show a general “map” for how to apply the eye shadows which is a great place to start! The higher end palettes usually come with a small beauty how-to guide that gives tips for easy looks.

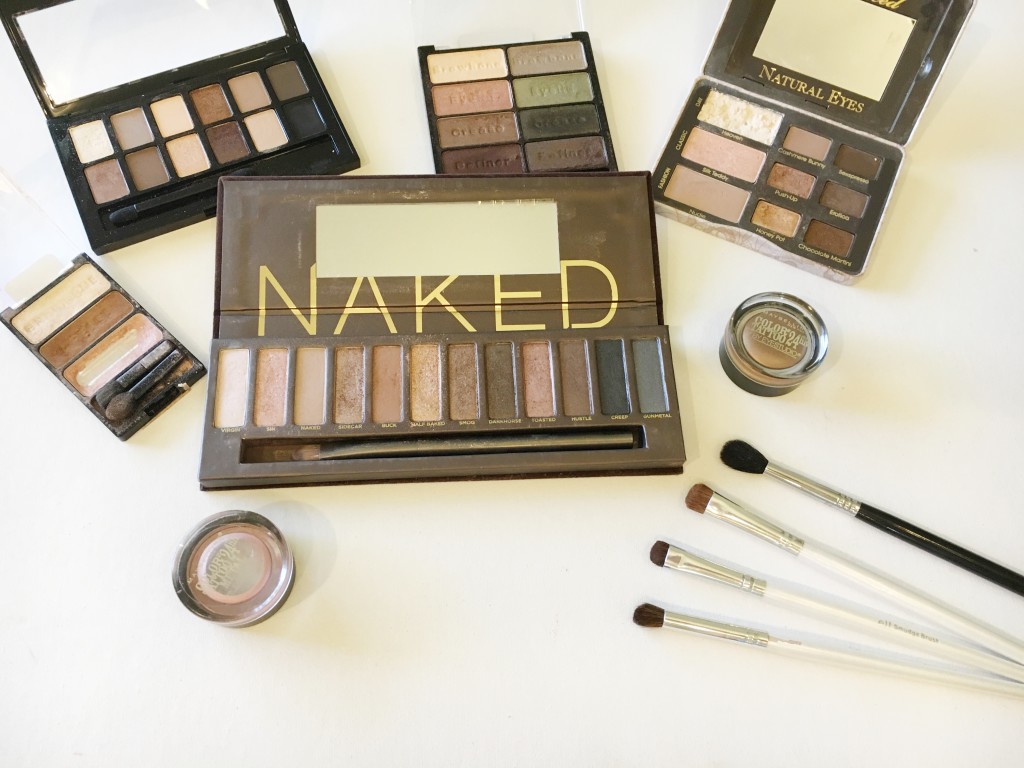
eyeshadowpicksforbeginners-leahtackles.jpeg

eyeshadowpicksforbeginners-leahtackles.jpeg

Maybelline The Nudes Palette

Wet n’ Wild Walking On Eggshells Trio

Wet n’ Wild Comfort Zone palette

Too Faced Natural Eyes palette

Urban Decay Naked palette

Maybelline Color Tattoo

(I suggest Bad To The Bronze and Inked In Pink)

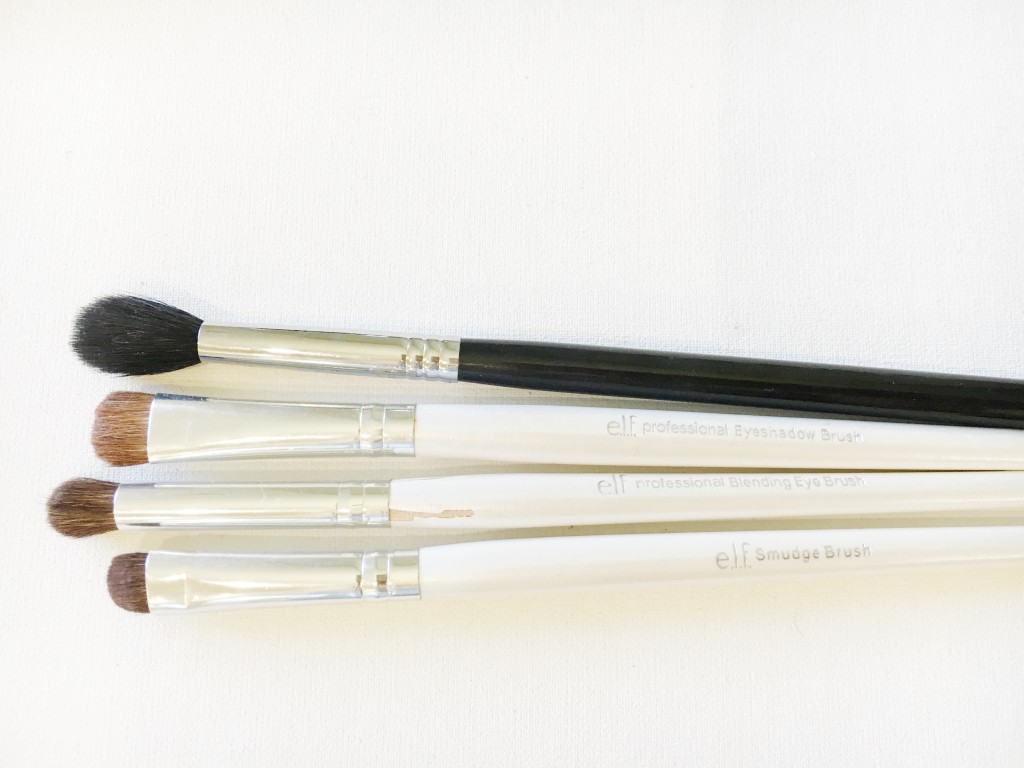
E.l.f Shadow Brushes

(Start with a basic flat eye shadow brush, a fluffy brush for your crease and for blending, and a smaller flat brush for smudging color on your lower lash line or putting a bright shimmery color near the tear ducts of your eye to brighten)

I hope that you found this helpful! I am doing a Q&A soon on my LeahTackles channel so be sure to ask your questions for that!! I hope you have a wonderful weekend : ) Thanks for reading!

FacebookTwitterEmailPinterestShare

Filed Under: Beauty Tagged With: ask us questions for Q&A, beauty blogger, beauty Q&A, beauty review, beauty videos, Beauty Vlogger, elf cosmetics, elf eye shadow brushes, eye shadow favorites, eye shadow for beginners, how to subscribe to a youtube channel, KwapisFamilyTackles, leahtackles, Lifestyle Blogger, Lipstick for beginners, Lipstick Swatches, makeup blogger, makeup bloggers, makeup review, maybelline, maybelline color tattoos, Maybelline The Nudes Palette, mom review, my lips but better, natural lipstick picks, revlon, Rimmel Kate Lipsticks, too faced cosmetics, too faced natural eyes, Urban Decay Cosmetics, wet n wild comfort zone palette, wet n wild eye shadow, wet n' wild walking on eggshells, Youtuber

My Favorite Eyebrow Product! 

February 3, 2016 & 2 Comments

Hi there! Happy Wesnesday!

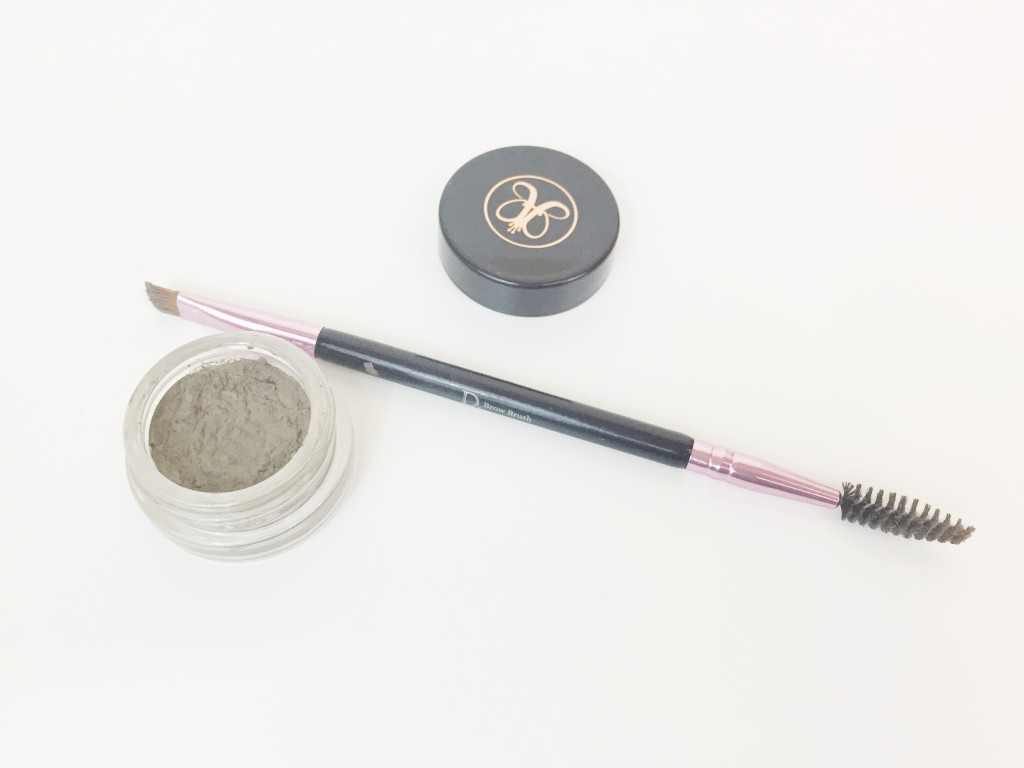
I am constantly changing up my makeup, and lately I’ve really been loving my brows! I’ve used the Anastasia Beverly Hills Dip Brow on and off for about a year, but just recently I’ve been using it nonstop.

browroutine-leahtackles.jpeg

What I Do:

I comb my brows in the general direction I want them to be with a spoolie brow brush (basically a brush that looks like a clean mascara wand). Then I dip my brush into my Dip Brow Pomade in Taupe and hold the brush vertical to brush the brow hairs closest to my nose up in their natural direction. I then use the brush horizontally and outline the lower part of my brows and then use the brush to push that product up so that I don’t end up using too much or creating too harsh of a look. I then usually set my brows with a clear brow gel, just incase they decide to get crazy ; )

Why I Love It:

I can get big, full, and defined brows without them looking overly harsh or painted on. I definitely always go lighter than you would think you need and slightly lighter than your brows to avoid them looking too harsh. A lot of people think they should buy their exact brow color, but I have had much better results going a bit lighter than my natural brows.

As always, thank you for reading! I hope that you have a wonderful weekend!

FacebookTwitterEmailPinterestShare

Filed Under: Beauty, Uncategorized Tagged With: Anastasia Beverly Hills, Anastasia Dip Brow Pomade, beauty blogger, beauty videos, Beauty Vlogger, Brow Pomade, Brow Product Reviews, Brow Routine, daily vlogger, Dip Brow in Taupe, KwapisFamilyTackles, leahtackles, makeup blogger, Makeup Reviews, Makeup Tutorials

IS YOUR UNDER EYE CONCEALER MAKING YOUR FINE LINES AND DARK CIRCLES MORE VISIBLE?

January 25, 2016 & Leave a Comment

Hi there! Happy Monday!

This morning I was thrilled to be volunteering in my 4 year olds classroom for a few hours, and her sweet teacher asked me about under eye concealer suggestions. First of all, thank you for asking! I absolutely love getting questions from all of you, and every time I take it as a compliment! So, ask away! I am also a huge fan of this topic, because I have (BAD) dark circles! I’ve talked about it before, but the combo of three kids under five and genetics (love ya mom and dad!) makes my dark circles situation rough most days. I also think it’s a super important topic because if you don’t apply or set your under eye concealer correctly it can cause the makeup to set into your fine lines making the lines and dark circles more visible! Let’s be real, none of us have time for that!

What I Do For My Under Eye Make Up and Dark Circles:

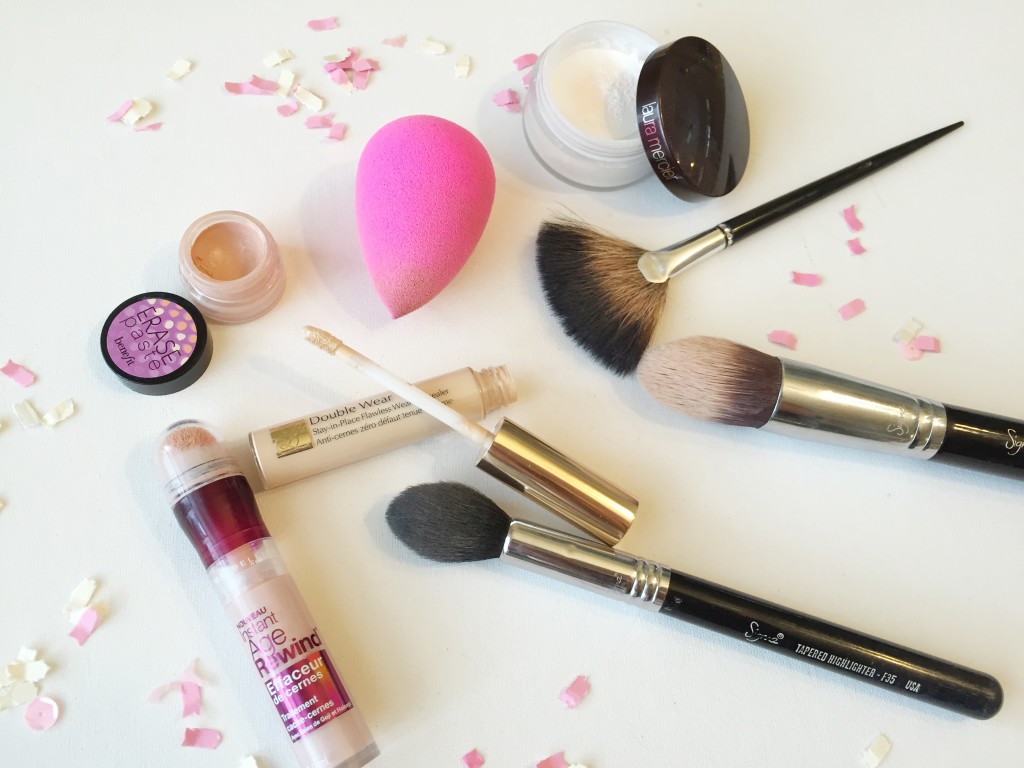
UNDEREYECONCEALERTIPS-DARKCIRCLETIPS-LEAHTACKLES.jpeg

1. If you’re not using an eye cream, you should be! I really love using the Benefit It’s Potent Eye Cream which you can find at Ulta or Sephora. It’s a little pricy, but I really like this and it has helped my dark circles to appear less drastic. I also like this because it doesn’t take forever to absorb into the skin, and it doesn’t feel heavy at all.

2. I always use some sort of pinky/salmon concealer to brighten up the dark circles under my eyes. My go-to favorite is a drugstore concealer! I use the Maybelline Instant Age Rewind Eraser Dark Circles in Brightener! Make sure you get the one that actually says “Dark Circles” because they also have a regular concealer that isn’t specific to the under eye area. I also really like the Benefit Erase Paste, it works so well on days when I want maximum concealing power, but it’s thicker and harder to work with when I’m in a real hurry.

3. I then use a concealer (Tip: Look for one that is one shade lighter than your skin tone for extra brightening power! But I am very fair so I just get the lightest shade offered) over the brightening concealer from step 2. I really love the Estée Lauder Double Wear Concealer or the It Cosmetics Bye Bye Under Eye! I like to make a triangle under each eye and then use either a damp Beauty Blender, or my Sigma F86 Tapered Kabuki Brush (any makeup sponge similar to this or tapered kabuki brush will work) to pat and lightly press the concealer into the skin. Don’t drag the brush in a painting motion! You want that product to stay there!!

*Note: Sometimes I go from step 2 to step 4 and skip this step altogether, but most days I include this in my routine.

4. I then ALWAYS set my under eye concealer with a loose setting powder, preferably a brightening setting powder, with my Sigma F35 Tapered Highlighter (or a fan brush works wonderfully too!).  By setting your under eye concealer with a powder you are helping it to stay put, and also avoiding the risk of the product settling into your fine lines or wrinkles. I love the Laura Mercier Secret Brightening Powder or for a much less expensive route, the E.L.F High Definition Under Eye Setting Powder is also fantastic! Who can beat $3?!

If You Enjoyed This Post You May Also Enjoy:

My Top 3 Ways To Apply Liquid Foundation

I hope that this was helpful! If it was please subscribe, share, or “pin” onto your Pinterest account! I have share buttons for social media at the bottom of each post : ) Have a wonderful week! Let’s chat again on Wednesday! xo

FacebookTwitterEmailPinterestShare

Filed Under: Beauty Tagged With: beauty blender, Beauty Reviews, benfit erase paste concealer, Cover Up Dark Circles, Diminish Fine Lines, Easy makeup tips, estee lauder double wear concealer, laura mercier secret brightening powder, leahtackles, LeahTackles Makeup, Lifestyle Blogger, makeup blogger, makeup tips, makeup videos, maybelline age rewind dark circles, mommy blogger, Sigma Beauty, Under Eye Concealer Tips, Under eye makeup help, Youtuber

Next Page »

SUBSCRIBE

Leave your email to subscribe!

SEARCH

SPONSORS

ARCHIVES

GRAB MY BUTTON


copy & paste code

site design by The Kinch Life Design & development by Olive & Ivy Design

Catch The Webinar Replay! Boundary Setting For Entrepreneurs

Go to leahtacklessocial.com and sign-up for the link!