Leah Tackles

  • Home
  • About
  • Policy
  • Beauty
  • Fashion
  • Cooking
  • Exercise
  • DIY Projects
  • Decor
  • Book Club
  • Family

HOW TO DO A ONE COLOR BOLD EYE SHADOW LOOK IN 2 MINUTES!

January 16, 2017 & Leave a Comment

Hi there! Happy Monday! And Happy Martin Luther King Day!

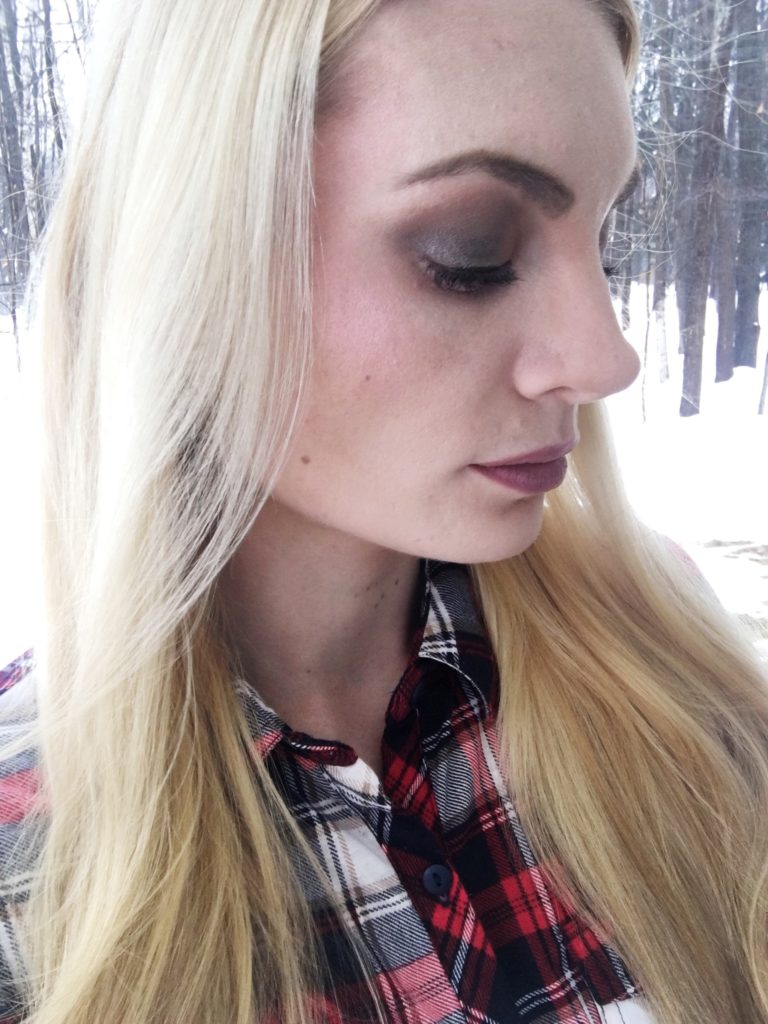
Lately, on days like today, when I’ve been rushing to get my makeup on before rushing with the kids out the door I’ve been wearing a super easy eye shadow look that I want to show you how to easily recreate today.


The  Look:

leahtackles-easyonecolorboldeyeshadowlook-beautytutorial.jpeg

What You’ll Need:

oneeyeshadowlookintwominutes-quickeyeshadowlook-singleshadowlook-leahtackles.jpeg

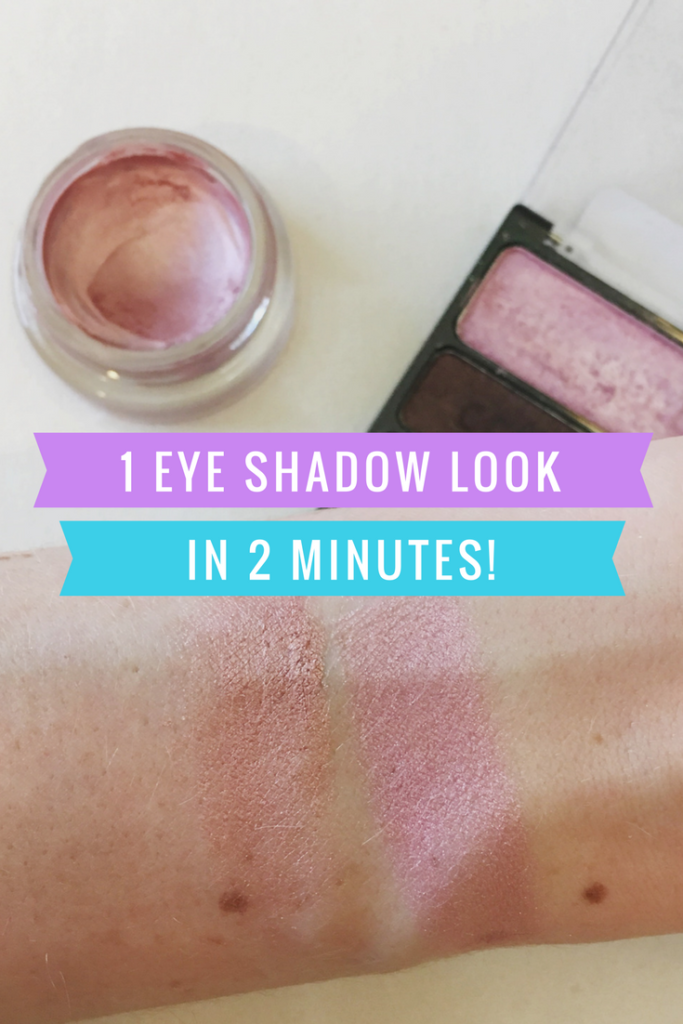
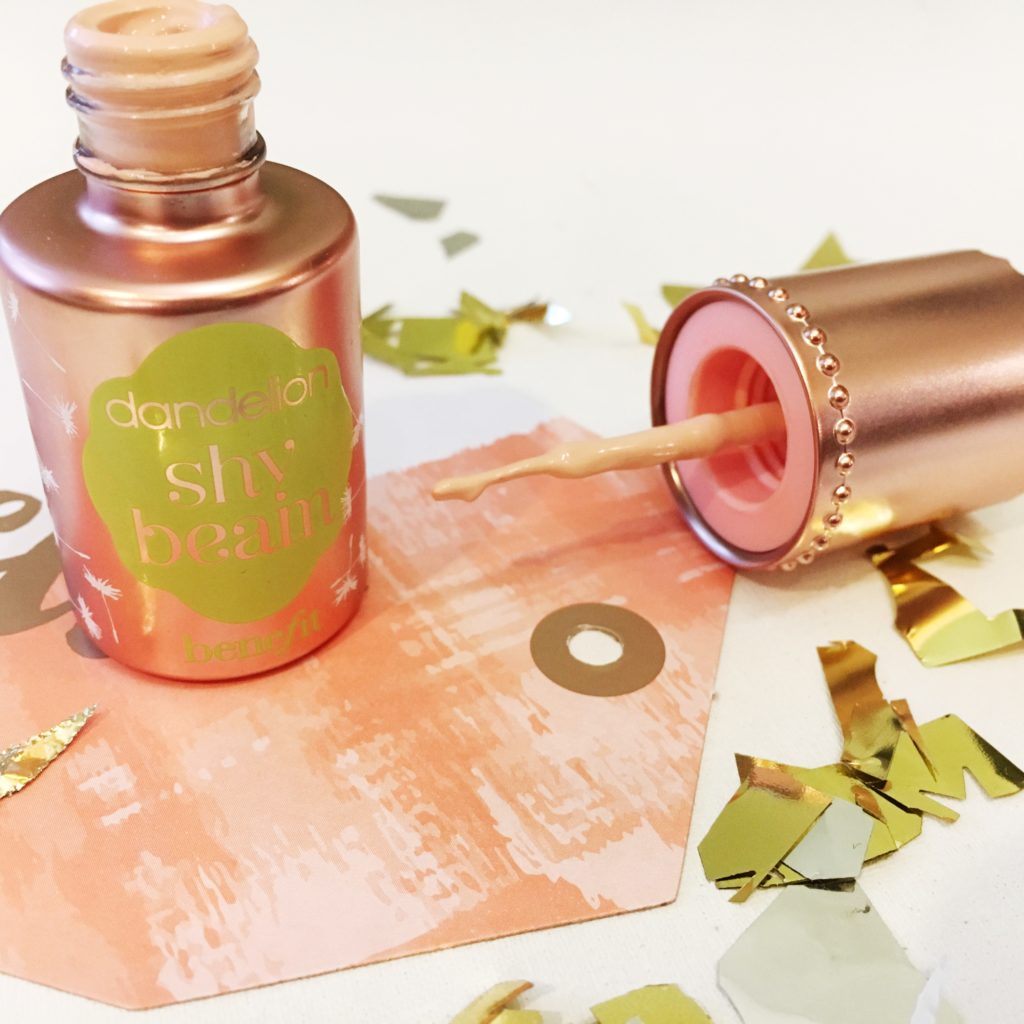
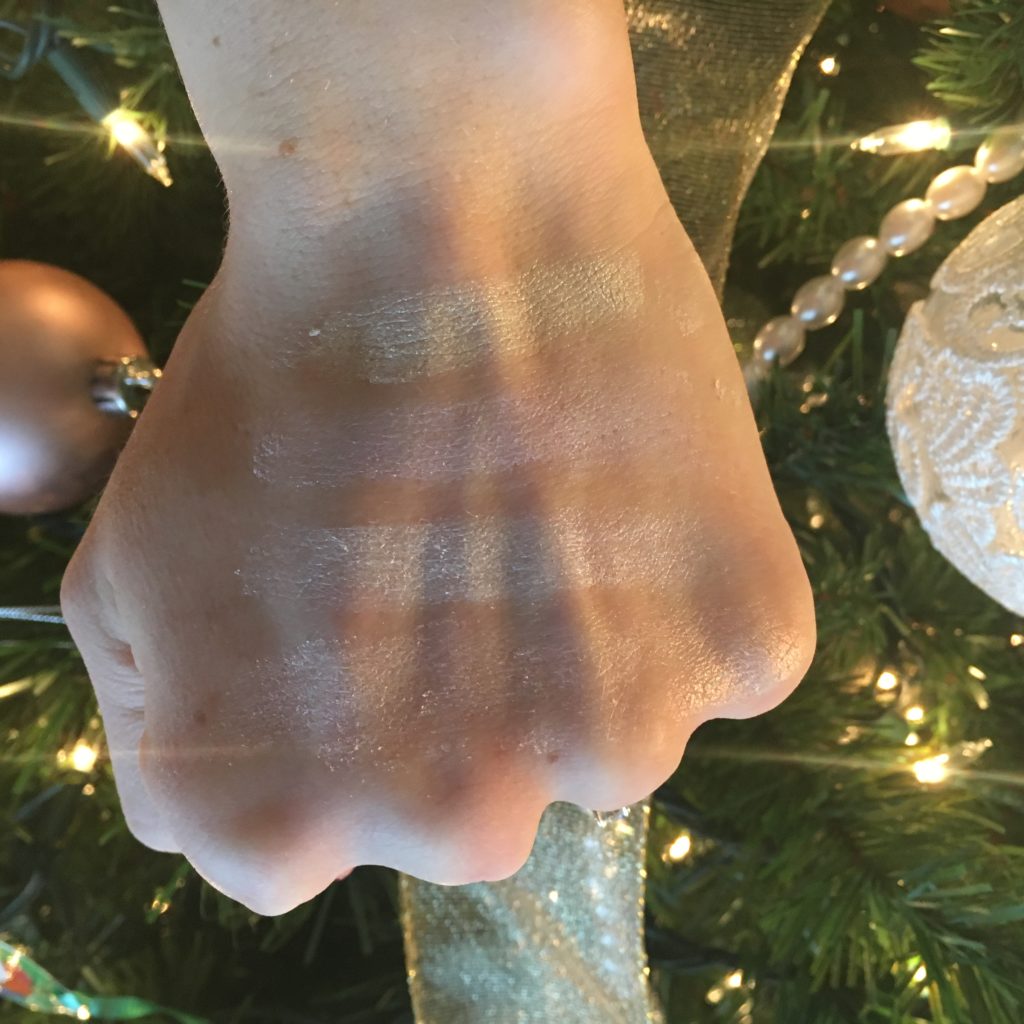
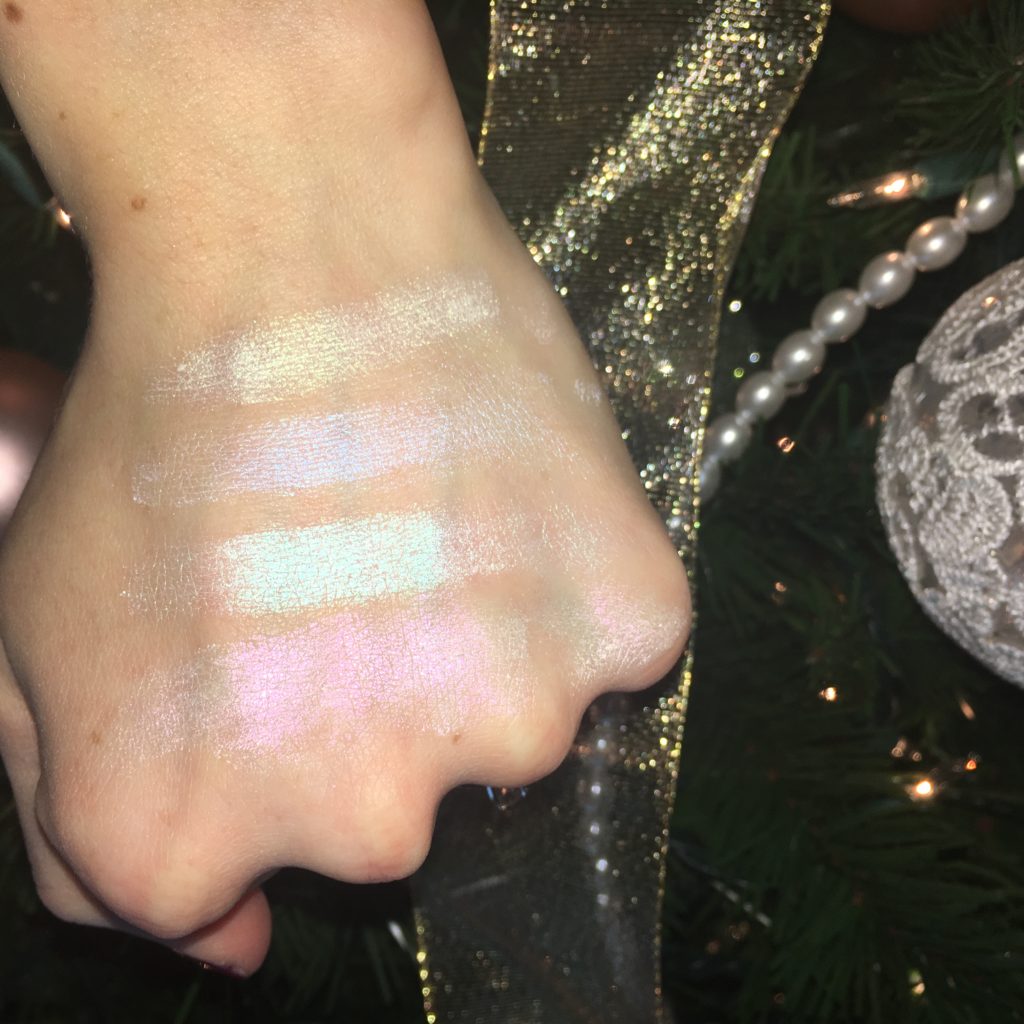
-One bright color of your choice! Have fun I’ve been loving pinks, purples, greens, and even blues! (I used Wet n’ Wild I’m Getting Sunburned Trio the top pink/purple shade for my look today)

-A basic shadow brush (I used the Sigma Shader E60)

-A blending brush (I used the Sigma Blending E25)

Optional:

-A cream or ivory eye shadow to blend (I like Bobbi Brown in Bone 2 or Wet n’ Wild Single Shadow in Brulee)

-An eye shadow primer or base (I used Maybelline Color Tattoo in Inked in Pink)

How To Get the Look:

Apply your base or eye shadow primer if you choose to use one. Take any basic eye shadow brush and apply the eye shadow of your choice on your lid all the way up to your crease or just above your crease. I do not use pat it onto the lids to avoid too much fallout with eye shadow falling onto the rest of your skin. If you do get eye shadow on your skin simple brush it off with a brush or makeup sponge. Then take a fluffy eye shadow brush or blending brush to soften any harsh lines and blend the edges of the eye shadow. If you wish, you can use the ivory or cream eye shadow to blend the eye shadow instead of blending only wish a clean brush. I then applied a slight winged liquid eye liner (I used L’Oreal Lineur Intense) and mascara (I used Covergirl Super Sizer in Water Resistant).

I hope you liked this look! If you have any questions, please leave them in the comments below!

FacebookTwitterEmailPinterestShare

Filed Under: Beauty Tagged With: beauty blog, beauty blogger, beauty tips, beauty tutorial, Bobbi Brown Bone 2, Bold Single Color Eye Shadow Look, Easy makeup look, leahtackles, Maybelline Color Tattoo Inked In Pink, simple beauty, simple makeup, Single Eye Shadow Look, Wet n Wild I'm Getting Sunburned, Wet n Wild Single Brulee, winter makeup look

What Is A Matte Highlighter?

January 11, 2017 & Leave a Comment

Hi there! Happy Wednesday! And, much more importantly to me, HAPPY 2ND BIRTHDAY to my littlest love, Logan. I am so proud of you, and you’ll always be my baby!

Today I want to talk about a highlighting product that I had to try because the name itself was so contradictory to what I think of when I think of a highlighter, but it has become a go-to for me the past several months.


Benefit Shy Beam

benefit-shybeam-matte-highlighter-leahtackles.jpeg

benefitshybeamhighlighter-leahtackles.jpeg

benefitshybeam-mattehighlighter-leahtackles.jpeg

benefit-shybeam-mattehighlighter-leahtackles.jpeg

Highlighting has been a huge trend for the past several years, and I love highlighting with powders, creams, sticks, and liquid highlighting products ranging from $2 drugstore steals to much more expensive high end brands. I love using highlighter on my cheekbones, and also my cupids bow, but because I tend to get oily on my nose/T-Zone area I often skip a highlight there. A few months ago Benefit Cosmetics launched and re-vamped a lot of their products, including their Dandelion blush, and they came out with Dandelion Shy Beam which they describe as a nude pink “matte radiance” highlighter. I was very intrigued by this “matte” highlighter claim since this is the opposite of what you think of when you think of highlighter, and honestly sounds a bit like an oxymoron.

How I Use It

I absolutely LOVE this for highlighting down the center of my nose, and for highlighting around the outer corner or my eye and cheekbone. This is fantastic for any place you want to highlight or any place the sun would naturally hit your face because it is so subtle that you can get away with using it in lots of places at once without looking like a disco ball. As someone with combo/oily skin, having a matte highlighter gives you a beautiful lit from within look that is fresh and youthful without risk of feeling like your skin looks greasy or needs blotting immediately. I like to dot this on with the brush applicator and then use a small stippling brush, like the E.L.F  Small Stipple Brush, to tap it into the skin. You can also use a lightly damp Beauty Blender or your fingers to tap this into the skin. However you choose to apply this, be sure not to rub or you will risk rubbing off other makeup and won’t get the desired effect.

What are your thoughts? What is your favorite highlighter? Do you think the highlighting trend has become too much or are you still into it? Let me know in the comments! xx

FacebookTwitterEmailPinterestShare

Filed Under: Beauty Tagged With: beauty blog, beauty blogger, beauty review, Benefit Cosmetics, benefit dandelion blush, benefit dandelion shy beam, Benefit Shy Beam, highlight for fair skin, highlight for pale skin, Highlighter For Oily Skin, How To Highlight Your Nose, KwapisFamilyTackles, leahtackles, Liquid Highlighter, logan is 2, makeup blog, makeup review, Matte Highlighter, Shy Beam

HOW TO APPLY FALSE LASHES!

January 4, 2017 & Leave a Comment

Hi there! Happy Wednesday!

I hope that you are having a great week so far! I have been getting comments on some of my YouTube videos and Instagram pictures asking if I’m wearing false eyelashes or what lashes I am wearing. Up until about a year ago, I really only wore false eyelashes a handful of times in my entire life, but this past year I’ve been using them while filming certain videos and for special events, so today I decided to tell you about the lashes that I use and how I apply them.


How To Apply False Lashes:

howtoapplyfalselashes-leahtackles.jpeg

Pictures Wearing False Lashes:

howtowearfalselashes-leahtackles.jpeg fullsizerender-67 fullsizerender-66

When To Wear False Lashes:

Whenever you want! I definitely am NOT a false lash every day kind of girl, but I really love the way that they look on film and in pictures. I always have very long and dark lashes naturally, but the difference that false lashes can make is pretty remarkable!

How To Apply False Lashes:

1.Once you’ve removed your lash from the packaging hold the lash up to see if it fits your lash line or needs to be trimmed. If it needs to be trimmed you can do so easily with a small pair of scissors from a manicure set. For some, like myself, the lash bands are actually not long enough so I hold the lash up and figure out where to place it so that it starts in the middle and ends on the outer part of the lash line.

2. Apply a very light layer of a mascara to help blend your lashes with the falsies. This step is optional, but I’ve tried this step and it is my preference to do this.

3. Apply a thin strip of lash glue to the band of the false lash and then let the glue dry for about 30-40 seconds.

4. This is the “tricky” step but I promise it isn’t that bad! If one side of the lash has longer lashes, that part should go on the outer corner of your eye.  Hold the lash up either with your fingers or if you prefer, with a pair of tweezers, and right about your lash line until you get in where you want set it and then put it down onto your lash line. *TIP: Apply a slightly thicker than usual line of liquid eyeliner that helps to blend the false lash band and gives you a spot to “aim” when placing the lash.

5. Check out your handy work! If the lash is sticking too far out or not where you want it to be, lift it up and try again! If you need to, apply a bit more lash glue and repeat step 3. If you are happy with how your lash looks, make sure the band is pressed down and keep your eye closed or look down for a minute so that the lash can set.

6. Use a mascara to blend your lashes with the falsies, if needed. I like to add a little bit of mascara where the lash doesn’t reach near the inner corner of my eye, and then a little bit on my bottom lashes as well.

Repeat these steps for the other eye. That’s it! I know it is a lot of steps and sounds scary, but I promise it isn’t : ) I usually do one eye super quickly, and often struggle with the other once or twice before getting it how I want it, but it’s worth it for a little added drama to your look!

If you have any questions about how I do this, please let me know! I also re-use my false lashes several times by cleaning them after use, and if you’d like to see how I do that please let me know!

My Favorite False “Natural” Lashes

My Favorite “Glamour” Lashes

My Favorite Lash Glue

My Favorite Mascara

Thank you for reading! Have a beautiful day!

FacebookTwitterEmailPinterestShare

Filed Under: Beauty Tagged With: Apply False Lashes Like a Pro, Ardell False Lashes, beauty blog, beauty blogger, Beauty Vlogger, beauty youtuber, Best False Lashes, Best Lash Glue, False Lash How-To, Glamour False Lashes, How To Apply False Lashes, Inexpensive False Lashes, Lash Tutorial, leahtackles, LeahTackles Lashes, Long Lashes, Natural Lashes, Red Cherry False Lashes, Revlon Precision Lash Glue, vlogger

DOWNLOADABLE PRINTS FOR YOUR BEAUTY GALLERY WALL! KWAPISFAMILYPRINTS

January 2, 2017 & 2 Comments

Hi there! Happy Monday! And Happy 2017!

I hope that all of you had a wonderful time ringing in 2017! I love the unblemished, fresh start feeling that come with a new year. If you follow along with our family vlog channel, KwapisFamilyTackles on YouTube, then you may have seen a few teasers about a project that my husband and I have been working on over the past several months and today I am SO EXCITED to be sharing it with you! My husband is a crazy talented artist and we decided to combine his art skills with my love for social media marketing to bring you KwapisFamilyPrints on Etsy! KwapisFamilyPrints offers prints that you can download instantly to hang wherever your little heart desires! KwapisFamilyPrints also offers completely customizable invitations and signs for any event you can dream up. Please feel free to pass this on to family and friends who may be interested in our products! Stay tuned to my Instagram for new products and occasional discount codes for my followers ; )


SHOP KWAPISFAMILYPRINTS HERE!


KWAPISFAMILYPRINTS-ETSY-BEAUTYGALLERYWALLPRINTS-LEAHTACKLES.jpeg wakeup-and-makeup-mockup


Thank you so much for reading my blog! It truly means so much to me to have the support of all of you as we embark on this new adventure as a family! I hope that all of your hopes and dreams for the new year come true! xx

FacebookTwitterEmailPinterestShare

Filed Under: Beauty, Decor, Family Tagged With: Beauty Gallery Wall, Chic Home Decor, Custom Invitations, Do It Yourself Home Decor, Downloadable Prints, Etsy Invitations, Girly Gallery Wall, Girly Home Decor, home decor, Home Decor Prints, KwapisFamilyPrints, KwapisFamilyPrints Etsy Shop, KwapisFamilyPrints on Etsy, KwapisFamilyTackles, leahtackles, leahtackles etsy, makeup wall print, mascara wall print, Modern Home Decor

YOU NEED TO TRY THIS BODY WASH! UNDER $5

December 28, 2016 & Leave a Comment

Hi there! Happy Wednesday!

Today I want to share one of my “holy grail” drugstore items that I always repurchase and always have on hand. Be sure to let me know your favorite products in the comments section because I love finding new amazing things.


Caress Evenly Gorgeous Body Wash

caressevenlygorgoeusbodywash-leahtackles.jpeg

I prefer this over other higher end body scrubs and body washes that I have tried and I always repurchase this. This is an exfoliating body wash which makes it great for sunless tanning prep or just a good deep clean, but it’s also gentle enough that it can be used daily. I like all of the scents, but my favorite is the Burnt Brown Sugar and Karite Butter. I love this because it leaves my skin feeling smooth, clean, and it’s super affordable!

Thank you for reading! Have a wonderful rest of your week and HAPPY NEW YEAR! I cannot wait for 2017! Cheers love!  xx

FacebookTwitterEmailPinterestShare

Filed Under: Beauty Tagged With: affordable body wash, beauty blog, beauty favorites, beauty tips, Beauty Vlogger, beauty youtuber, Best Body Wash Ever, caress body wash, Caress Burnt Brown Sugar & Karite Body, Caress Evenly Gorgeous Body Wash, Drugstore Body Wash, drugstore favorites, leahtackles, makeup blog, shower routine, simple beauty, Skincare Favorites, skincare review, skincare routine, skincare tips

Kat Von D Alchemist Holographic Palette Review

December 26, 2016 & Leave a Comment

Hi there! Happy Monday!

I hope that all of you had a wonderful weekend, and if you celebrate, a very Merry Christmas! I had a wonderful Christmas with my family, and ate WAY too many cookies ; ) Today I am so excited to be sharing the *highly* anticipated Alchemist Holographic Palette from Kat Von D.


Kat Von D Alchemist Holographic Palette

katvond-alchemist-review-leahtackles.jpeg

katvondalchemsit-leahtackles.jpeg

Without Flash:

katvondalchemist-review-leahtackles.jpeg

With Flash:

katvondalchemist-leahtackles.jepg

katvondalchemist-holographichighlight-leahtackles.jpeg

katvondalchemistreview-swatches-leahtackles.jpeg

What It Is:

This palette is being called a “transformer” palette because it can be worn as a highlighter, or as a topper for eye shadows and even lipsticks.  Each of the four shades are formulated with “Double Dimension Technology” which catches the light from every angle, given a holographic effect.

My Thoughts:

I was intrigued by this palette because I have been watching Kat Von D slowly share sneaks on her Instagram account. Kat Von D has spent years working on these formulas and has called this palette one of her passion projects. Being a beauty lover, I knew that this was something I wanted to try for myself right away! I have worn two of the shades so far as a cheekbone highlight and it is stunning! A little bit goes a LONG way, but I absolutely loved the way it caught the light. I am excited to try this as an eye shadow topper, and think it would be a gorgeous look over a simple look to amp it up to something a lot more special.

Do I Need It?

I think that this is a must have for the makeup junkie who loves to try new things, play with makeup, and collect makeup. I think that this is beautiful for those looking for something new. I have noticed the similarities between this and the Anastasia Beverly Hills Moonchild highlighters, and after comparing swatches online they do look similar though not exactly the same. I think that if you have Moonchild you don’t need the Alchemist, but Alchemist seems more holographic and Moonchild seems to be more metallic or duochrome to me.

Do you have this? Are you planning to get it? I was able to pick it up on Sephora.com during the VIB pre-launch, but it is now available to everyone. Thank you, as always, for reading! I hope that you have a fantastic rest of your day : )

FacebookTwitterEmailPinterestShare

Filed Under: Beauty Tagged With: Alchemist Palette, B Blogger, beauty blog, Beauty Reviews, beauty tips, beauty youtuber, duochrome highlighter, holographic highlighter review, Kat Von D Alchemist, Kat Von D Alchemist Palette, Kat Von D Beauty, Kat Von D Instagram, leahtackles, LeahTackles Beauty, makeup blog, makeup blogger, makeup tips, Makeup Tutorials, sephora

NATURAL EFFORTLESS FOUNDATION FOR EVERY DAY! MAYBELLINE DREAM MATTE MOUSSE

December 21, 2016 & Leave a Comment

Hi there! Happy Wednesday!

The winter months include lots of social functions with friends and family starting with Christmas and holiday celebrations continuing on with things like Super Bowl parties, where I find myself wanting to look put together but not in a full-on multi step makeup routine. I have been “shopping my own stash” of makeup lately (which is how I found my current favorite Too Faced Snow Bunny Bronzer which I blogged about here). I recently rediscovered Maybelline Dream Matte Mousse Foundation and had to share it with you today!


Why I Love It:

maybelline-dream-matte-mousse-review-leahtackles.jpeg

leahtackles-everydaydrugstorefoundation-leahtackles.jpeg

maybellinedreammattemousse-review-leahtackles.jpeg

This foundation is one that I used years ago and had honestly forgotten about until I saw one of my most trusted beauty YouTubers, Emily Noel, mention it recently and I decided to give it another shot. This foundation gives me a great medium coverage without much work at all and I don’t mind the need to touch up much during the day. I will say that this isn’t as full coverage as some of my favorite foundations, but that is why I’ve been loving it lately…it’s EASY, no-fuss and looks very natural. I do like using a primer with this as I do all foundations, but I don’t find this to sink into my pores horribly if I do skip a primer. I do set this with a loose setting powder (my current favorite is the Laura Mercier Loose Setting Powder). I like applying this was an ever-so-slightly damp Beauty Blender, but it does also applying nicely with your fingers which is AWESOME when you’re in a rush or feeling a little lazy which is completely acceptable in these cold, dark months ; )

Please let me know your favorite easy, no-fuss foundation(s) in the comments! I LOVE trying new foundations, especially at awesome drugstore prices!! I hope that you have a VERY MERRY CHRISTMAS if you celebrate! Thank you so much for your support and love, it truly means the world to me! xx

FacebookTwitterEmailPinterestShare

Filed Under: Beauty Tagged With: beauty blogger, beauty tips, Beauty Vlogger, beauty youtuber, Dream Matte Mousse, Drugstore Foundation, drugstore foundation for combo skin, drugstore foundation for oily skin, easy foundation, Everyday Makeup, foundation for combo skin, Foundation Tips, leahtackles, leahtackles drugstore makeup, makeup blog, makeup tips, Matte Drugstore Foundation, Maybelline Dream Matte Mousse, maybelline dream matte mousse review, Mousse Foundation, natural foundation, simple makeup

ADD VOLUME TO YOUR HAIR WITHOUT TEASING! USE THESE PRODUCTS

December 19, 2016 & Leave a Comment

Hi there! Happy Monday!

I have a lot of hair and I tend to get a lot of questions (on my YouTube channel especially) about how I style my hair. I have long, color treated, hair. I have a lot of hair, but my hair is very fine and naturally straight. A lot of days I will curl my hair with either a 1 1/2 inch Hot Tools Curling Iron or a Nume Wand which adds a lot of volume. I also do the regular tricks like blow drying my hair upside down or spraying my hair with a hairspray like L’Oreal Elnett which I’ve blogged about before here. However, I have a confession, I *hate* teasing my hair! I am really bad at backcombing, and almost never do it. I remember my sorority sister teasing my hair before going out to a party when “the bump” was in (circa 2007) because I couldn’t do it myself. Today I want to share two of my favorite products that I use to add lift and volume to my fine hair and help me avoid backcombing.


bedheatblowdrylotion-batisteplumpingpowderxxl-volumewithoutteasinghair-review-leahtackles.jpeg


Bed Head SuperStar Blowdry Lotion for Thick Massive Hair:

I let my hair air dry as long as possible and then put a nickel to quarter sized amount of this thin watery liquid into into my palms and with my head upside down and then blow dry my hair as I normally would. I love the way this smells, and definitely notice a dramatic difference! I love that my hair looks very voluminous and full.

Batiste Dry Styling XXL Plumping Powder:

This product isn’t something that I use daily, but when I really want to add lift to my roots without teasing I reach for this. This is a white powder that feels like corn starch and you can feel it grip to your hair.  It is a product that you have to be very careful with and add a little bit at a time. I part my hair and add a bit to the roots in several sections around my crown to increase the volume of my hair. It works REALLY well and once I get the volume I gentle brush it out or use my fingers to get it how I want it before *lightly* setting it with a hair spray.

Thank you for reading! I hope that you’re having a wonderful start to your week! If you haven’t yet, please don’t forget to subscribe! xx

FacebookTwitterEmailPinterestShare

Filed Under: Beauty Tagged With: Add Volume to Hair, batise xxl plumping powder, batiste, batiste xxl plumping powder review, beauty blog, beauty blogger, bed head blowdry lotion review, Bed Head Hair Care, Bed Head Superstar Blowdry Lotion For Thick Massive Hair, easy hair tips, fine hair care, hair care tips, hair product reviews, Hair TIps, hairstyle, L'oreal Elnett Hairspray, leahtackles, makeup blog, simple hair styling, Volume without teasing hair

TOO FACED SNOW BUNNY BRONZER REVIEW

December 14, 2016 & 1 Comment

Hi there! Happy Wednesday!

I hope that you have been having a fantastic week so far! Today is my middle little loves birthday! Happy 4th Birthday Connor David! I love you so! Today I want to talk about a bronzer that I used years ago and loved but somewhere along that way got lost in my drawers of makeup. A few weeks ago while decluttering my makeup collection, I pulled out a few products I wanted to try using again and the Too Faced Snow Bunny Perfecting Bronzing Powder has become a rediscovered favorite that I want to share with you today.


Too Faced Snow Bunny Bronzer

toofacedsnowbunnybronzer-leahtackles-review.jpeg

First of all this packaging is absolutely beautiful! I actually have the older packaging, but both the new and older packaging is beautiful with simple details. This one of those products that makes me happy just looking inside the compact because the beautiful shimmery shades are stunning. The bronzer is made up of four strips of color in a white highlight, a bronze, a very pale pink, and a light tan. I think that I avoided this because these days I usually use a matte bronzer or at least tend to avoid a lot of shimmer, but this is stunning! You can use this as a blush, a bronzer, or a highlight which is also great. I like that you can use the four colors separately, but I tend to twirl my brush in all four colors and then lightly dust onto my cheeks. Although this has shimmer it is a very subtle highlight and I think it’s perfect in the winter months for a very natural glow. This looks wonderful in the sunlight, especially that snowy sun reflecting light, and lasts on me all day.

Have you tried this bronzer? What bronzers do you like to wear in the winter? Leave a comment to let me know! Have a great day and please subscribe! xx

FacebookTwitterEmailPinterestShare

Filed Under: Beauty Tagged With: beauty blogger, beauty review, Beauty Vlogger, beauty youtuber, Best Winter Bronzer, leahtackles, makeup blogger, makeup review, makeup tips, Pale Skin Bronzer, Shimmering Bronzer, too faced, Too Faced Bronzer, Too Faced Perfecting Bronzing Powder, Too Faced Review, Too Faced Snow Bunny Bronzer, Too Faced Snow Bunny Bronzer Review

GO LONGER BETWEEN HAIRCUTS? LIVING PROOF SPLIT END MENDER REVIEW

December 12, 2016 & Leave a Comment

Hi there! Happy Monday!

I hope that you had a great weekend! If you’re like a lot of us, you probably don’t get your haircut the recommended every 6-8 weeks, and sometimes the ends of your hair can start looking a little rough between trims. Today I am going to be sharing my thoughts on the Living Proof Perfect Hair Hair Day Fresh Cut Split End Mender.


Living Proof Split End Mender

skipahaircut-hereishow-leahtackles.jpeg

livingproofsplitendmender-leahtackles.jpeg

What It Is

The Living Proof Split End Mender can be used on wet or dry hair to seal individual split ends so that the ends of your hair looks smooth and aligned. It also contains a conditioning layer that keeps ends sealed and soft for polished looking ends. You can start using this right after a haircut to help prevent split ends, or to treat split ends.

How I Use It

I like to apply this to the bottom few inches of my hair while it is still damp after showering. I also have used it after straightening and curling my hair when the ends look a little bit raggedy and it definitely works to smooth out my ends.

My Thoughts

livingproof-splitendmender-leahtackles.jpeg

I love that a little bit of this goes a long way and helps my split ends look smooth! I really feel like this helps get that “just left the salon” look. I really like this to treat my split ends when my hair is damp. This does work to smooth my ends after curling or straightening for a sleek look, but I can get the same effect using other serums as well. I already have added this to my “loves” list at Sephora and will continue using this to prevent and treat split ends.

Have you ever tried this or other Living Proof products? Let me know your thoughts in the comments! Have a wonderful day and don’t forget to subscribe : )

FacebookTwitterEmailPinterestShare

Filed Under: Beauty Tagged With: beauty, beauty blogger, beauty review, Beauty Vlogger, Haircare Review, leahtackles, Living Proof, Living Proof Hair Care, Living Proof Perfect hair Day, Living Proof Review, Living Proof Split End Mender, Living Proof Split End Mender Review, makeup review, skincare, skincare review, vlogger

« Previous Page
Next Page »

SUBSCRIBE

Leave your email to subscribe!

SEARCH

SPONSORS

ARCHIVES

GRAB MY BUTTON


copy & paste code

site design by The Kinch Life Design & development by Olive & Ivy Design