Leah Tackles

  • Home
  • About
  • Policy
  • Beauty
  • Fashion
  • Cooking
  • Exercise
  • DIY Projects
  • Decor
  • Book Club
  • Family

My Favorite Eyebrow Product! 

February 3, 2016 & 2 Comments

Hi there! Happy Wesnesday!

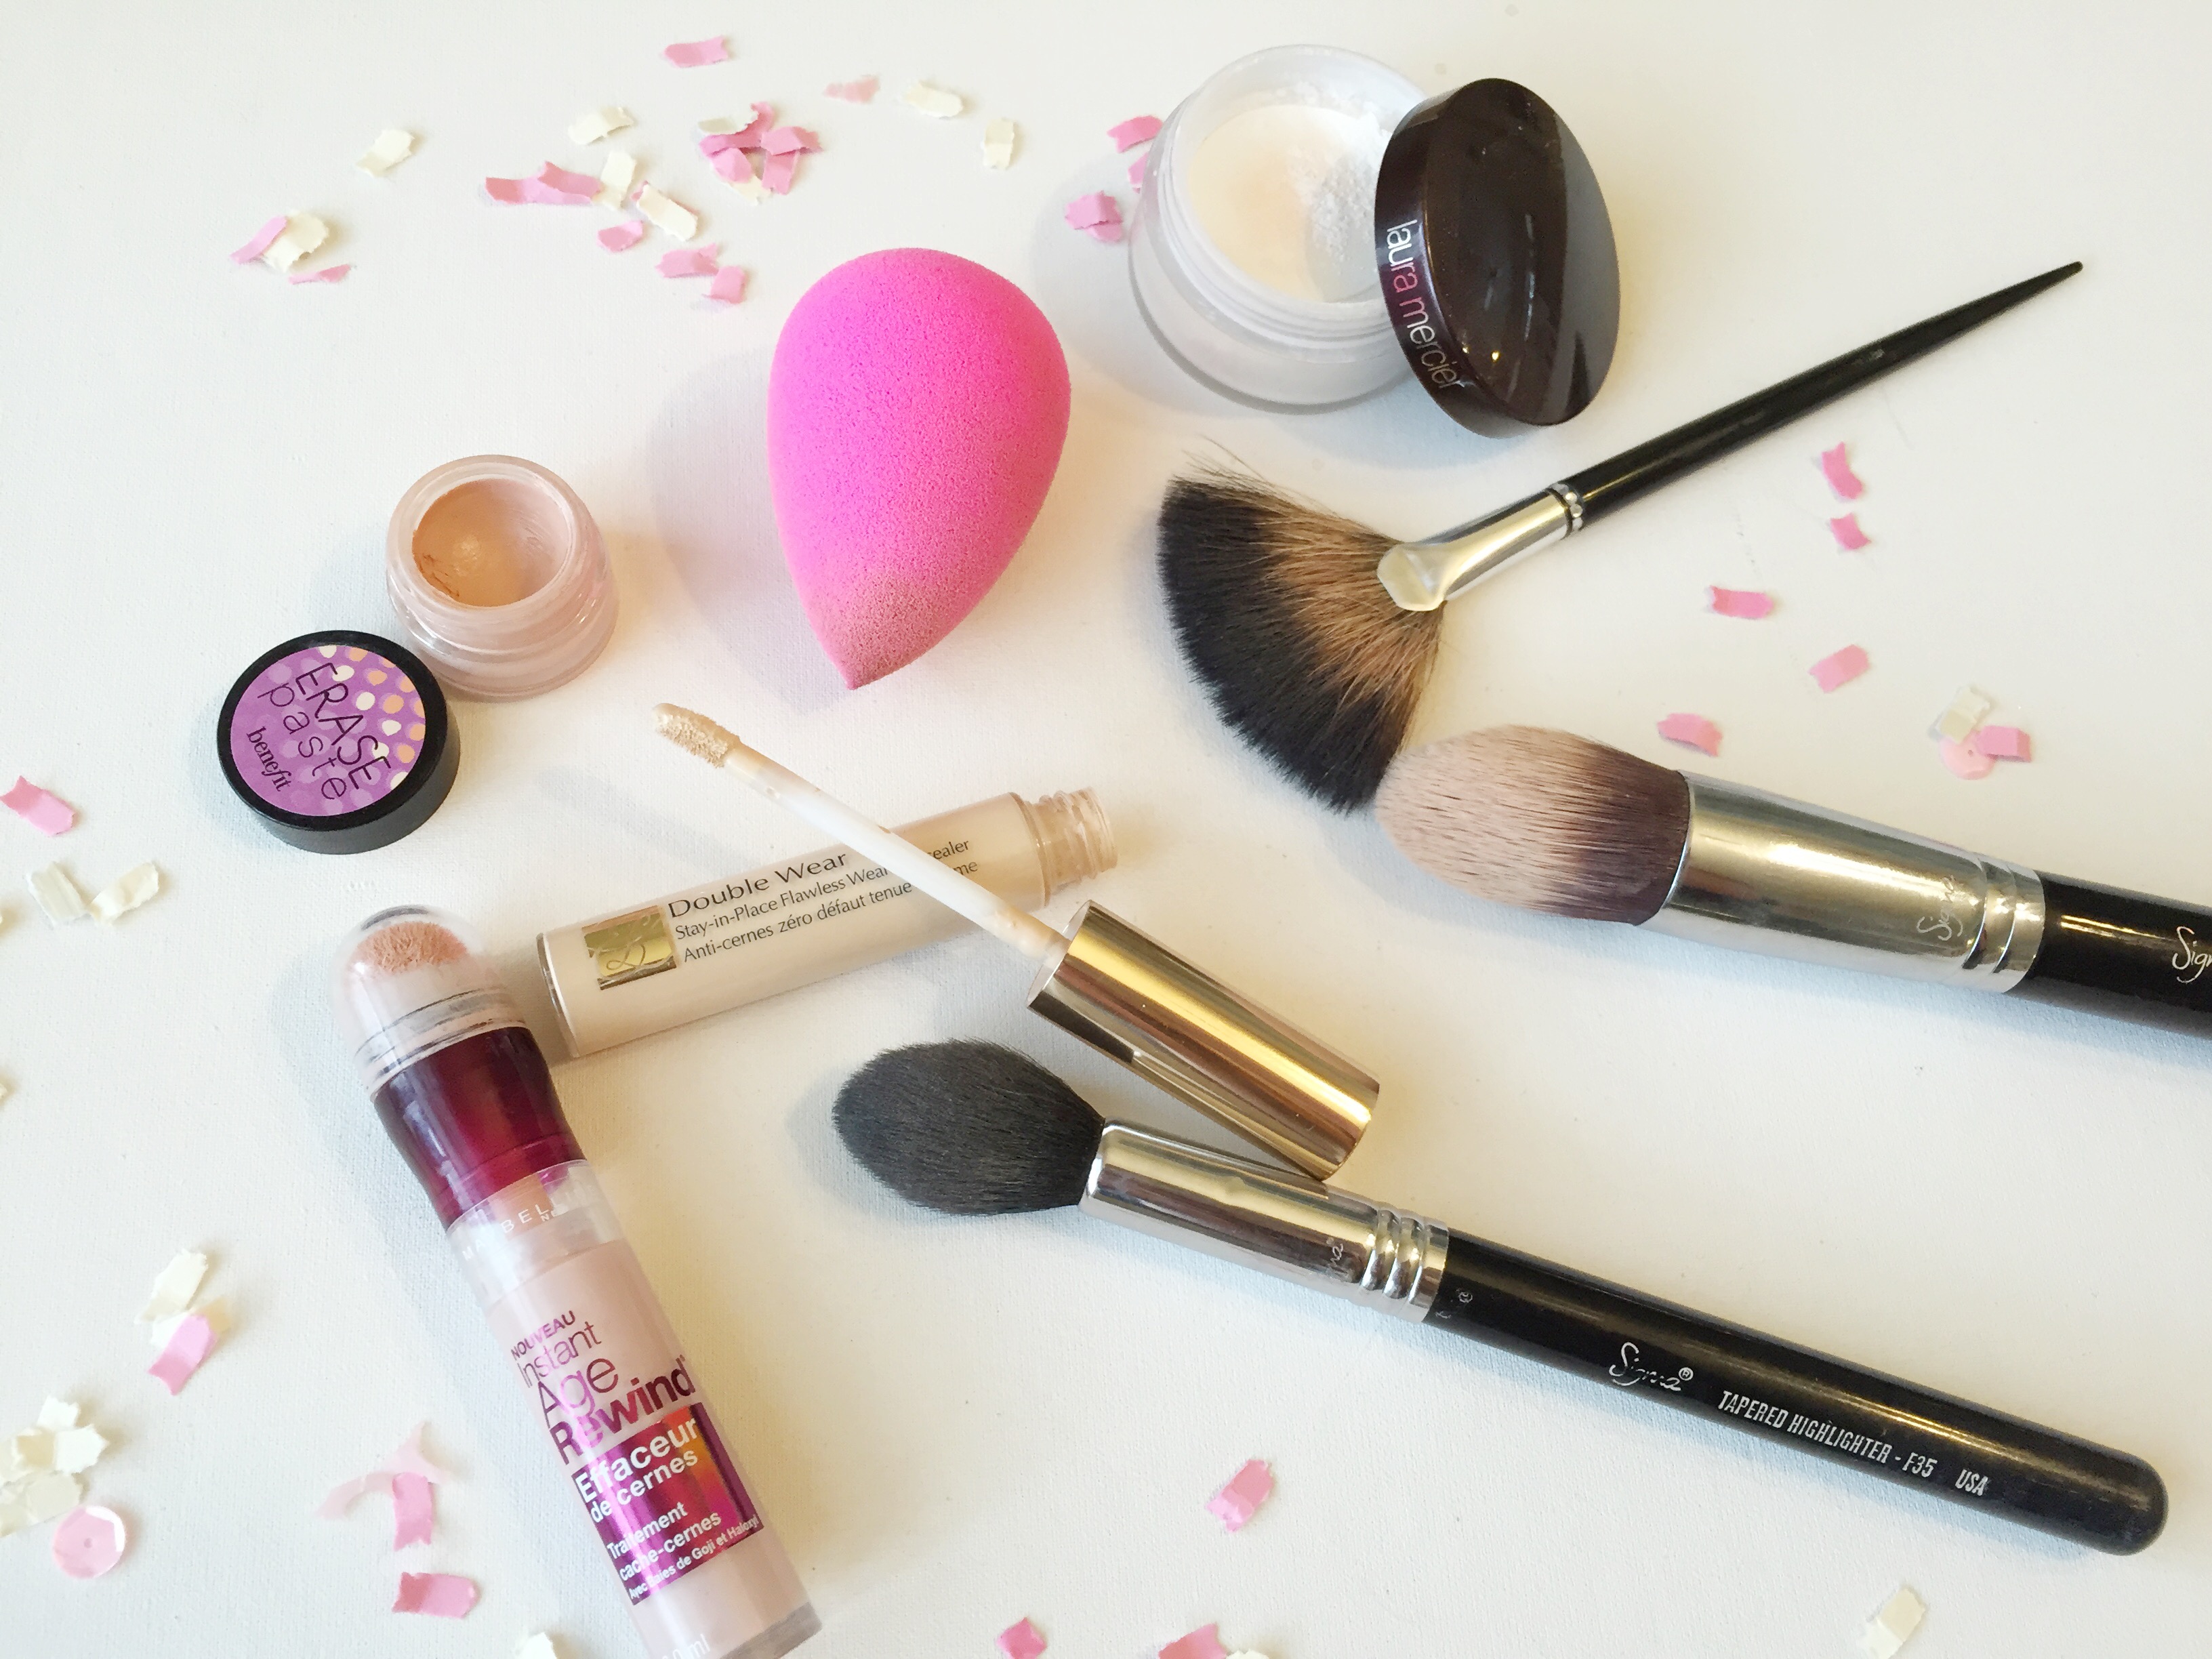
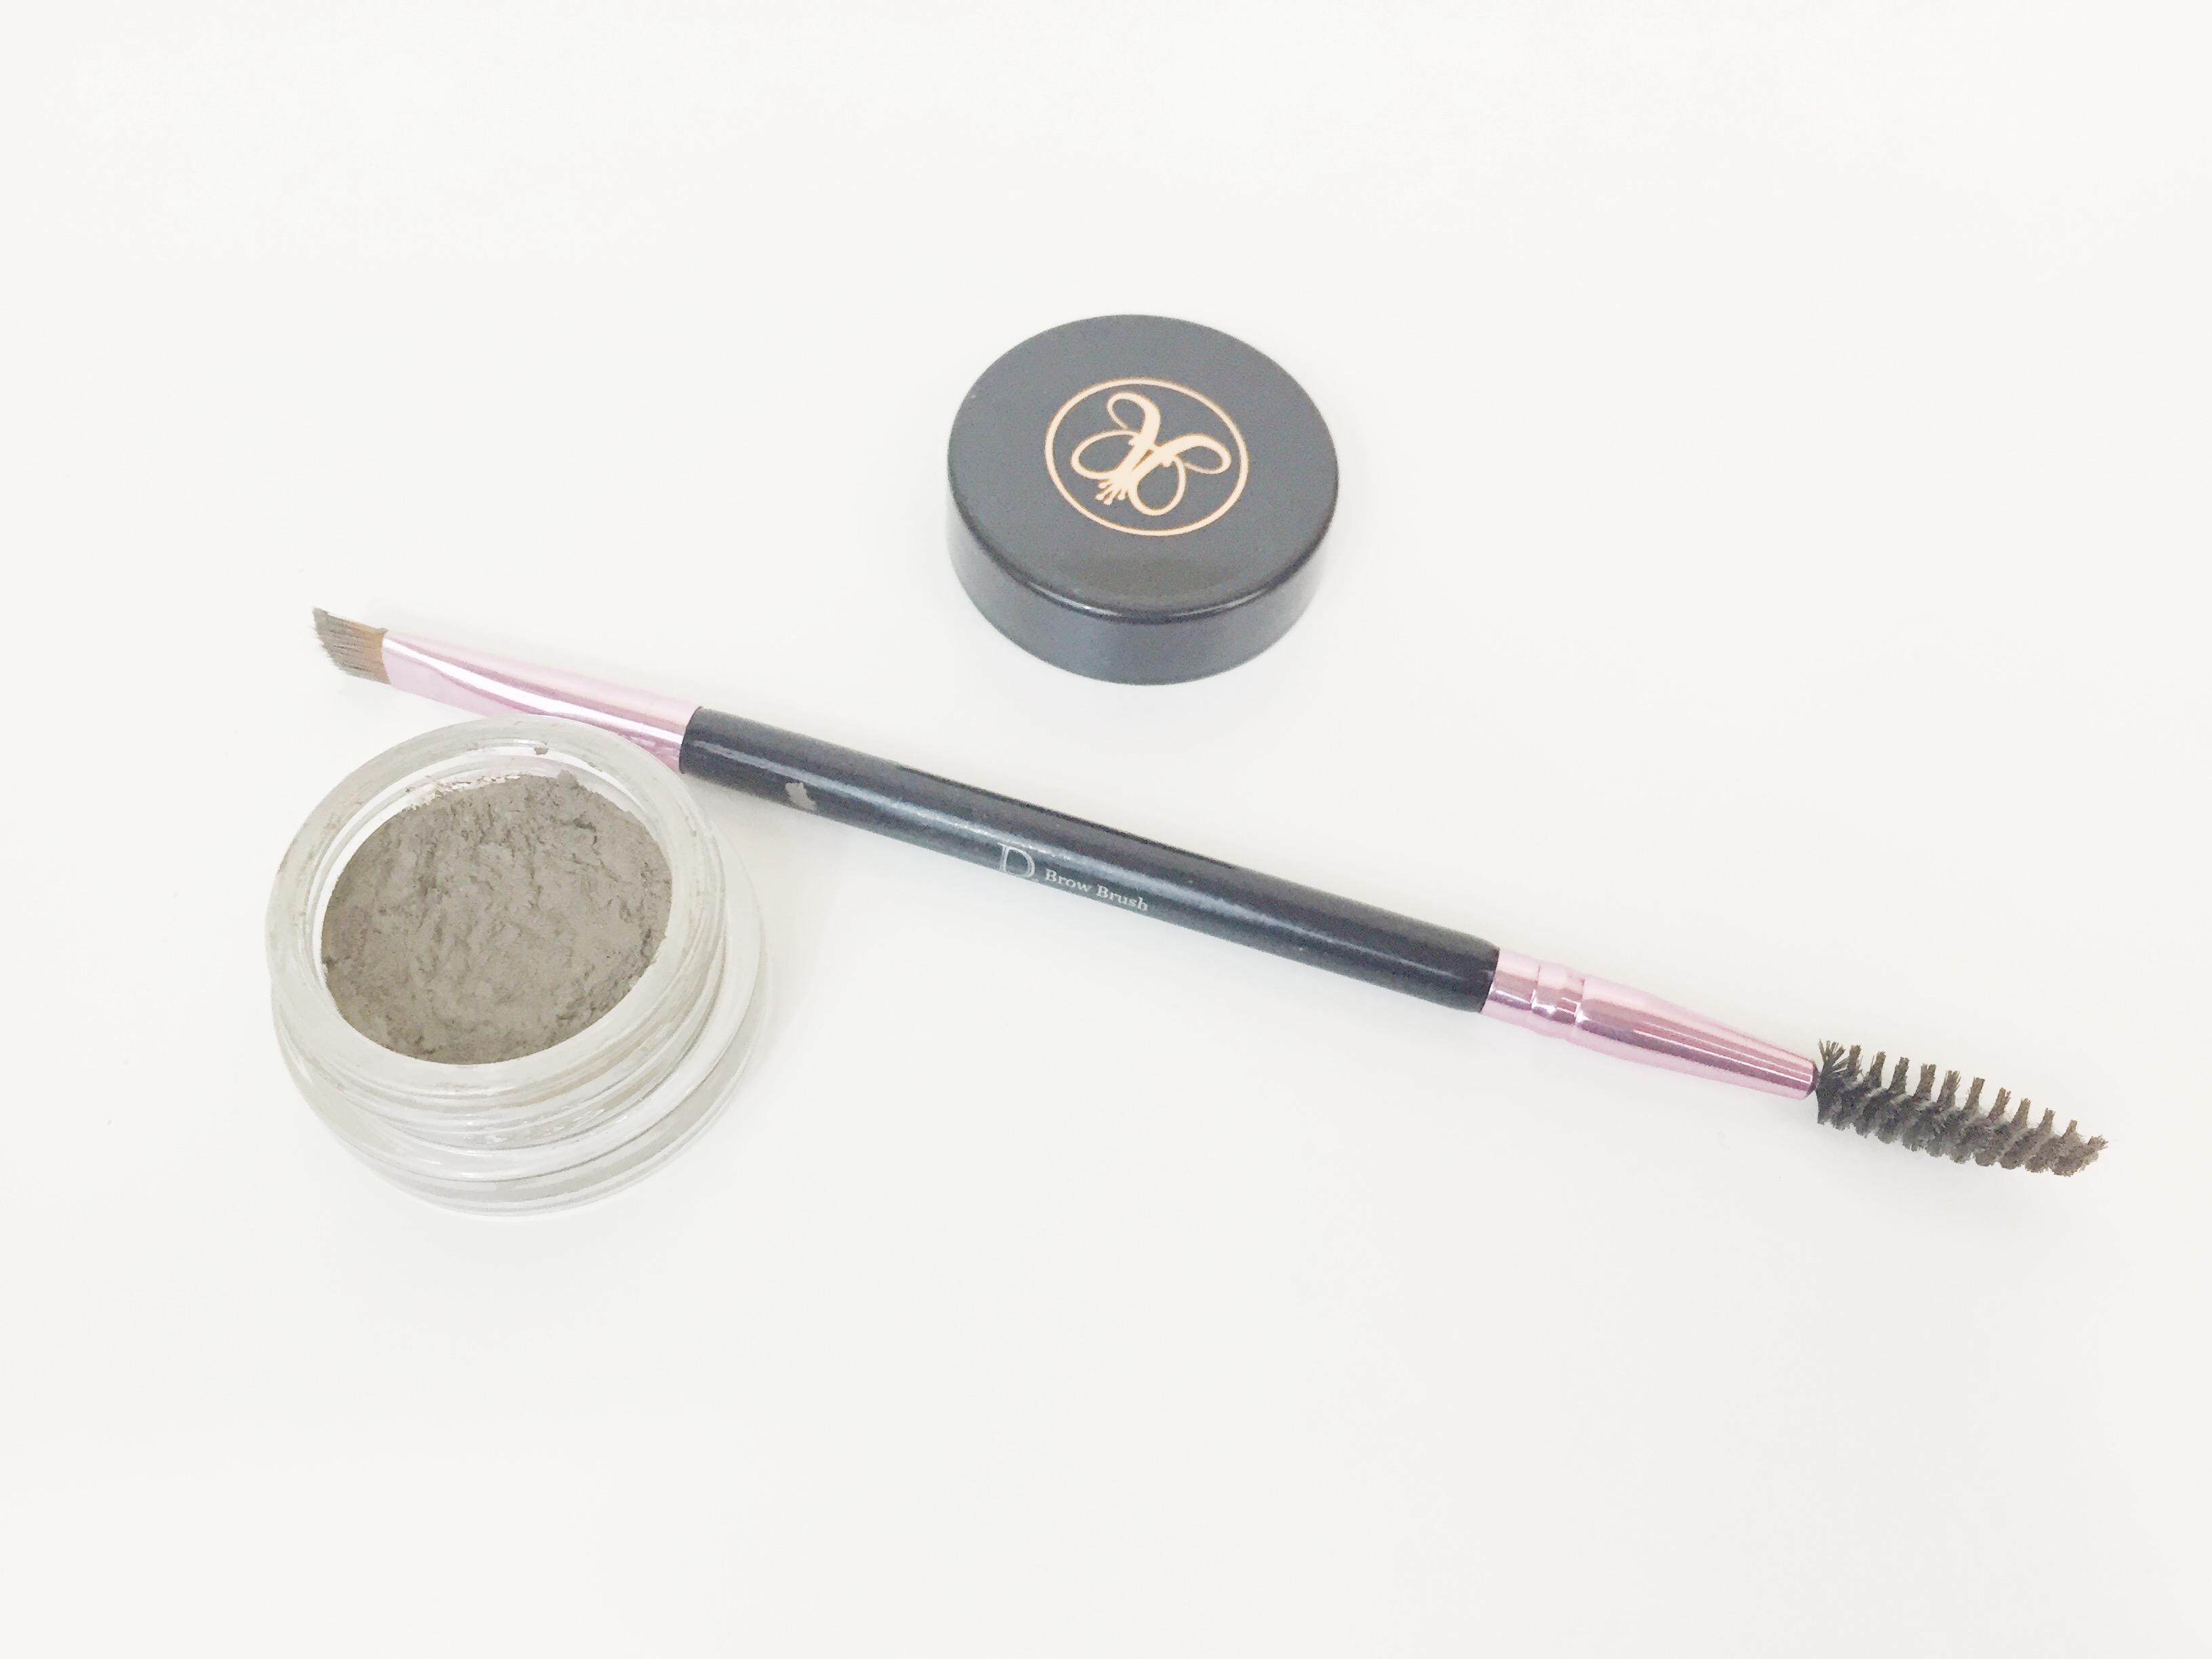
I am constantly changing up my makeup, and lately I’ve really been loving my brows! I’ve used the Anastasia Beverly Hills Dip Brow on and off for about a year, but just recently I’ve been using it nonstop.

browroutine-leahtackles.jpeg

What I Do:

I comb my brows in the general direction I want them to be with a spoolie brow brush (basically a brush that looks like a clean mascara wand). Then I dip my brush into my Dip Brow Pomade in Taupe and hold the brush vertical to brush the brow hairs closest to my nose up in their natural direction. I then use the brush horizontally and outline the lower part of my brows and then use the brush to push that product up so that I don’t end up using too much or creating too harsh of a look. I then usually set my brows with a clear brow gel, just incase they decide to get crazy ; )

Why I Love It:

I can get big, full, and defined brows without them looking overly harsh or painted on. I definitely always go lighter than you would think you need and slightly lighter than your brows to avoid them looking too harsh. A lot of people think they should buy their exact brow color, but I have had much better results going a bit lighter than my natural brows.

As always, thank you for reading! I hope that you have a wonderful weekend!

FacebookTwitterEmailPinterestShare

Filed Under: Beauty, Uncategorized Tagged With: Anastasia Beverly Hills, Anastasia Dip Brow Pomade, beauty blogger, beauty videos, Beauty Vlogger, Brow Pomade, Brow Product Reviews, Brow Routine, daily vlogger, Dip Brow in Taupe, KwapisFamilyTackles, leahtackles, makeup blogger, Makeup Reviews, Makeup Tutorials

SOMETHING FOR ME | ADULT COLORING BOOKS?

February 1, 2016 & 2 Comments

Hi there! Happy Monday!

I hope that all of you had a great weekend! I got to spend some great time with my husband and all three kids and that just makes my heart happy! I am a person who likes to be busy, and that’s good because I am very busy (in fact more busy than even I would like!) but I am horrible about making time for myself! I know a lot of you out there, especially moms, can probably relate! It’s hard to prioritize time for yourself! As I’m sure you’ve noticed, everyone and their mother is using adult coloring books (literally, my mom has some!), so I decided to jump on the bandwagon. If you’ve been watching our daily vlogs you know that in just a couple of days our life will be getting even crazier, so I thought this would be the perfect time to try these. I am fairly crafty, but I am not an artist at all, but I am excited! I think it’s important that we do something for ourselves that is just for fun and just for us! So, in the comments, tell me something you do for yourself! And, have you tried any adult coloring books?


DisneyPrincessAdultColoringBook-LeahTackles.jpeg

Thank you so much for reading! Have a wonderful week and do something for you : )

FacebookTwitterEmailPinterestShare

Filed Under: Book Club, DIY Projects Tagged With: Adult Color Bookings, Disney Adult Coloring Books, Disney Princess Art Therapy 100 Images to Inspire, KwapisFamilyTackles, leahtackles, Me Time, Mommy Time, You Time

PEACHES & PETALS SUBSCRIPTION BOX REVIEW! GET 50% OFF!

January 27, 2016 & Leave a Comment

Hi there! Happy Wednesday!

I hope that all of you are having a fabulous and productive week! My family has a lot going on currently, and if you watch our daily vlogs you’ll know a little about what I’m talking about, but I wanted to tell my readers that I will be continuing to upload every Monday and Wednesday as of now!  In December I reviewed the Peaches & Petals box for the first time I was very impressed! The wonderful gals at Peaches & Petals asked if I would like to receive another box for consideration & review and I happily accepted. For the January box I decided to film an unboxing so that you could get my real first impressions and to make it a little bit more fun : ) I filmed this video a week ago and now have some thoughts on the items that I’ve been trying from the box, so I’ll also briefly share those below.

Peaches & Petals was kind enough to offer my followers 50% off their first box with the code LEAHPEACH so be sure to use that! This box is $19.99 a month, and I think that’s a very good deal if you’ll use these types of lifestyle items! I love this box because just like my beloved PopSugar Must Have Boxes, they can easily be made into gifts or passed along…not that I do that often because usually I want them myself ; )

PEACHES & PETALS

Fruit Infuser Water Bottle

I already LOVE this and think it’s amazing quality! I love that this is a glass bottle, because the infuser bottle I already have is plastic and now I have the option to use either depending on where I want to use it. I can’t wait to try more fruit waters with this.

Selfie Stick

I have had a blog for almost two years, and I have been on YouTube for almost one year, but I didn’t own a selfie stick until now! I had a little phone attachment, but never a selfie stick! I haven’t used this yet, but can’t wait to try it out! It is HARD to capture a family of five without one!

Adventure Jewelry

Okay, I thought this was adorable when I opened it, but I can’t get it to fit my wrist very well and the quality doesn’t seem as nice as the jewelry from last months box, however I will wear it when I stack my bracelets.

Healthy Cooking Cookbook

I love reading cookbooks and cooking magazines, so I was really happy to see this! I haven’t tried any of the recipes, but there are definitely a lot I would love to try out!

Inspirational Decal

How cute is this?! I gifted this to one of my best friends! Yay for Happy Mail!

What is your favorite subscription box? Do you have any you would like to see me review? Please let me know in the comments! I hope you have a wonderful weekend!

FacebookTwitterEmailPinterestShare

Filed Under: Cooking, Family, Fashion Tagged With: Adventure Jewelry, beauty blogger, Beauty Reviews, daily vlogger, Fruit Infuser Water Bottle, Healthy Cooking Cookbook, KwapisFamilyTackles, leahtackles, Lifestyle Blogger, Lifestyle Vlogger, Mommy Review, Peaches & Petals Promo Code, Peaches & Petals Subscription Box, Peaches & Petals Subscription Box January 2016, Peaches & Petals Unboxing, Selfie Stick, Subscription review

IS YOUR UNDER EYE CONCEALER MAKING YOUR FINE LINES AND DARK CIRCLES MORE VISIBLE?

January 25, 2016 & Leave a Comment

Hi there! Happy Monday!

This morning I was thrilled to be volunteering in my 4 year olds classroom for a few hours, and her sweet teacher asked me about under eye concealer suggestions. First of all, thank you for asking! I absolutely love getting questions from all of you, and every time I take it as a compliment! So, ask away! I am also a huge fan of this topic, because I have (BAD) dark circles! I’ve talked about it before, but the combo of three kids under five and genetics (love ya mom and dad!) makes my dark circles situation rough most days. I also think it’s a super important topic because if you don’t apply or set your under eye concealer correctly it can cause the makeup to set into your fine lines making the lines and dark circles more visible! Let’s be real, none of us have time for that!

What I Do For My Under Eye Make Up and Dark Circles:

UNDEREYECONCEALERTIPS-DARKCIRCLETIPS-LEAHTACKLES.jpeg

1. If you’re not using an eye cream, you should be! I really love using the Benefit It’s Potent Eye Cream which you can find at Ulta or Sephora. It’s a little pricy, but I really like this and it has helped my dark circles to appear less drastic. I also like this because it doesn’t take forever to absorb into the skin, and it doesn’t feel heavy at all.

2. I always use some sort of pinky/salmon concealer to brighten up the dark circles under my eyes. My go-to favorite is a drugstore concealer! I use the Maybelline Instant Age Rewind Eraser Dark Circles in Brightener! Make sure you get the one that actually says “Dark Circles” because they also have a regular concealer that isn’t specific to the under eye area. I also really like the Benefit Erase Paste, it works so well on days when I want maximum concealing power, but it’s thicker and harder to work with when I’m in a real hurry.

3. I then use a concealer (Tip: Look for one that is one shade lighter than your skin tone for extra brightening power! But I am very fair so I just get the lightest shade offered) over the brightening concealer from step 2. I really love the Estée Lauder Double Wear Concealer or the It Cosmetics Bye Bye Under Eye! I like to make a triangle under each eye and then use either a damp Beauty Blender, or my Sigma F86 Tapered Kabuki Brush (any makeup sponge similar to this or tapered kabuki brush will work) to pat and lightly press the concealer into the skin. Don’t drag the brush in a painting motion! You want that product to stay there!!

*Note: Sometimes I go from step 2 to step 4 and skip this step altogether, but most days I include this in my routine.

4. I then ALWAYS set my under eye concealer with a loose setting powder, preferably a brightening setting powder, with my Sigma F35 Tapered Highlighter (or a fan brush works wonderfully too!).  By setting your under eye concealer with a powder you are helping it to stay put, and also avoiding the risk of the product settling into your fine lines or wrinkles. I love the Laura Mercier Secret Brightening Powder or for a much less expensive route, the E.L.F High Definition Under Eye Setting Powder is also fantastic! Who can beat $3?!

If You Enjoyed This Post You May Also Enjoy:

My Top 3 Ways To Apply Liquid Foundation

I hope that this was helpful! If it was please subscribe, share, or “pin” onto your Pinterest account! I have share buttons for social media at the bottom of each post : ) Have a wonderful week! Let’s chat again on Wednesday! xo

FacebookTwitterEmailPinterestShare

Filed Under: Beauty Tagged With: beauty blender, Beauty Reviews, benfit erase paste concealer, Cover Up Dark Circles, Diminish Fine Lines, Easy makeup tips, estee lauder double wear concealer, laura mercier secret brightening powder, leahtackles, LeahTackles Makeup, Lifestyle Blogger, makeup blogger, makeup tips, makeup videos, maybelline age rewind dark circles, mommy blogger, Sigma Beauty, Under Eye Concealer Tips, Under eye makeup help, Youtuber

MY EXPERIENCE WITH BREAST MILK JEWELRY! HOLLYDAY DESIGNS REVIEW & PROMO CODE!

January 20, 2016 & 4 Comments

Hi there! Happy Wednesday!

If you would have told me six  years ago that I would own a piece of jewelry made out of my breast milk, and not just that I would own breast milk jewelry, but that I would would find peace and closure with it, and treasure it? I would have told you there was no way! But here I am today thrilled to be sharing my start to finish experience ordering breast milk jewelry.

When I found out I was pregnant in 2010 I did what I do for everything: research! I knew that I wanted to breastfeed, and that was on my “Must Do To Be The *Perfect* Mom” list. Now, breastfeeding is supposed to be the most natural thing ever, right? So I didn’t do any prep to breastfeed while I was busy researching and prepping for my first born. Fast forward to delivery day and the first week of Hailey’s life and I wished that I had! It took me SO LONG to be able to breastfeed Hailey well, and we both struggled with her latch, my nerves, but finally after ordering books, gadgets, and anything breastfeeding related I could off of Amazon we got the hang of it it. I went on to breastfeed Hailey for over 14 months and she had breastmilk for 18 months. Connor was unable to breastfeed due to medical reasons, but I did pump some breastmik for him. With my third, Logan, I was lucky because he latched perfectly immediately! My breastfeeding issues ended up coming later with him, so I fought to breastfeed him and turned to pumping most of his milk eventually. Logan stopped breastfeeding at around 11 months but thankfully I had pumped enough for him to have breast milk until his first birthday. Logan drank every single ounce I pumped except for about 1 tablespoons that I shipped to Holly Day Designs to have a charm made for my Pandora bracelet. My heart hurt so much when Logan wouldn’t nurse anymore, and any time I offered and he wouldn’t nurse I felt rejected and like our special bond had ended too soon. I was not able to let go of the sadness of my last little love ending his nursing journey until I ordered my breast milk jewelry and then as silly as it may sound a wave of peace washed over me and I felt the closure I had so needed.

*Note: I was provided my breast milk charm from Holly Day Designs in exchange for my honest review and consideration. I never accept payment in exchange for a positive review. I have a promo code below, but do not earn money if you order! The promo code is to pass on this wonderful treasure to my readers!!


What IS Breast Milk Jewelry?

It is a piece of jewelry of your choice (rings, necklaces, charms, bracelets, etc) where she will plasticize your milk and then encase it in a clear resin. There are TONS of choices! Check out the Holly Day Design Website or the Holly Day Design Facebook Page!

What is the process like?

Once you order you will get her shipping address on both the confirmation screen and via email! She has a great F.A.Q page, but I promise it isn’t scary! I wondered how in the world I would send milk, but it was as simple as sending my milk (fresh or thawed is fine but don’t send more than 1 ounce) that I double bagged in my breast milk storage bags and put inside a piece of thick cardstock in a bubble envelope! She has an awesome system where you can log in to your account and check the status to know when she has received your milk and when she has shipped your jewelry among other messages that I loved! My breast milk charm came a lot faster than I imagined, and I am absolutely in love with it! be sure to check her website for her current turnaround times.

What I ordered:

I picked out the European Bracelet Breast Milk Pearl in Solid

IMG_5106 IMG_5107 IMG_5108 hollydaydesigns-breastmilkcharm-leahtackles.jpeghollydaydesigns-breastmilkcharm-leahtackles.jpeg

I knew that I wanted a subtle piece that I could easily wear. I love that this is something where nobody would know that it’s breast milk without me telling them (well all of you will know! haha!). I picked the solid option, but she also offers a beautiful swirled option for this pearl as well.

Get Your Own:

I have a unique coupon code just for my LeahTackles readers!! If you would like to order your own breast milk jewelry be sure to do so by February 15th using the code below to get 15% off your order of $50 or more!

LEAHTACKLES15

I hope that you enjoyed this! If you know a breastfeeding mama, please consider passing this blog post along! I couldn’t be happier with my decision to order, and know it will be something I treasure for years to come. My breastfeeding journey is over, and all of my milk is gone, but now thanks to Holly Day Designs I have a little keepsake to remember the struggles, the work, the labor of love, the pride I felt sustaining life with my body, and all of the special moments with my babies that I experienced nursing them.

You May Also Be Interested In:

 Nursing Mama Style Tips

Let’s Talk About Breastmilk

Baby Items I Didn’t Know I NEEDED

Have a beautiful weekend! Stay warm! xx

FacebookTwitterEmailPinterestShare

Filed Under: Family, Fashion Tagged With: Breast Milk Charm, Breast Milk Jewelry, Breast Milk Jewelry Promo Code, Breast Milk Jewelry Review, Breast Milk Pandora Charm, Breastfeeding Closure, breastfeeding keepsake, breastfeeding memory, breastfeeding style, daily vlogger, Holly Day Designs, KwapisFamilyTackles, leahtackles, Lifestyle Blogger, mama jewelry, mom gift idea, mom jewelry, mom reviews, mommy blogger, Mommy Vlogger, nursing fashion, Nursing Jewelry, nursing mom gift idea, nursing style

MAKE SOMEONE’S DAY FOR UNDER $10 SEND “HAPPY MAIL”!

January 18, 2016 & 2 Comments

Hi there! Happy Monday!

I hope that you had a fantastic weekend! I got to go on a date with the hubs on Friday which was long overdue and so nice! And on Sunday Hailey had her very first cheerleading competition. Hailey did such an incredible job, it was just her and one other girl for her performance and she ROCKED it! What did you do over the weekend? Let me know in the comments!

Last Wednesday I had what I like to call a “Happy Mail Day”. One of my best friends and sorority sisters surprised me when a package I knew was on the way had a bunch of extra goodies tucked inside! And if you know me, you know that lots of cute little details is completely up my ally! And we also got our first-ever mail from one of our KwapisFamilyTackles subscribers (and friends!) which was so sweet, too! My “Happy Mail Day” made me so happy, and is continuing to make me so giddy happy when I think about it, that I thought it would be fun to share some of my ideas for brightening your friends day by sending them some “Happy Mail”. I plan to start doing this for my friends, slowly but surely, because I think it’s such a nice way to show some love, support, and appreciation for them adding to your life.


My “Happy Mail”:

 IMG_4827

myhappymailday-LeahTackles.jpeg


1. Stuff a Mug

Starbucks has a lot of pricy mugs, but they usually have one or two out at a time that are less than $10. Or, go to TJMaxx or Home Goods to find a super cute mug for less. Then buy some pretty chocolates, stickers, a tube of lipstick, or a fun nail polish to stick inside to make it extra special.

2. Cozy Winter Day

I love the idea of getting a fun pair of fuzzy socks, a packet of nice hot cocoa or coffee, and a magazine that you know they’d enjoy to create a little cozy winter day gift.

3. Pretty Up That Desk

I love having fun stationary, pencils, and cute little decor set up on my desk. I think gathering some fun washi tape, pens, coasters, or other small knick-knacks would be such a cute little gift to get in the mail!

4. Printed Pictures

If you have pictures together consider printing them (if you use a service like Groovebook already this would be super easy to do!) and putting them together in an envelope with fun captions! I know most of us are bad at actually printing off our pictures these days, and I personally would adore a nice gesture like this.

5. Bake It Up

I remember shortly after one of my bridal showers baking some cheesecake bars and I wanted to send them to the person who had gotten us the baking book, but I had zero clue how to do so! I didn’t own a vacuum sealer, but I went to the store and bought a small Ziploc Vacuum Pump kit for a few dollars and it worked beautifully! Now I can send brownies, cookies, or breads easily!

And remember, packaging is everything! Use fun duct tape or washi tape to decorate the box, include a cute note, and make it as fun to open as possible!

What are your favorite ways to show your friends some love? I would love to start some conversation in the comments! Don’t be shy, commenting is super easy, free, and you won’t get spammed! Just try it!! xx

FacebookTwitterEmailPinterestShare

Filed Under: DIY Projects Tagged With: daily vlogger, Disney Blogger, disney vlogger, erin condren life planner, friend gift ideas, Gift Ideas, girly gift ideas, Happy Mail, Happy Mail Day, KwapisFamilyTackles, leahtackles, Little Things, makeup blogger, Mom Blogger, Reviews, small gift ideas, Target Dollar Spot, The Art of Disney The Golden Age Collectable Postcards, washi tape

CUSTOM BUNTING FLAGS DIY (PERFECT QUICK & CHIC VALENTINE’S DAY DECOR!)

January 13, 2016 & Leave a Comment

Hi there! Happy Wednesday!

I hope that you’re having a fantastic week and thank you for reading! As most of you know, I absolutely LOVE Christmas! I say that I  sing Christmas carols all year and that’s no exaggeration. I also put my tree up November 1st…yes, I’m on of *those* people. So, when I have to pack away my beloved Christmas decorations, it’s always a little sad. This year because the house felt so plain without all of the Christmas decorations, I decided to decorate for Valentine’s Day, which usually I do very minimally (read: window clings and kids art projects). I have basically a $0.00 budget for Valentine’s Day decorations, so I decided to do a few D.I.Y style. So, here is an easy DIY for bunting flags project that takes almost no time, and costs no or very little out-of-pocket money. I loved it so much that I made one for Logan’s birthday, too!

 IMG_4713 (1)


WHAT YOU’LL NEED:

IMG_4810

-Cardstock

-Scissors

-Printer

-Ribbon, string, or bakers twine

Step 1:

Use Ella Claire’s amazing free bunting printables and print off the letters you need onto the cardstock of your choice! Do not be intimidated by this!! All I did was select the print icon and then look to see which pages you need to print! So for example I needed 3,7, and 8 to spell “O-N-E” for Logan’s birthday bunting flags.

Step 2:

Cut out your flags.

Step 3:

Use a hole punch to punch a hole on either side of the top of each flag.

Step 4:

IMG_4811

Starting with the ribbon (or whatever you’re using to string your flags) on the front side of the first letter and string each letter on. *Tip: Be careful not to pull the string, but instead gently slide the letters so that the paper doesn’t rip.

Step 5:

IMG_4803

Hang up your adorable bunting and impress your friends ; )

If you found this helpful please considering sharing! You can “Pin” this post on your Pinterest account by hovering over any of the pictures or using the Pinterest share button at the bottom of this post. Thank you!

FacebookTwitterEmailPinterestShare

Filed Under: Decor, DIY Projects Tagged With: Bunting DIY, Chic Do It Yourself, Craft, Cute Valentine's Decor, Decor Ideas, DIY Bunting Flags, Do It Yourself Project, Easy Valentine DIY, First Birthday DIY, Flag Bunting Do It Yourself, KwapisFamilyTackles, leahtackles, LeahTackles DIY, Lifestyle Blogger, mommy blogger, Mommy Vlogger

HAPPY 1ST BIRTHDAY LOGAN SULLIVAN!

January 11, 2016 & Leave a Comment

Hi there! Happy Monday!

Today my youngest, my baby, is one! I cannot believe that our youngest is already a whole year old! I am so grateful that we started daily vlogging so that we have so much footage of the second half of his first year! And let’s be real, he was well documented his entire first year : )

Logan,

Happy Birthday LoLo! You amaze & entertain us every day! We are so grateful that we had a change of heart, and that our forever plan of two kids changed to three. You are determined, sweet, serious, and tough! And then out of nowhere you’ll do something that cracks us up. We cannot wait to keep watching you grow, and we know you’ll do amazing things! But don’t grow up *too* fast, okay? <3

We love you so,

Mommy (and Daddy, Hailey, and Connor)

*Note: Picture credit to Brooke Ashley Snow Photography!

Loganisone-leahtackles.jpegLoganSullivanKwapisisOne-BrookeAshleySnowPhotography-LeahTackles.jpeg 12544171_10107711611181194_1030032921_o 12544217_10107711610412734_873215278_o 12557615_10107711611191174_1402924295_o

Thank you for reading!! Have a beautiful week! And if you have snow like we do, STAY SAFE!! xx

P.S Don’t forget to follow me on Instagram and help me stay accountable!! I promised to up my Instagram game this year!

FacebookTwitterEmailPinterestShare

Filed Under: Family Tagged With: 1st Birthday, 1st Birthday Ideas, 1st Birthday Style, baby style, Birthday Wishes, Brooke Ashley Snow Photography, daily vlogger, disney custom, disney vlogger, family vlogger, KwapisFamilyTackles, leahtackles, Logan is One, Logan Sullivan Kwapis, Mickey Mouse Birthday, mickey mouse custom, mom reviews, mom youtuber, mommy blogger, Mommy Vlogger, Presh Toast Crowns, toddler style

NEW YEAR’S RESOLUTIONS ACCOUNTABILITY! TIPS + MY OWN GOALS!

January 6, 2016 & 3 Comments

Hi there! Happy Wednesday!

My scheduled post decided to somehow unschedule itself, so if Monday’s post got to your email late I apologize! I have yet to miss a blog post in almost two years, but now I’ve officially had a late one…for those of you who know me know admitting this makes me *cringe*. But hey, it’s 2016, and one of my goals that you’ll read about below is patience, so that should include with myself? RIGHT?! For the past 5+ years I have written out my New Year’s resolutions and they have been lofty, but I haven’t stuck to them like I would like. So, this year I decided to share my three New Year’s resolutions, or as I’ve decided I’m going to call them “goals”, with you to hold myself accountable. If you’d like to leave yours in the comments or send them to me via social media, please feel free to do so!

Leah’s New Year’s Goals 2016:

2016 New Year goals - handwriting on a sticky note against grained wood with blank notes

*Image from XNSpy.com

1. Instagram More Regularly

This may seem like a silly goal to a lot of you, but as someone who has a blog and YouTube channels, I want to be better about sharing on Instagram because I know that is a hugely popular social media forum. I love Instagram, but I want my feed to reflect myself, my blog, my message, and have a theme.

2. Blog and YouTube Improvements/Learning/Love/Growth

I want to continue to create reliable, consistent, and quality work for all of you on both this blog, as well as my YouTube channel, and my family Daily Vlog channel.

3. Have More Patience

I want to have more patience with my children, my husband, and myself. And just patience in general.

If you’d like me to check in or follow up with my progress, I would be more than happy to do so! This post is for me to make myself stay accountable, and for you to see some raw honest real-life resolution/goal setting. If I can do it, you totally can do it!! I hope your 2016 is THE BEST year yet!


FacebookTwitterEmailPinterestShare

Filed Under: Family Tagged With: Blog Goals, Instagram Goals, KwapisFamilyTackles, leahtackles, Lifestyle Blogger, mommy blogger, Mommy Vlogger, New Year's Goals, New Year's Resolutions, Orange Rhino Goas, YouTube Goals

MAKEUP AT WALT DISNEY WORLD! WHAT I PACKED + MY SECRET BEAUTY WEAPON!!

January 6, 2016 & Leave a Comment

Hi there! Happy Monday!

So, just like people debate on wearing makeup while in labor, people debate whether or not you should wear makeup at Disney. Now, I think it’s fine to wear makeup, and it’s fine to go bare faced, the choice is yours! However, this is a makeup blog, and I did chose to wear makeup on our recent trip to Disney. We did go in December, so while it was around 80 degrees every day, it wasn’t super hot, so that did make the decision to wear makeup easier. I want to share what I wore for those who want an idea for what makeup holds up in the Florida heat.


MAKEUP I TOOK & WORE TO DISNEY:

disneymakeuppicks-leahtacklesdisney.jpeg

Benefit Pore Fessional Primer 

Bare Minerals Matte Foundation with Broad Spectrum SPF 15 

Estée Lauder Double Wear Stay-in-Place Flawless Wear Concealer

Tarte Amazonian Clay Cheek Palette

Maybelline Eye Studio Eye Shadow Quad 

Maybelline Eye Studio Color Tattoo 24 Hour Eye Shadow 

Anastasia Beverley Hills Brow Wiz 

Mally Brow Gel

NYX Butter Gloss 

EOS Lip Balm

Urban Decay All Nighter Makeup Setting Spray

And the very best, my secret weapon and the ONLY thing I carried around with me besides lip gloss:

Peter Thomas Roth Oily Problem Skin Instant Mineral Broad Spectrum SPF 30 Sunscreen Translucent Brush On Titanium Dioxide & Zinc Oxide Powder

That is quite the name, huh? But this stuff is incredible! Matte finish, oil absorbing, and sun protection! I love that the brush retracted and it was an easy way to stop shine or sunburn on my nose and face. This is the best thing I packed on the trip for myself!

In case you’ve missed it, here is my most recent Disney video:

 I hope that you found this post helpful! If you did, please SHARE IT, PIN IT, and SUBSCRIBE!!! I appreciate all of you so much! I hope that you’re all having a wonderful 2016 so far!! Go make it happen!! xx

FacebookTwitterEmailPinterestShare

Filed Under: Beauty Tagged With: Anastasia Beverly Hills Brow Wiz, beauty tips, Covergirl Clump Crusher Mascara, Disney World Haul, Disney World Tips, EOS lip balm, KwapisFamilyTackles, leahtackles, Makeup at Disney, makeup favorites, Makeup I Wore At Disney, Mally Brow Gel, Maybelline Color Tattoo, Maybelline Eye Studio Eye Shadow Quad, NYX Butter Gloss, Peter Thomas Roth Oily Probloem Skin Instant Mineral Powder, Skincare Favorites, Urban Decay All Nighter Setting Spray

« Previous Page
Next Page »

SUBSCRIBE

Leave your email to subscribe!

SEARCH

SPONSORS

ARCHIVES

GRAB MY BUTTON


copy & paste code

site design by The Kinch Life Design & development by Olive & Ivy Design