Leah Tackles

  • Home
  • About
  • Policy
  • Beauty
  • Fashion
  • Cooking
  • Exercise
  • DIY Projects
  • Decor
  • Book Club
  • Family

Homemade Baked Elephant Ears!

June 6, 2014 & Leave a Comment

Hi there! Happy Friday!!!

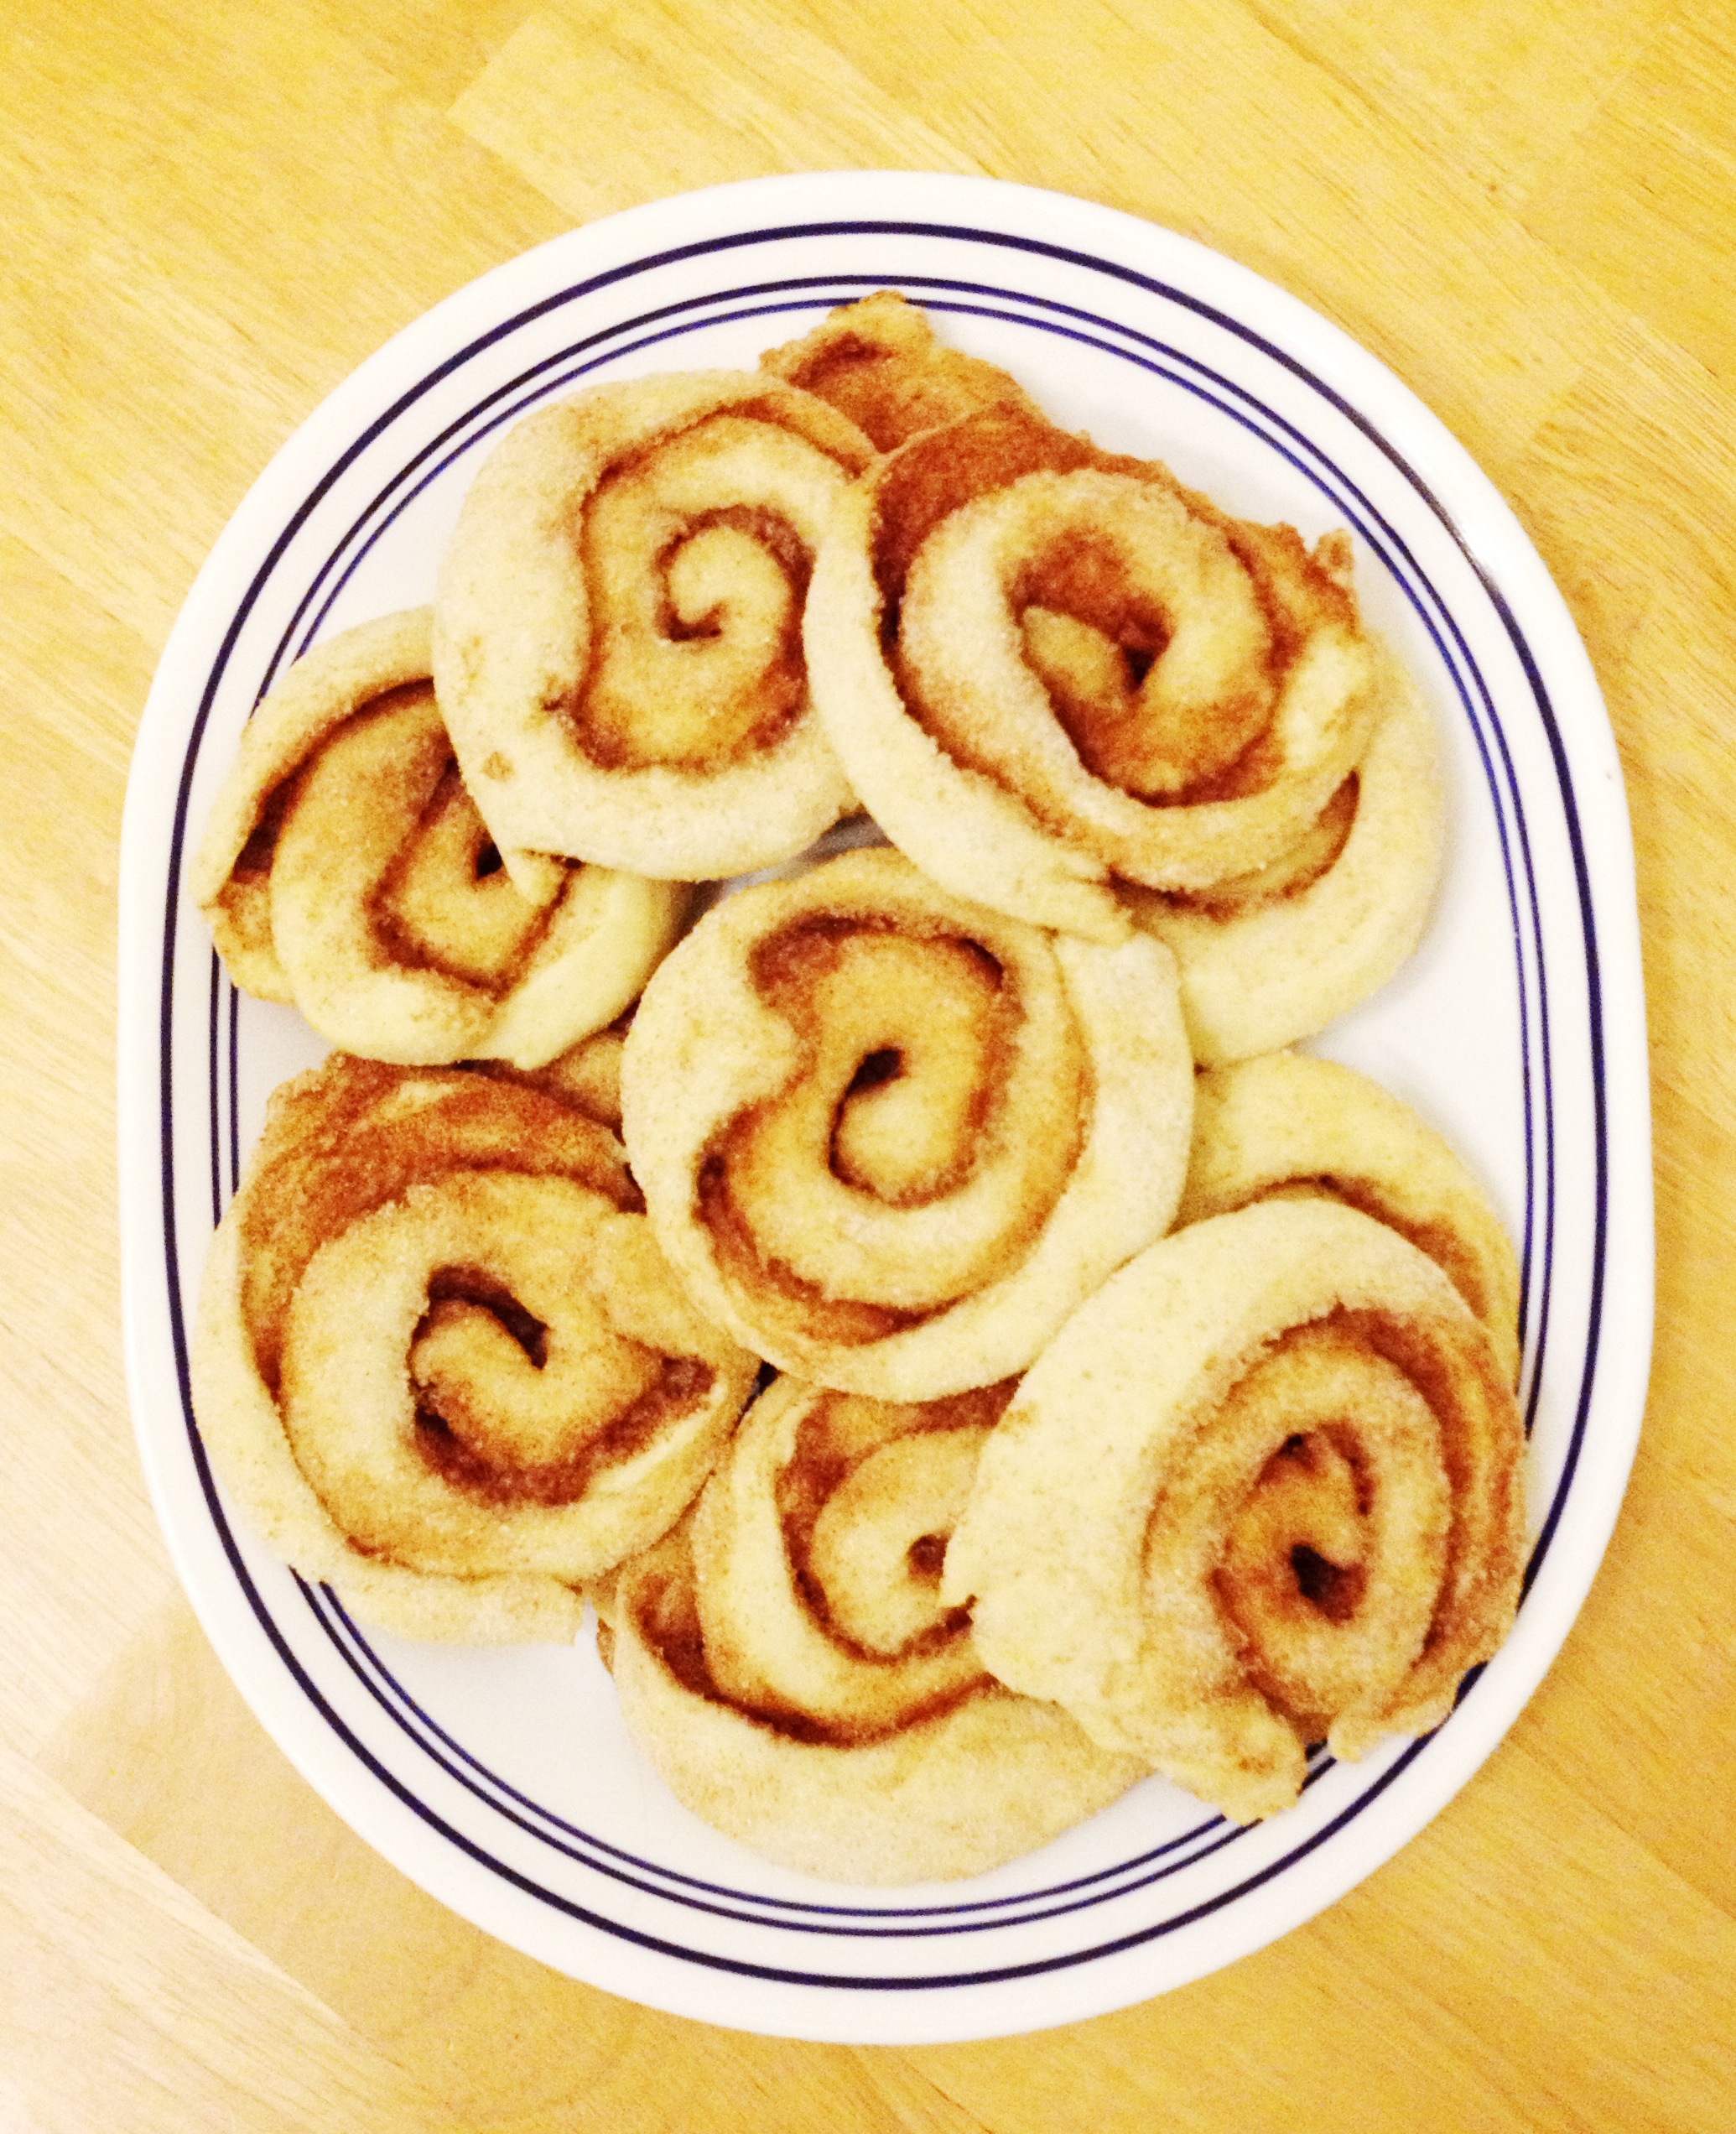
Today I want to share a recipe that I found flipping through Taste of Home Magazine (I know, again! I am not paid by them whatsoever, I just love the recipes they offer!): Baked Elephant Ears!! I think these would be so fun for any summer party! If you make these, I would LOVE to hear about it, so comment (click the link by the title of this post) to let me know about it!


elephant-ears-recipe.jpeg


Ingredients:


elephant-ears-recipe-ingredients.jpeg


Dough:

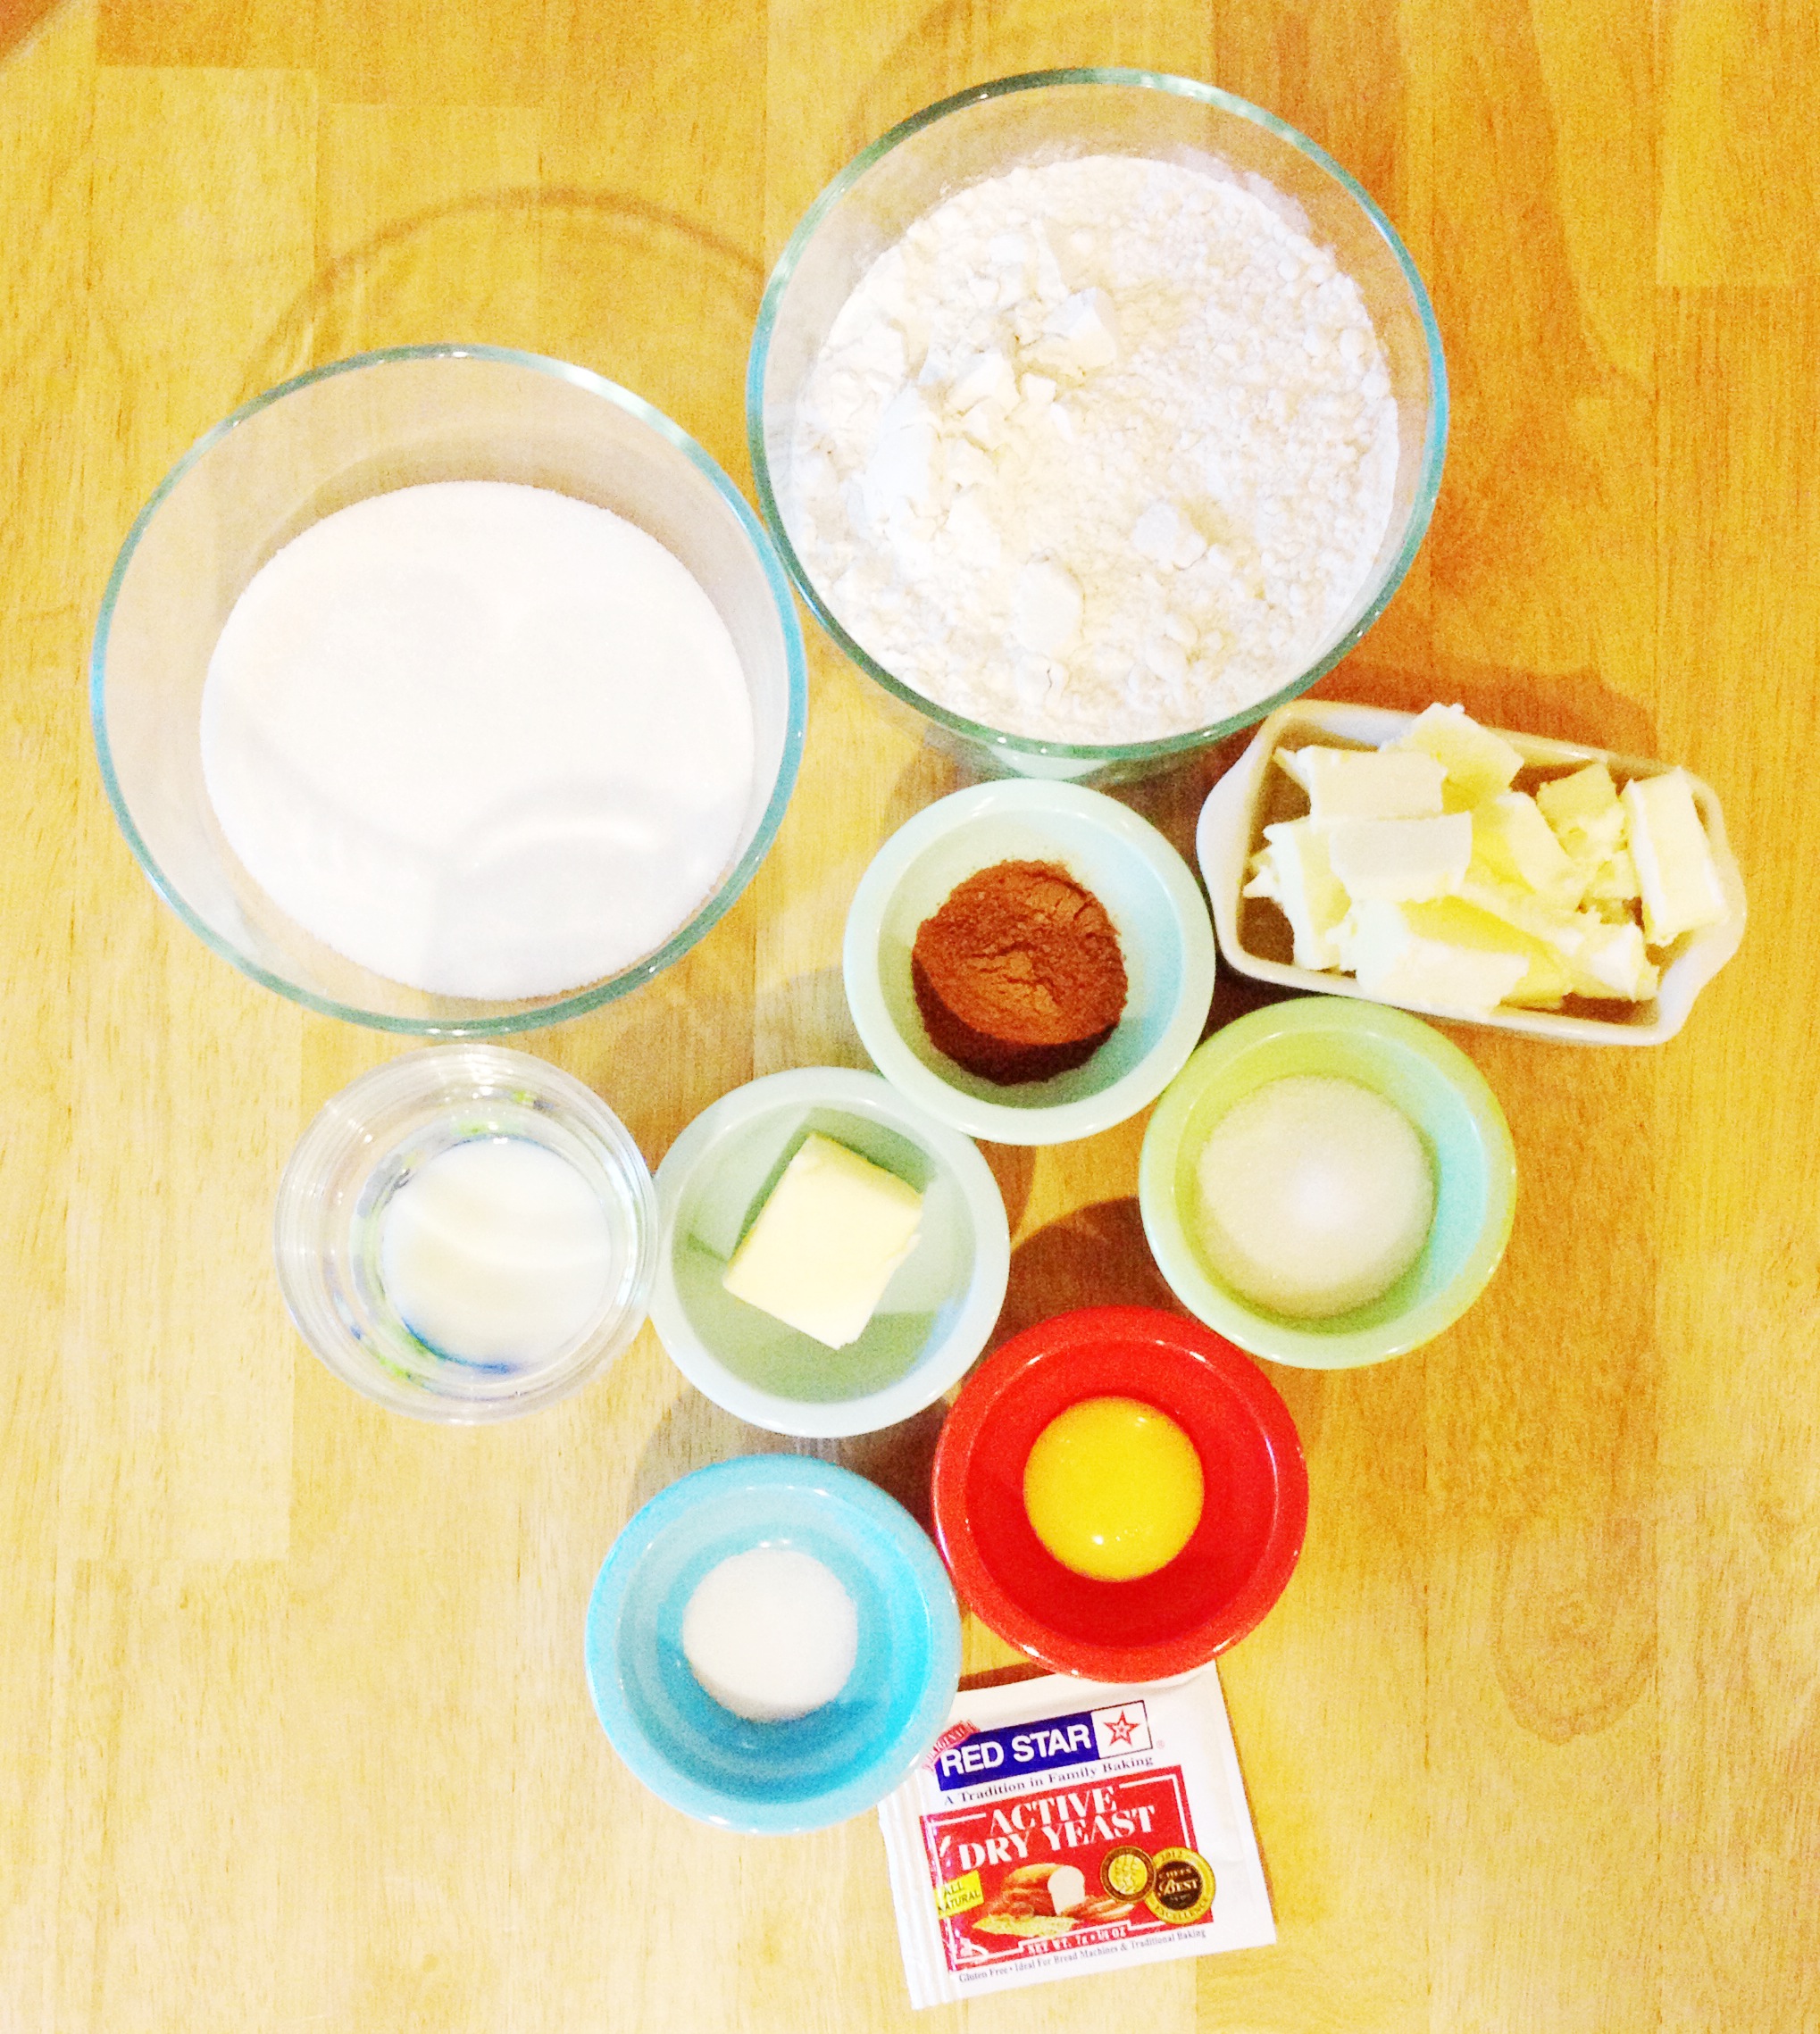
1 package active dry yeast

1/2 cup warm water between 110° to 115°

2 cups all-purpose flour

4 1/2 teaspoon sugar

1/2 teaspoon salt

1/3 cup cold butter, cubed

1/3 cup milk

1 egg yolk


Filling:

2 tablespoons butter, softened

1/2 cup sugar

2 teaspoons ground cinnamon


Cinnamon-Sugar Topping:

1/2 cup sugar

3/4 teaspoons ground cinnamon


Directions:


Dough:

In a small bowl dissolve yeast in the warm water. In a large bowl mix the flour, sugar and salt. Cut the butter into the flour mix until crumbly. Stir the milk and egg yolk into the disolved yeast. Add the yeast mix to the flour mix and stir until a soft dough forms. Cover the dough in plastic wrap and put into the fridge for 2 hours. Preheat you over to 375°. Punch down the dough and turn onto a floured surface. Cover dough and let rest for 10 minutes. Roll dough into a 18X10 inch rectangle.

Filling:

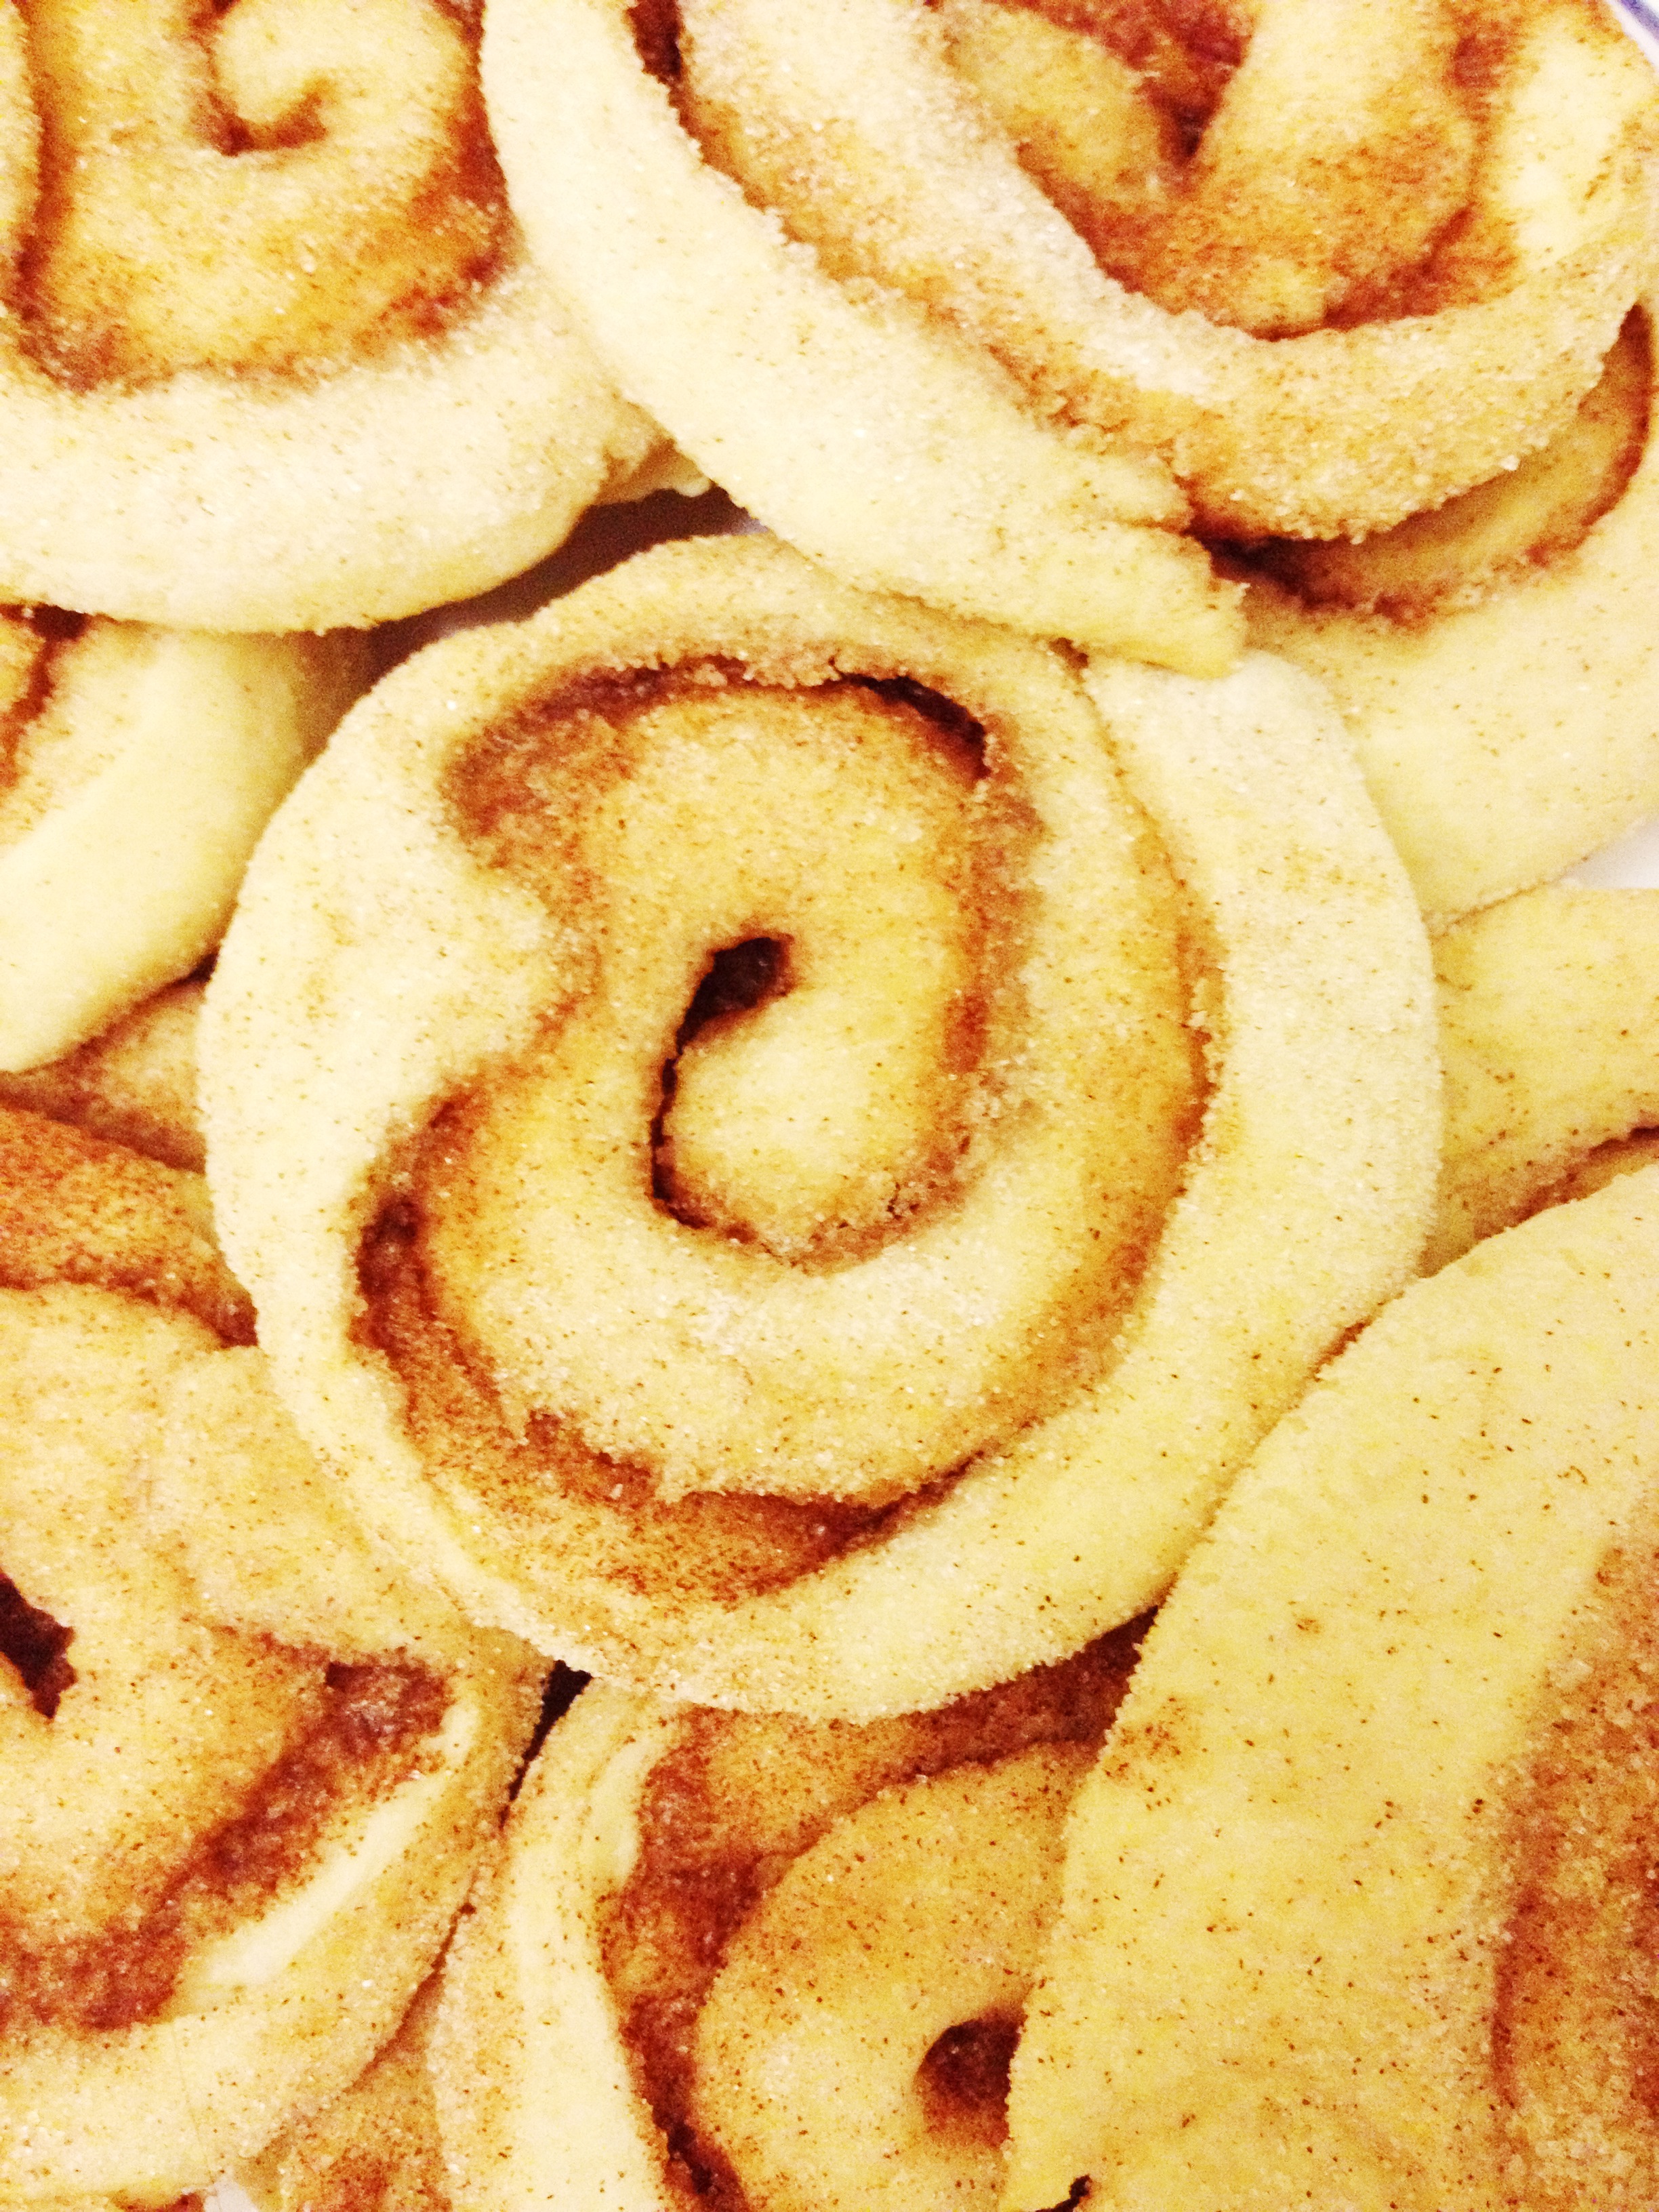
Spread the butter onto the rolled out dough. Mix the sugar and cinnamon and sprinkle over the butter. Roll the dough up jelly roll style, starting with a long side. Pinch the seam to seal the dough after you have rolled it up. Cut into approximately 24 slices that are 3/4 inches thick. Cover the slices with plastic wrap until you are ready to work with each slice.

Cinnamon-Sugar Topping:

In a small bowl, mix the cinnamon and sugar. Sprinkle about 1/2 teaspoon of the mixture on a sheet of waxed paper, top with a slice of dough, and top with another 1/2 teaspoon of the cinnamon-sugar. Press or roll the dough into a 4 inch circle.

Baking:

Place 2 inches apart on a baking sheet that is coated in cooking spray. Bake 7-9 minutes or until golden brown. Cool onto wire racks.


elephant-ears.jpeg


Thank you so much for reading : ) If you enjoyed this post, please subscribe by entering your email into the subscription box on the right side of this screen! I hope that you have a fabulous weekend! XO

FacebookTwitterEmailPinterestShare

Filed Under: Cooking Tagged With: baked elephant ears, elephant ears, elephant ears recipe, fair food, leah tackles, leahtackles, Summer 2014, taste of home, taste of home magazine

Adorable Watermelon Slice Cookies!

May 23, 2014 & Leave a Comment

Hi there! Happy Friday!!

I thought that because this weekend is the big kickoff to summer that it would be the perfect time to share this recipe! It is a very simple recipe, it just needs a little prep, but the end result is so adorable! You will impress all of your family and friends with these *for sure*! I found this recipe in my Taste of Home magazine last summer.  If you enjoy this recipe, please pin it to your Pinterest account by clicking the “pin” button that will show up if you scroll over any of the pictures on this blog post : )


watermelon-cookie-recipe.jpeg


Ingredients:


watermelon-cookies.jpeg


3/4 cup butter, softened

3/4 cup sugar

1 egg

1/2 teaspoon almond extract

2 cups all-purpose flour

1/4 teaspoon baking powder

1/8 teaspoon salt

Red and green food coloring

1/3 cup mini chocolate chips


Directions:

In a large bowl cream the butter and the sugar until fluffy. Beat in the almond extract and the egg. In a seperate bowl mix the flour, baking powder, and salt. Slowly add the dry mix to the creamed batter. Reserve 1 cup of the dough. Tint the rest of the dough red and shape into a 3 1/2 inch roll. Wrap in plastic wrap or press n’ seal (my favorite!). Tint 1/3 of the dough green and wrap in the plastic wrap. Wrap the remaining plain dough in plastic wrap. Put all 3 colors of dough into the fridge for 2 hours. After 2 hours, on a lightly floured surface, roll the plain dough into an 8 1/2 by 3 1/2 inch rectangle. Unwrap the red dough and roll the plain dough around the red. Roll the green dough into a 10 by 3 1/2 inch rectangle and wrap it around the other roll. Put in the fridge again for 8 hours at least or overnight. Slice the cookies into 1/4 inch or slightly smaller circles. Place the cookies about 2 inches apart on an ungreased cookie sheet. Press mini chocolate chips into the cookies to create the watermelon seeds. (*NOTE: I used regular chocolate chips because that is what I had on hand, but have included a picture of ones I made with the mini chocolate chips at the top of this post. I think the mini look better, personally! But both taste great ; ) ) Bake at 350° for 8-10 minutes. Cut in half with a sharp knife immediately. Remove to wire racks to cool.


watermelon-cookies.jpeg


These cookies are so great for all those summer BBQs I know you’re going to be heading to anyways, and they’re an amazing way to impress your hostess (mother-in-laws?! Meeting the parents!?! go for it!!) or host! These also can be made in advance and kept like other slice-and-bake cookies if you want to save yourself some time the day of an event! If you enjoy this recipe, please subscribe to my blog and make my weekend!! If you have any questions or if you make these, tell me about it! Find me on Facebook, Twitter, or Instagram! Or, comment by clicking the link by the title of this post. Have a wonderful holiday weekend and stay safe!! : )

FacebookTwitterEmailPinterestShare

Filed Under: Cooking Tagged With: baking, bbq, bbq cookies, butter cookies, cookies, easy roll cookies, freezer cookies, leah tackles, summer cookies, taste of home, watermelon baking, watermelon butter cookies, watermelon cookies

Simple 3 Ingredient Easter Candy-Hopping Into Spring Series Part 2

April 9, 2014 & 2 Comments

Hi There! Happy Wednesday!

Today I want to share with you another recipe that I found in Taste of Home for the second week of my Hopping Into Spring Series! It is tasty, looks so sweet tucked into a gift bag or Easter basket, and best of all? It is only 3 ingredients! You really can’t beat that! I had my daughter, Hailey, helping me out in the kitchen and she was SO proud of her candy-making skills! If you missed last weeks Hopping Into Spring Series, here is the recipe for Easter Basket Cupcakes! If you enjoy either recipe, please scroll over any of the pictures in this post until you see a round pink “pin” button, and then click that so you can pin it to your Pinterest account.

Okay, let’s get started!

JELLY BEAN BARK (re-named Bunny Bark in my house!):


jelly-bean-bark.jpeg


This is a great recipe where you can involve your kids or nieces and nephews, but it’s also a lot of fun to do with or for your friends! It takes almost no time to do and the result is a very nice looking, homemade springtime candy. I love the touch of whimsy that homemade candy has, especially tucked into an Easter basket or a gift bag for friends. It is very sweet, you only need a couple of bites, but it is a very delicious combination of flavors.

INGREDIENTS:


Jelly Bean Bark Ingredients


1 tablespoon butter

1 1/4 cups of white candy coating, coarsely chopped (NOTE: I found this by the chocolate chips in the baking section, but I have also seen it by the specialty cake and candy making things)

2 cups small jelly beans


DIRECTIONS:

Line a 15 X 10 X1 (a close size will also work) with foil. Grease the foil with butter. In the microwave, melt the candy coating according to the directions on the package and stir until smooth. Spread into your prepared pan. Top with the jelly beans, pressing them down a little bit as you go. Let the bark harden completely before breaking up into pieces or cutting if you prefer.


Hailey-jelly-bean-bark


I hope that you enjoyed the recipe and look out next Wednesday for the third and final Hopping Into Spring Series post. If you have anything you’d like to see a future post about, have any questions or comments please let me know! And if you try this recipe, I would love to see it! Comment (click the link by the title of this post) or you can find me on Facebook, Twitter, or Instagram! I am LeahTackles on all social media. I hope you have a great rest of your week! If you enjoyed this post, please remember to subscribe! You’ll totally make my day! Stay tuned Friday for another new post!!

FacebookTwitterEmailPinterestShare

Filed Under: Cooking Tagged With: bunny bark, diy candy, Easter, easter candy, easy candy, easy homemade candy, homemade candy, homemade easter candy, jelly bean bark, jelly beans, recipe, springtime, springtime treat, taste of home, treat


SUBSCRIBE

Leave your email to subscribe!

SEARCH

SPONSORS

ARCHIVES

GRAB MY BUTTON


copy & paste code

site design by The Kinch Life Design & development by Olive & Ivy Design

Catch The Webinar Replay! Boundary Setting For Entrepreneurs

Go to leahtacklessocial.com and sign-up for the link!