Leah Tackles

  • Home
  • About
  • Policy
  • Beauty
  • Fashion
  • Cooking
  • Exercise
  • DIY Projects
  • Decor
  • Book Club
  • Family

HIGHLIGHTER 101: HOW TO HIGHLIGHT SIMPLY IN A HIGHLIGHT HEAVY MAKEUP WORLD! EASY STEPS!

July 11, 2016 & 2 Comments

Hi there! Happy Monday!

Highlighting, contouring, strobing, baking, and color correcting are all makeup terms that you may hear a lot right now because there is a huge trend of strong contours and BAM highlighting. Now, don’t get me wrong, I love to contour and highlight, but I feel like it can be very intimidating to see a YouTube video with 10 steps or a Pinterest picture with tiger stripes all over a face diagram. So, today I want to share the exact products you can use and what you can do to get a subtle, beautiful highlight for summer. If you’d like something similar for color correcting, baking, or contouring please let me know in the comments : )

HIGHLIGHTER 101:

What You’ll Need:

highlighter101-leahtackles-highlightingmakeupmadeeasy.jpeg IMG_6062

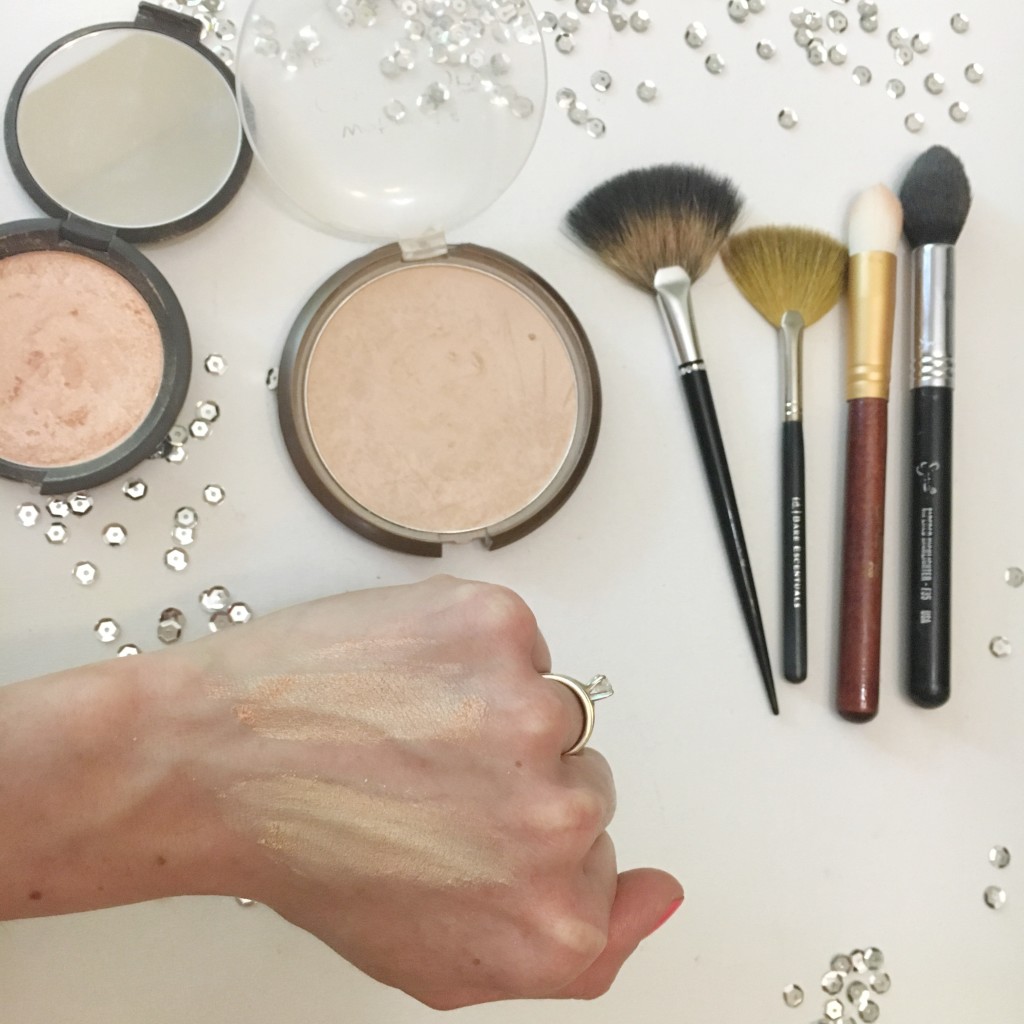
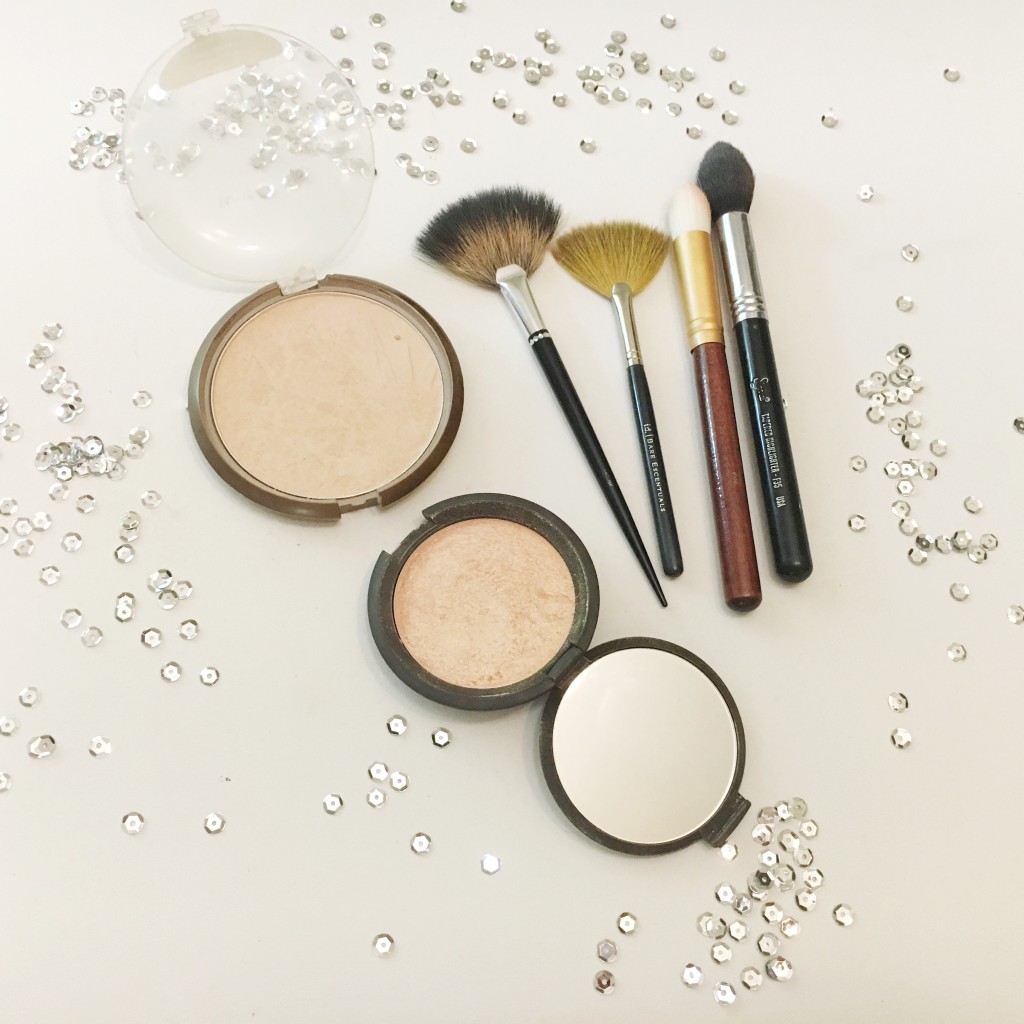
First you will need a highlighter of your choice, I prefer powder highlight most days and suggest that for when you’re first starting out. I love Becca Shimmering Skin Perfector Pressed Powder Highlighters like Champagne Pop, but you can also get a beautifully look much cheaper using Reserve Your Cabana from Wet n’ Wild.

You will also need a brush to apply your highlighter! I like to use a tapered highligher brush like the Sigma F35 but any dome or tear dropped shaped similar brush will work just fine. You can also use a fan brush for highlighting, and these often come in brush kits so you may have a few laying around.

What To Do:

After you have applied your blush and bronzer (if you choose to wear them) and set any foundation or concealer that you are wearing you want to put your brush into your powder highlighter and tap off the excess. Then from your cheek bone (usually about an inch below the outer part of your eye) up to the outer edge of your eyebrow you want to *lightly* apply the highlighter in a crescent moon shape. Be sure to blend this in with the brush so that it isn’t a harsh line of product. Ta-da! You are beautifully sun kissed! If you want to get extra fancy, you can apply a bit to the cupids bow above your top lip, or down the center of your nose.

I hope that you enjoyed this post! If you would like a more detailed post on highlighting let me know! I hope that you’ve found this helpful! You can “Pin” this onto your Pinterest (just hover over any picture or use the share buttons on the bottom if this post!) or share if on social media! Have a wonderful start to you week! xx

FacebookTwitterEmailPinterestShare

Filed Under: Beauty Tagged With: BBlogger, beauty blog, Beauty Reviews, Beauty Vlogger, Becca Shimmering Skin Perfector Pressed Champagne Pop, Champagne Pop, Daily Vloggers, Easy Makeup Highlighting, Highlighter 101, Highlighting Brush, Highlighting Easily, Highlighting Explained, How To Highlight Made Easy, How To Highlight Simply, KwapisFamilyTackles, leahtackles, makeup how to, Makeup Reviews, makeup tutorial, makeup videos, Mom Blogger, Sigma F35, simple makeup, Wet n' Wild Reserve Your Cabana, What To Buy To Start Highlighting

CURRENT FOUNDATION OBSESSION (DRUGSTORE)

June 29, 2016 & Leave a Comment

Hi there! Happy Wednesday!

I hope you are having a wonderful week so far! Thank you for taking the time to read my blog : ) If you are new, hi! I am Leah and I hope you’ll subscribe to be notified whenever I post something new!

I have a few favorite drugstore foundations, but I have one that I recently rediscovered and have been wearing almost daily. I told you last week I’ve been shopping my own stash and it really is a great way to use what you already have. You can read that Shop My Own Stash! Makeup Challenge post here : )

About My Skin:

I have combo/oily skin with larger pores  (usually large pores and oil go hand-in-hand! woo hoo?!)

Covergirl Ready, Set, Gorgeous Fresh Complexion Oil-Free Foundation in 105 Classic Ivory:

covergirlreadysetgorgeous-leahtackles.jpeg

covergirl-readysetgorgorgeous-classicivory-leahtackles.jpeg

This is a drugstore foundation that I picked up some time ago when it first came out. I liked this foundation but didn’t use it too much when I first purchased it, but now I am LOVING it and definitely picking up another when this one runs out. This foundation has coverage that you can build up from medium to fuller coverage. I like that it’s oil free and even though it’s fairly full coverage it doesn’t feel cakey on my skin. And probably the biggest pro for me is that it keeps me matte a lot longer than most foundations, so I don’t feel like I have to blot constantly or cake on the powder. I don’t want a foundation that feels heavy or like it will melt off my face if I go outside in the summer, and this one blends into the skin beautiful but still gives me the coverage I want. I also am a big fan of the squeeze tube because you can get every last bit out of it.

What is your go to foundation right now? I am still on the hunt for the perfect summer BB cream for my combo/oily skin! I want to try the Rimmel Matte BB Cream because I’ve heard good things : ) If you have a favorite, let me know that too!

FacebookTwitterEmailPinterestShare

Filed Under: Beauty Tagged With: beauty blog, beauty blogger, Beauty Giveaways, Beauty Reviews, Beauty Vlogger, Covergirl Cosmetics, Covergirl Foundation, Covergirl Ready Set Gorgeous Foundation Review, Covergirl Ready Set Gorgeous Fresh Complection Foundation, daily vlogger, family vlogger, KwapisFamilyTackles, leahtackles, Lifestyle Blogger, makeup blog, Makeup Reviews, makeup videos, Makeup Vlogger, Mom Blogger

IS YOUR UNDER EYE CONCEALER MAKING YOUR FINE LINES AND DARK CIRCLES MORE VISIBLE?

January 25, 2016 & Leave a Comment

Hi there! Happy Monday!

This morning I was thrilled to be volunteering in my 4 year olds classroom for a few hours, and her sweet teacher asked me about under eye concealer suggestions. First of all, thank you for asking! I absolutely love getting questions from all of you, and every time I take it as a compliment! So, ask away! I am also a huge fan of this topic, because I have (BAD) dark circles! I’ve talked about it before, but the combo of three kids under five and genetics (love ya mom and dad!) makes my dark circles situation rough most days. I also think it’s a super important topic because if you don’t apply or set your under eye concealer correctly it can cause the makeup to set into your fine lines making the lines and dark circles more visible! Let’s be real, none of us have time for that!

What I Do For My Under Eye Make Up and Dark Circles:

UNDEREYECONCEALERTIPS-DARKCIRCLETIPS-LEAHTACKLES.jpeg

1. If you’re not using an eye cream, you should be! I really love using the Benefit It’s Potent Eye Cream which you can find at Ulta or Sephora. It’s a little pricy, but I really like this and it has helped my dark circles to appear less drastic. I also like this because it doesn’t take forever to absorb into the skin, and it doesn’t feel heavy at all.

2. I always use some sort of pinky/salmon concealer to brighten up the dark circles under my eyes. My go-to favorite is a drugstore concealer! I use the Maybelline Instant Age Rewind Eraser Dark Circles in Brightener! Make sure you get the one that actually says “Dark Circles” because they also have a regular concealer that isn’t specific to the under eye area. I also really like the Benefit Erase Paste, it works so well on days when I want maximum concealing power, but it’s thicker and harder to work with when I’m in a real hurry.

3. I then use a concealer (Tip: Look for one that is one shade lighter than your skin tone for extra brightening power! But I am very fair so I just get the lightest shade offered) over the brightening concealer from step 2. I really love the Estée Lauder Double Wear Concealer or the It Cosmetics Bye Bye Under Eye! I like to make a triangle under each eye and then use either a damp Beauty Blender, or my Sigma F86 Tapered Kabuki Brush (any makeup sponge similar to this or tapered kabuki brush will work) to pat and lightly press the concealer into the skin. Don’t drag the brush in a painting motion! You want that product to stay there!!

*Note: Sometimes I go from step 2 to step 4 and skip this step altogether, but most days I include this in my routine.

4. I then ALWAYS set my under eye concealer with a loose setting powder, preferably a brightening setting powder, with my Sigma F35 Tapered Highlighter (or a fan brush works wonderfully too!).  By setting your under eye concealer with a powder you are helping it to stay put, and also avoiding the risk of the product settling into your fine lines or wrinkles. I love the Laura Mercier Secret Brightening Powder or for a much less expensive route, the E.L.F High Definition Under Eye Setting Powder is also fantastic! Who can beat $3?!

If You Enjoyed This Post You May Also Enjoy:

My Top 3 Ways To Apply Liquid Foundation

I hope that this was helpful! If it was please subscribe, share, or “pin” onto your Pinterest account! I have share buttons for social media at the bottom of each post : ) Have a wonderful week! Let’s chat again on Wednesday! xo

FacebookTwitterEmailPinterestShare

Filed Under: Beauty Tagged With: beauty blender, Beauty Reviews, benfit erase paste concealer, Cover Up Dark Circles, Diminish Fine Lines, Easy makeup tips, estee lauder double wear concealer, laura mercier secret brightening powder, leahtackles, LeahTackles Makeup, Lifestyle Blogger, makeup blogger, makeup tips, makeup videos, maybelline age rewind dark circles, mommy blogger, Sigma Beauty, Under Eye Concealer Tips, Under eye makeup help, Youtuber


SUBSCRIBE

Leave your email to subscribe!

SEARCH

SPONSORS

ARCHIVES

GRAB MY BUTTON


copy & paste code

site design by The Kinch Life Design & development by Olive & Ivy Design

Catch The Webinar Replay! Boundary Setting For Entrepreneurs

Go to leahtacklessocial.com and sign-up for the link!