Leah Tackles

  • Home
  • About
  • Policy
  • Beauty
  • Fashion
  • Cooking
  • Exercise
  • DIY Projects
  • Decor
  • Book Club
  • Family

BAN.DO 2017 AGENDA REVIEW AND WHY I SWITCHED TO A SIMPLE PLANNER!

September 19, 2016 & Leave a Comment

Hi there! Happy Monday!

I hope that you had a great weekend! Today Connor, our middle little love, started school! I can’t believe I now have two of three in school! Things have been crazy lately, and that inspired this life change for me and I want to share it with you today.


WHY THE CHANGE?

Lately I have been feeling completely overwhelmed and I decided that I needed to simplify my life in areas where I could, and try to cut myself a little slack. I have been an avid Erin Condren Life Planner user for years, and while I still love the Life Planner I decided it was becoming too much for me. I know, that sounds awfully dramatic because after all, it is only a planner, but the way I used the Erin Condren planner it really was too much for me at this point in my life. My Life Planner was full-on weekly sticker sheet spreads, fancy markers, and not only was that time consuming, but it was expensive. I loved it! And I still do, they’re fun and like a scrapbook or memory keeper. At some point I hope to go back to it, but it was becoming something I dreaded doing instead of something that brought me joy. If I do go back to a decorated planner, I will have two planners because I can’t imagine giving up the Ban.do style!  Right now I need function and a little cute tossed in, which is what made me order the Ban.do 2017 Agenda.

THE DIFFERENCE IT HAS MADE:

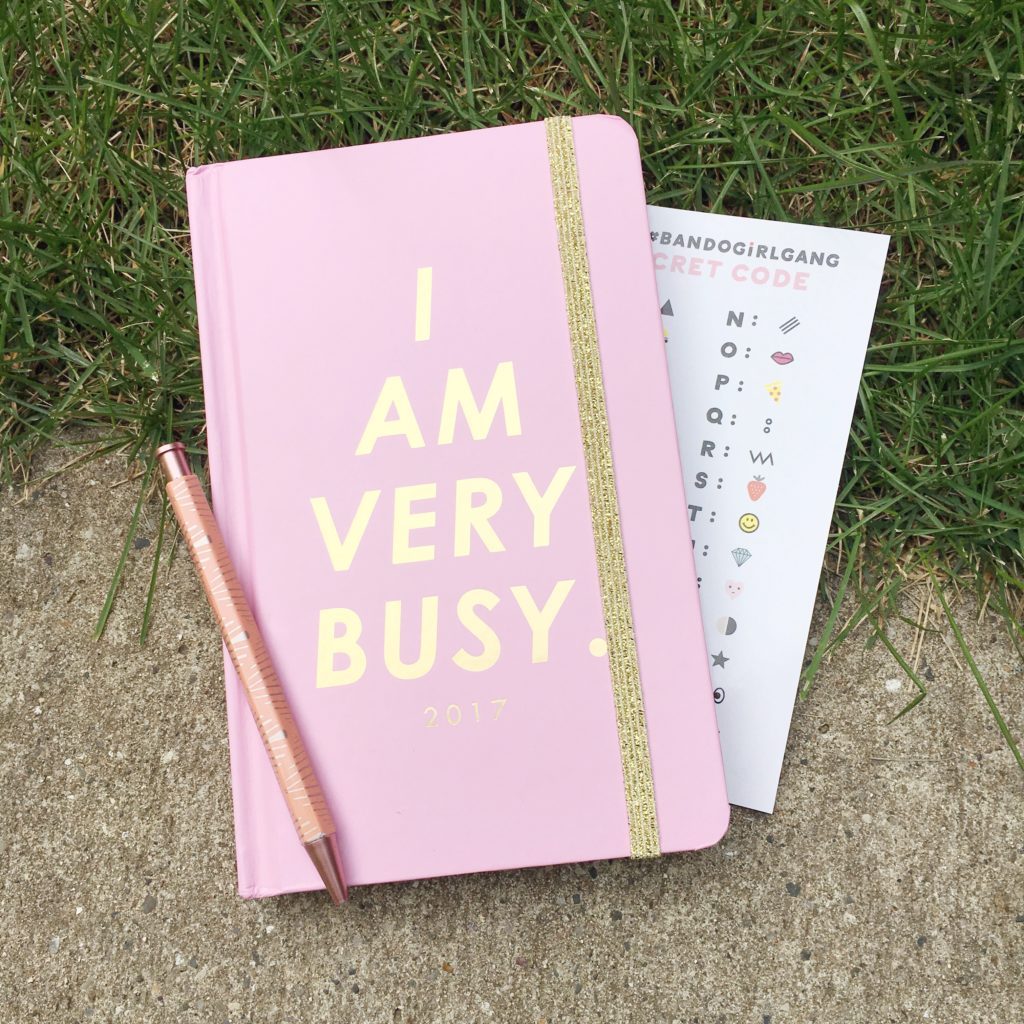
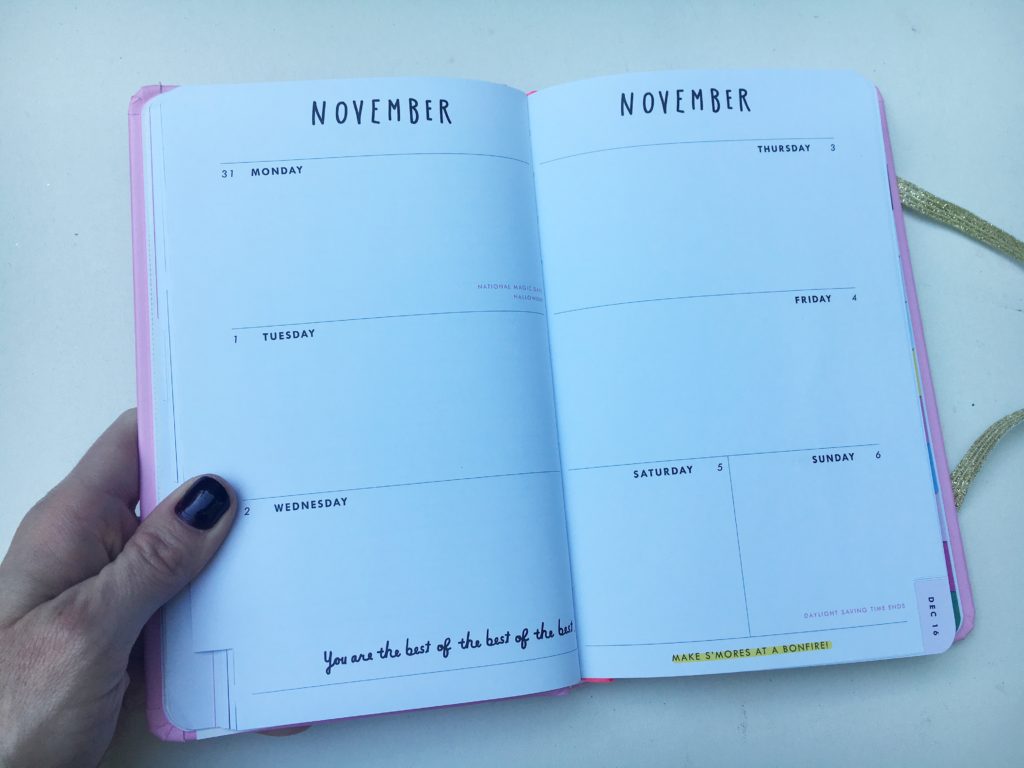
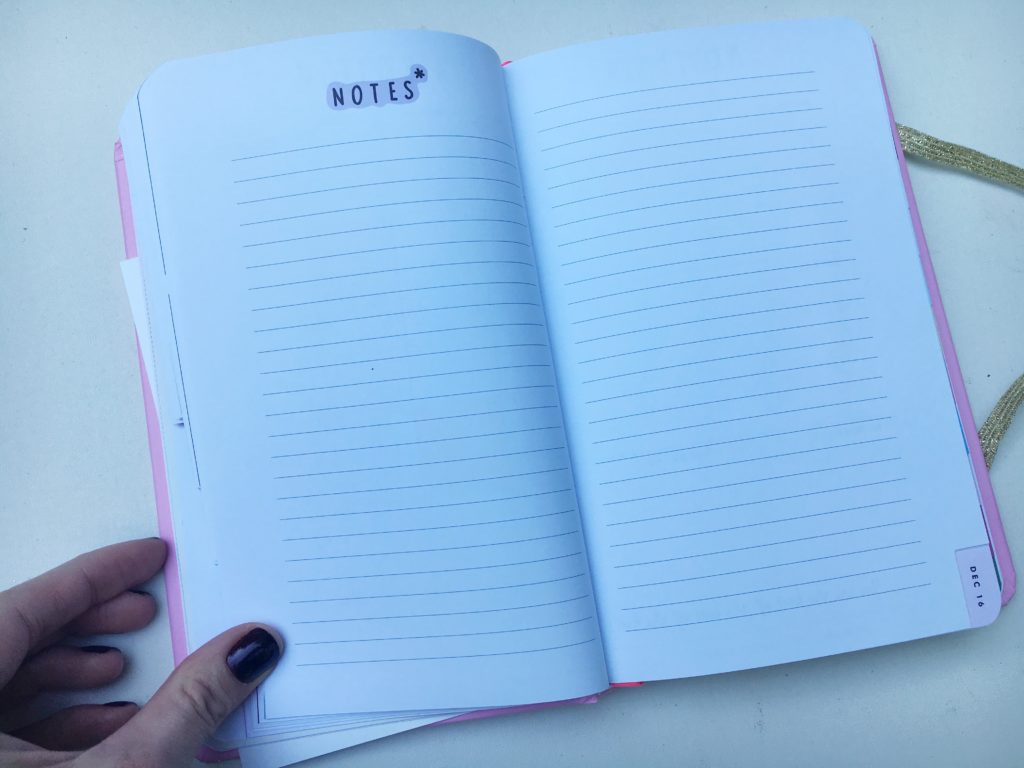
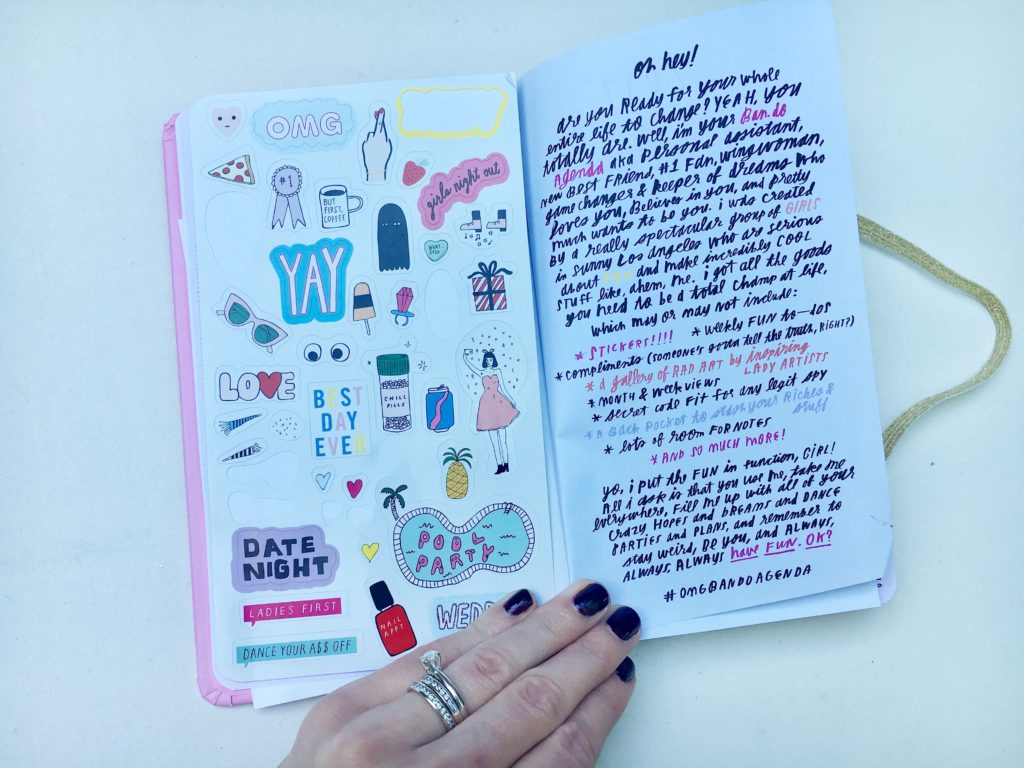
The second I ordered the Ban.do planner I felt like a weight had come off my shoulders! That sounds crazy, it isn’t as if I was forced by anyone but myself to fill out my other planner in such detail, but I truly felt lighter after deciding to make the switch! The Ban.do planner is adorable, and gives me the cuteness factor I crave, but it’s also SUPER functional and easy to fill out on-the-go! I love that I can toss it into my bag and that is it! It also is way more cost effective! I spent $25 on the planner including shipping and it comes with cute little stickers, a cute “secret code” key and messages sprinkled throughout the planner, and a planner with monthly view and weekly pages that has inspirational and funny quotes! I am obsessed! I am a convert!!

BUY THE BAN.DO 17 MONTH CLASSIC AGENDA 

(*Note: NOT an affiliate link!)

 bandoagenda-leahtackles.jpeg

bandoagenda-review-leahtackles.jpeg

bandoagendareview-leahtackles.jpeg

bandoplannerreview-leahtackles.jpeg

bandoagenda-leahtackles.jpeg

bando-planner-agenda-review-leahtackles.jpeg

What planner or agenda do you use? Please let me know in the comments! Have you let go of anything that made you feel a little bit more free? Let me know that as well! Have a wonderful week! Thank you for reading : )

FacebookTwitterEmailPinterestShare

Filed Under: Book Club, DIY Projects Tagged With: agenda, agenda review, ban.do, Ban.do Agenda, Ban.do agenda review, ban.do planner review, ban.do review, cute & simple planner, cute planner, daily vlogger, easy to use planner, family vlogger, leahtackles, leahtackles life, Lifestyle Blogger, Mom Blogger, planner, simple planner, WIfe Blogger

FALL FASHION POST! HOW TO LOOK GOOD, BE COMFORTABLE, AND NOT BREAK THE BANK!

September 14, 2016 & Leave a Comment

Hi there! Happy Wednesday!

We are starting to slowly but surely starting to get chillier days here in the midwest, and that means that I’ve started wearing some of my favorite fall pieces again. I love clothes and I love fashion, but I’m also very realistic about my fashion choices because I am a mom of little kids and whatever I wear on a daily basis needs to withstand a lot! I need a wardrobe that is fashionable, affordable, and comfortable *without* looking frumpy! Whether you’re a mom like me who needs clothes that can go from the store to the park and maybe, just maybe, out to eat, or you’re just settling into your career and you haven’t quite made it to your dream clothing budget I want to share my favorite places to buy clothes!


HOW I SHOP:

I like to have a mix of high quality never-go-out-of-style pieces and trendy pieces. My style is classic and I love girly details. I like to throw in more trendy and edgy pieces that I’m drawn to, but I don’t wear every trend that comes down the runway. I often mix and match high end things, and very budget friendly things. I think that if you truly only buy pieces that you LOVE, you can make a $20 pair of boots look like a $200 pair and you can feel like a million dollars without going into debt. I try to buy things that are easy to wash at home and that I am comfortable wearing, but I definitely like dressier things for the rare occasions that I do get to go all-out. And, I would always rather be slightly “overdressed” than underdressed.

WHERE I SHOP:

Basics:

Target

Nordstrom

Classic:

H&M

J. Crew Factory

J. Crew

Trendy:

Forever 21

Dottie Couture Boutique

Boots:

Just Fab

Target

Dresses:

Forever 21

Lulu’s

Express

NEED A LITTLE INSPIRATION?:

I post outfits on my Instagram account and if you tap the picture once I always link all of the outfit details! If you tap the picture twice you “love” the picture and that makes me happy, too ; )

leahtacklesinstagram-fashionlookbookideas-leahtackles.jpeg

I hope that you enjoyed this post! If you would like to see a fall look book or outfit inspiration post or where I find my jewelry and accessories,  please let me know and I will definitely do it. And let me know you’re favorite websites or stores to shop for clothes in the comments! I would love to get more ideas : ) If you liked this post please don’t forget to share it and subscribe!!

FacebookTwitterEmailPinterestShare

Filed Under: Fashion Tagged With: 30 Fashion, Affordable Boots, Affordable Style, beauty blogger, Classic Style, classic style with trendy details, clothing reviews, daily vlogger, express, fall fashion, Fall Look Book, fashion blog, fashion reviews, forever 21, girly style, H&M, How to wear trendy pieces, j crew, J Crew Factory, Late 20s Fashion, LeahTackles Fashion, Lulus, Mom Fashion, mom style, mom vlogger, Nordstorm, Outfit Inspiration, outfit of the day, target style, What I wear, Where I shop, Youtuber

TOO FACED X NIKKI TUTORIALS THE POWER OF MAKEUP REVIEW & GIVEAWAY!

September 7, 2016 & 12 Comments

Hi there! Happy Wednesday!

I hope that all of you are having a fantastic week so far! Yesterday I uploaded a video sharing my review of the new and highly anticipated Too Faced Cosmetics The Power of Makeup palette that is a collaboration with YouTuber Nikki Tutorials. I love Too Faced and couldn’t wait to get my hands on this palette! And, thanks to my Ulta Beauty Ultamate Reward Points, I was able to score two of them so that I have one to give to a lucky follower : ) Below I will share detailed swatches and a link to the video where you can see my thoughts on the palette and also enter the giveaway.


TOO FACED X NIKKI TUTORIALS THE POWER OF MAKEUP:

toofaced-thepowerofmakeup-giveaway-leahtackles.jpeg img_8867

SWATCHES:

EYESHADOWS:

Ivy, Sugar Coated, Frosted Yum (*Note: left to right)

thepowerofmakeup-giveaway-leahtackles.jpeg

Irresistible, Painkiller, Makeup & Chill

thepowerofmakeup-leahtackles-giveaway.jpeg

Mystic Hour, Wham Bam, Wanted

thepowerofmakeuptoofaced-giveaway-beauty-leahtackles.jpeg

BLUSHES:

I will Always Love You, Justify My Love

thepowerofmakeup-toofaced-giveaway.jpeg

BRONZER AND HIGHLIGHTER:

Chocolate Soleil, Champagne Truffle

toofaced-giveaway-leahtackles.jpeg

WATCH MY REVIEW WITH GIVEAWAY INFO:

Thank you for reading! Let me know in the comments what you think of this palette! Have a great rest of your week : )

FacebookTwitterEmailPinterestShare

Filed Under: Beauty Tagged With: beauty blogger, beauty videos, Beauty Vlogger, daily vlogger, leahtackles giveaway, makeup giveaway, The Power of Makeup Giveaway, The Power of Makeup Palette, too faced, too faced cosmetics, Too Faced Giveaway, Too Faced The Power Of Makeup, too faced the power of makeup giveaway video, too faced the power of makeup review, too faced the power of makeup swataches, Too Faced X Nikki Tutorials, Youtuber

$3 EYE SHADOW TRIOS YOU NEED TO GO BUY!

August 17, 2016 & Leave a Comment

Hi there! Happy Wednesday!

Thank you for taking the time to read my blog! It really does mean so much to me!! : ) .I have had people ask me to just tell them what to buy, or tell me that they don’t know where to begin when it comes to eye shadow. Today I want to talk about Wet n’ Wild Color Icon Eye Shadow Trios! These are about $3 each, and that price is a fantastic value! These are super soft and super pigmented shadows that are easy to blend. I also love these because they tell you right on the packaging where to apply each color to create a beautiful and easy look. You can of course wear the eye shadows however you like, but I think that having a little direction is less intimidating for beginners. If you’re a longtime reader you’ve heard me talk about these before, but they really are worth the mention again!


My Favorite Wet n’ Wild Trios:

wetnwildeyeshadow-leahtackles.jpeg

Silent Treatment

wetnwildsilenttreatment-leahtackles.jpeg

Walking On Egg Shells

wetnwildwalkingoneggshells-leahtackles.jpeg

I’m Getting Sunburned

wetnwildimgettingsunburned-leahtackles.jpeg

Seriously, go spend a few bucks and go buy these! They are fantastic!

Have a wonderful weekend! Be sure to subscribe if you haven’t yet! It makes my day!! xx

FacebookTwitterEmailPinterestShare

Filed Under: Beauty Tagged With: beauty blogger, beauty videos, daily vlogger, fashion blogger, KwapisFamilyTackles, leahtackles, Lifestyle Blogger, makeup, makeup fashion, makeup review, makeup tips, makeup tutorial, Wet N Wild Color Icon Eye Shadow, wet n wild eye shadow, Wet n Wild Eye Shadow Swatches, Wet n Wild I'm Getting Sunburned, Wet N WIld Silent Treatment, Wet N WIld Trio, Wet n Wild Walking On Egg Shells, Wet n' Wild Makeup

SUNLESS TANNING TIPS TO GIVE YOU A PERFECT APPLICATION EVERY TIME!

August 10, 2016 & Leave a Comment

Hi there! Happy Wednesday!

I have very fair skin, and while I’ve learned to embrace the pale these days I didn’t always feel that way! I started getting spray tans in high school, and I still love a great spray tan but those can be extremely pricy! I also will admit to the fact that I have used tanning beds (very minimally but still it makes me cringe!) in the past but haven’t been in one in about 6 years. Even though I’ve embraced my naturally fair skin, I do love how a bit of a tan makes my skin appear a bit more even, my muscles more defined, and overall just a nice healthy glow.  And my favorite way to get a little glow going? Without any hesitation, at-home sunless tanning! I have been using sunless tanning products at home for about half my life now, and I have made plenty of sunless tanning mistakes along the way, but now I have some tips up my sleeve that really help me get a natural looking tan every time.


sunlesstanningsecrets-leahtackles.jpeg

Exfoliate:

Okay, I know you’ve probably heard before that it is important to exfoliate before you tan you skin, but I of course have to throw that in because it is an important first step! I love my Caress Evenly Gorgeous Burnt Brown Sugar & Kartie Butter Exfoliating Wash! The name may be a mouthful, but this stuff smells incredible and works as well as higher end exfoliating products for me.

Skip Shaving:

If you shave you legs in the shower and then get out and immediately apply self tanner the tanner will go into the hair follicles you’ve just opened up and then you will have little dark spots visible all over your legs which isn’t as lovely as the slimming, flaw covering tan you can get if you wait 20 minutes or alternate your shaving and sunless tanning days. I like to shower at night, so I usually will shave one night and then the next night apply sunless tanner and just rotate nights to keep up on both my shaving and my summer glow.

Start Down and Work Up:

This sounds simple, but begin with your feet and legs and work your way up so that you’re not behind over to get your legs and creasing the sunless tanner that you’ve already applied to the rest of your body.

How To Apply To Your Back Without Help:

I LOVE using the St. Tropez Applicator Mitt for reaching hard to get places, like my back, and it also helps to get a nice even application without any awkward zebra stripes! You can also, if you’re reasonably flexible, put a little bit of your sunless tanner onto the front and back side of you hand and reach behind to tackle that challenging middle section of back. I also have been known to use a sunless tanning mist for my back, but I actually prefer lotion (loving the Banana Boat Summer Color right now!) for the rest of my body.

Use a Makeup Sponge or Makeup Brush:

This is my BIGGEST TIP! For years and years I always dreaded the telltale sign of a fake tan that stopped at your wrists, or the awful look of sunless tanner all over your fingers, but now I have finally found a way around it! After I’ve finished tanning the rest of my body and washed my hands throughly (get between those fingers!) I use a stippling makeup brush like the Sigma F50 or a cheap makeup sponge to apply a tiny half-of-a-pea-sized amount of sunless tanner to the tops and sides of my hands, fingers, and wrist! You want just the ever so slight amount to help blend some color onto those areas without having horribly obvious self tanner faux pas. Seriously, this is LIFE CHANGING!!

Fix a Goof:

If you get streaky try using a mix of lemon juice and baking soda for a small streak, and if you get a big orange disaster somewhere like your palms or between your fingers try a whitening toothpaste or a little bit of an acetone based nail polish remover.

I hope that you found this post helpful! If you did please considering sharing it using my share buttons below or hovering over the picture to “pin” it to your Pinterest! Thank you! Have a wonderful weekend!! xx

FacebookTwitterEmailPinterestShare

Filed Under: Beauty Tagged With: Banana Boat Summer Color, beauty blog, beauty tips, Caress Evenly Gorgeous, daily vlogger, fashion blogger, Fix Sunless Tanning Mistakes, How-To Sunless Tan Flawlessly, KwapisFamilyTackles, leahtackles, Lifestyle Blogger, makeup blogger, mommy blogger, skincare tips, St Tropez Applicator Mitt, Sunless Tan with makeup brush, Sunless Tan Your Hands, Sunless Tanning Tips, Sunless Tanning with Makeup Sponge, tanning tips

THE RIGHT WAY TO WEAR LIQUID LIPSTICK! THE BASICS!

August 3, 2016 & Leave a Comment

Hi there! Happy Wednesday!

On Monday I shared my DIY HONEY ALMOND LIP SCRUB with you and promised that today I would be sharing how to apply liquid lipstick to make it very long wearing and not flaking off the lips.


HOW TO APPLY LIQUID LIPSTICK:

1. Make sure that you have exfoliated your lips before you get started using a lip scrub like this DIY LIP SCRUB. Liquid lipstick is very drying, so you need to be sure to do this step!

2. I like to put a *little* bit of a lip balm like the Tsum Tsum Lip Smackers or the EOS Lip Balms on before applying even matte liquid lipsticks. Don’t slather it on.

3. I suggest lining your lips with a liner that goes with your liquid lipstick, or an anti feathering clear lip liner like Too Faced Borderline or Urban Decay 24/7 Liner in OZone. If you choose to use a color that goes with your liquid lipstick, you can also fill in your entire lip lightly to help the liquid lipstick have a nice color base.

4. Make sure to get any excess lipstick off of the applicator by wiping it against the top of the tube before you begin applying it on your lips.

5. Apply a THIN layer, I’m talking as thin as possible, of liquid lipstick onto your lips. For most matte liquid lipsticks one thin layer is all you need, but if using a metallic shade you may need to do a second layer once the first layer has dried. Do not put on a thick layer or layer after layer thinking that this will help you lipstick to stay on or last longer because it will not! Putting on too much liquid lipstick will make it begin to flake off and therefore look patchy!!

6. I try to wear my liquid lipstick until about lunchtime and then reapply after lunch and that second application usually lasts the rest of the day. Certain foods or drinks, like an oily salad dressing, can break down the liquid lipstick and cause it to come off faster.

7. If you like use a gloss that can be put over the liquid lipstick to make it look nice when it does start to go south after several hours of wear! I have some liquid lipsticks that I can truly wear most of the day, and others that aren’t as long wearing but still wear longer than traditional lipsticks.

LIQUID LIPSTICKS I LOVE (a few of many!):

LIQUIDLIPSTICKSHOWTO-LEAHTACKLES.JPEG

(*Note: left to right)

Stila Stay All Day Liquid Lipstick in Como

Kylie Cosmetics Metal Matte Liquid Lipstick in Heir

Too Faced Melted Matte Liquid Lipstick in Feelin’ Myself

Anastasia Beverly Hills Liquid Lipstick in Sarafine

LIQUID LIPSTICK SWATCHES WET:

LIQUIDLIPSTICKSWATCHESWET-LEAHTACKLES.JPEG

LIQUID LIPSTICK SWATCHES DRY:

LIQUIDLIPSTICKSWATCHESDRY-LEAHTACKLES.JPEG

I hope that you enjoyed this post! If you did please share it using my social media links at the bottom of this post! Have a wonderful day!! xx

FacebookTwitterEmailPinterestShare

Filed Under: Beauty Tagged With: ANASTASIA BEVERLY HILLS LIQUID LIPSTICK, beauty blog, beauty youtuber, daily vlogger, DIY LIP SCRUB, EASY LIP SCRUB, HOW TO APPLY LIQUID LIPSTICK, HOW TO WEAR LIQUID LIPSTICK, KwapisFamilyTackles, KYLIE COSMETICS, KYLIE COSMETICS METAL MATTE LIQUID LIPSTICK, leahtackles, LEAHTACKLES LIQUID LIPSTICK, LIQUID LIPSTICK, LIQUID LIPSTICK HOW TO, makeup blog, makeup haul, Makeup Reviews, makeup swatches, makeup tutorial, STILA LIQUID LIPSTICK IN COMO, THE RIGHT WAY TO WEAR LIQUID LIPSTICK, TOO FACED MELTED MATTE

DIY HONEY ALMOND LIP SCRUB! EASY & PERFECT FOR LIQUID LIPSTICKS FANS!

August 1, 2016 & 2 Comments

Hi there! Happy Monday!

I hope that you had a wonderful weekend! We had an exciting weekend because we celebrated our 1 year Vlogiversary for our KwapisFamilyTackles Daily Vlog channel! Yes, we have every single day for an entire year (and a leap year!) on film! I will include a little montage video at the end of this post : ) Also, I can’t believe that it is already August! I have been having such a fun summer with my little loves and I’m not ready for it to end!!

Liquid lipstick is such a hot trend right now, and one that I adore because long wearing lipstick is ideal for the fast paced lives that we all are living these days!! However, liquid lipsticks can be *very* drying! Today I wanted to share my favorite DIY lip scrub that I love because it works AND the ingredients are things that most of you probably have on hand! It’s also very affordable and easy to throw together quickly. On Wednesday I will share with you How To Apply Liquid Lipstick for a beautiful, long wearing look : )


HONEY ALMOND LIP SCRUB:

diylipscrub-honeyalmondlipscrub-leahtackles.jpeg

Ingredients:

3-4 Teaspoons of granulated sugar

*This exfoliates!

1/2 Teaspoon of honey

*This hydrates!

1/2 Teaspoon of oil of your choice (I used olive oil)

*This moisturizes!

A few drops of an extract of your choice (I used almond extract)

*This gives flavor!

Instructions:

diylipscrub-sugarlipscrub-leahtackles.jpeg

Simply mix the ingredients together and put in a small jar! I used a small jar that had been from a sample of skincare product, but old lip balm jars also work well! You could even use a small tupperware like the ones used for dressings or sauces. The consistency should be pretty granulated because that’s what will really scrub your lips, but it should still stick together, so you may need to add a bit more sugar depending on how much extract you put in.

How To Use It:

I like to rub this in a circular motions all over my lips in the evenings before applying lip balm. I love this lip scrub because it is edible, so you can wipe it off OR lick it off!

I hope you enjoyed this beauty DIY! I love this recipe because it can be stored at room temperature and makes a great gift : )  If you have any questions, please let me know in the comments! Don’t forget to share this post if you liked it or found it helpful!

FacebookTwitterEmailPinterestShare

Filed Under: Beauty, Family Tagged With: BEAUTY DIY, BEAUTY DIY GIFT IDEA, BEAUTY TUTORIALS, beauty videos, daily vlogger, DIY LIP SCRUB, EASY BEAUTY DIY, HONEY ALMOND LIP SCRUB, KwapisFamilyTackles, leahtackles, LIP SCRUB, LIPCARE, LIQUID LIPSTICK PREP, Mom Blogger, skincare, SKINCARE DIY, SUGAR LIP SCRUB, VIDEO MONTAGE, VLOGIVERSARY, WIfe Blogger

HOW TO GET FREE DELUXE SIZE SAMPLES FROM SEPHORA WITH EVERY ORDER!

July 27, 2016 & Leave a Comment

Hi there! Happy Wednesday!

On SnapChat (I’m LeahTackles on all social media!) a couple of days ago I mentioned that I used a promo code to get a free deluxe size sample of a Christophe Robin hair mask when I was ordering online from Sephora and several people told me that they had no idea these codes existed, so I thought I would share how I get a free deluxe size sample item with every order from Sephora.com that I make!


SephoraPromoCodeFreebies-LeahTackles.jpeg

sephorafreesamples-leahtackles.jpeg


When you go to Sephora.com there is a quick link that says “Weekly Specials” and if you click on that you can view all of the freebies that you can get with an order from Sephora.com that week. You can also do a google search for Sephora promo codes or look on a site like RetailMeNot but the codes are the same as the ones shown on Sephora. Sometimes the code will only work if you buy certain items or brands, or if you spend a certain amount, but often times they are free with a purchase. The catch is that you can only use one coupon code for each transaction, so choose wisely ; )

I did not know that you could use these promo codes for a long time! I also didn’t use Ebates until a couple of months ago, but now I always do both when I shop on Sephora.com! I first go to EBates so I can get cash back for my Sephora purchase and then I go to Sephora.com and figure out what promo code I want to use first before doing my actual shopping so that I don’t forget. I also check the point perks incase I want to cash in on any of those.

What is the best freebie you have gotten from Sephora? Let me know in the comments! Or, if you didn’t know about this I hope it was helpful and that you get some fun things to try as a result : )

FacebookTwitterEmailPinterestShare

Filed Under: Beauty Tagged With: beauty blogger, Beauty Samples, Beauty Vlogger, beauty youtuber, Benefit Cosmetics, Christophe Robin, daily vlogger, Ebates, Ebates Sephora, KwapisFamilyTackles, leahtackles, LeahTackles Beauty, Save Money at Sephora, Sephora Free Samples, Sephora Promo Code Freebies, Sephora Shopping Tips, too faced, Too Faced Sun Bunny

HOW & WHY TO USE AN EYESHADOW PRIMER OR BASE

July 25, 2016 & Leave a Comment

Hi there! Happy Monday!

I hope that you’re having a wonderful start to your week! For years I didn’t prime my eyes or even know what it meant to prime my eyes before applying eye shadow, but now it’s an essential part of my routine that I want to share with you incase you are skipping this step of your makeup routine.


eyeshadowprimer-eyeshadowbase-leahtackles.jpeg


WHAT IS AN EYE SHADOW PRIMER?

An eye primer, like Too Faced Shadow Insurance, is used to prep your eye before you apply your eyeshadow. An eye primer gives you a smooth surface before you apply eyeshadow, and also help prevent the natural oils in your skin from breaking down your eyeshadow during the day. Primers also neutralize any discoloration on your lids which helps eyeshadow colors to appear very pigmented when applied. Primers also help make your eyeshadow easier to blend, which is a huge benefit!

WHAT IS AN EYE SHADOW BASE?

Primers help for your eyeshadows to appear more intense and pigmented. An eye shadow base can be many different things, but the general term means something that is a little moist or sticky that helps the shadow stick to your eye. A base does not always help with creasing like a primer does, but a lot of things that can be used as a base, such as a M.A.C Paint Pot or Maybelline Color Tattoo, can also be used as a primer for an easy 2-in-1.

HOW TO USE THEM:

I always use an eye shadow primer of some kind, but often when I’m hurrying I use something that can perform as both a primer and a base. I also will sometimes use only a base, such as the Maybelline Color Tattoos! I actually was wearing a Maybelline Color Tattoo with nothing else on top on my eyes the morning my youngest son, Logan, was born and it lasted all though labor and from the day before…good stuff, huh?

SOME OF MY FAVORITES:

My favorite primer is the Too Faced Shadow Insurance, but I also like the Urban Decay Primer Potion. You can often get these primers in a deluxe sample size with holiday sets or other kits which is great because a little tiny bit goes a long way and they last forever!

My favorite eye shadow base products are the Maybelline Color Tattoos (there is also a stick form available!) and the M.A.C Paint Pots.

I hope that you found this helpful! As always, please let me know if you have any questions! Also, feel free to share this on social media using the easy share buttons at the bottom of each post : ) xx

FacebookTwitterEmailPinterestShare

Filed Under: Beauty Tagged With: beauty blog, beauty blogger, Beauty Vlogger, beauty youtuber, daily vlogger, Eye Base, Eye Primer, M.A.C Paint pot, makeup basics, makeup blog, Makeup for moms, makeup tips, makeup tutorial, Maybelline Color Tattoo, mom vlogger, Too Faced Shadow Insurance, Urban Decay Primer Potion, What Is Eye Shadow Base, What Is Eye Shadow Primer

HOW TO GET INSTAGRAM WORTHY BROWS! NEW PRODUCTS!

July 20, 2016 & Leave a Comment

Hi there! Happy Wednesday!

I will skip doing any other makeup before I will skip doing my brows! Having your brows filled in, whether you prefer a dramatic look or a soft fiber gel comb through, just makes you look pulled together and chic. Benefit Cosmetics recently launched a bunch of new brow products, and brought back some old standbys in new futuristic looking packaging. I do not have the entire line, but I have a few that I’d like to share with you today!


benefitcosmeticsbrowcollection2016-leahtackles.jpeg


Goof Proof Brow Pencil in Shade 1:

goofproofbrowpencil-benefit-leahtackles.jpeg

I love this pencil for when I want the look of a filled in and perfect brow but am trying to do it quickly. I do always fill my brows in a couple of shades lighter that my brows to avoid looking too harsh.

KABrow! in Shade 1:

kabrow-benefitcosmetics-leahtackles.jpeg

I got a deluxe sample size of this from Ulta by using a coupon that came in the catalog mailer and I am definitely going to be buying a full size! It comes with a little pot of a cream-gel brow color on one end and an angled brush on the other! So easy to do a put together look with this! This does remind me of my Anastasia Beverly Hills Dip Brow, but it seems slightly a bit more wet in formula. I always start on the bottom of my arch in the middle of my brow and go to the ends before finishing at the start of my brows because I like to avoid having the most color deposited where my brows begin.

Gimme Brow in Shade 1:

benefitgimmebrow-leahtackles.jpeg

This volumizing fiber gel is one that I’ve used before and I think it’s fantastic for super natural or rushed days but where you don’t want to skip doing your brows altogether. I love the little fibers especially for brushing the start of my brows up for a very natural and feminine look. I also like to use this to set my brows after either a gel or pencil.

Browvo! Conditioning Primer:

benefitbrowvo-leahtackles.jpeg

I just got a deluxe size sample of this and I am very curious! It claims to give your brows a fuller look instantly and prime the brows so that your other brow products last longer and wear better. I will definitely keep you posted if you guys have interest!

As always, please ask any questions that you have in the comments! I am definitely passionate about filling in my brows and experimenting with new innovations in the brow world, so I am very excited for these Benefit Cosmetic goodies! This post is not sponsored and these items were purchased with my own money or received as samples from Ulta Beauty. And please don’t forget to subscribe and check out my social media! It truly means so much to have your support!! xx


FacebookTwitterEmailPinterestShare

Filed Under: Beauty Tagged With: beauty blogger, Beauty Reviews, Beauty Vlogger, beauty youtuber, Benefit Brow Launch 2016, Benefit Brow Products, Benefit Brow Review, Benefit BrowVo!, Benefit Cosmetics, Benefit Gimme Brow, Benefit Goof Proof Brow Pencil, Benefit KaBrow!, daily vlogger, KwapisFamilyTackles, leahtackles, LeahTackles Vlogs, Lifestyle Blogger, makeup review, Makeup Tutorials, michigan blogger, Ulta Beauty, ulta beauty rewards, Ultamate Rewards

Next Page »

SUBSCRIBE

Leave your email to subscribe!

SEARCH

SPONSORS

ARCHIVES

GRAB MY BUTTON


copy & paste code

site design by The Kinch Life Design & development by Olive & Ivy Design

Catch The Webinar Replay! Boundary Setting For Entrepreneurs

Go to leahtacklessocial.com and sign-up for the link!