Leah Tackles

  • Home
  • About
  • Policy
  • Beauty
  • Fashion
  • Cooking
  • Exercise
  • DIY Projects
  • Decor
  • Book Club
  • Family

NATURAL EFFORTLESS FOUNDATION FOR EVERY DAY! MAYBELLINE DREAM MATTE MOUSSE

December 21, 2016 & Leave a Comment

Hi there! Happy Wednesday!

The winter months include lots of social functions with friends and family starting with Christmas and holiday celebrations continuing on with things like Super Bowl parties, where I find myself wanting to look put together but not in a full-on multi step makeup routine. I have been “shopping my own stash” of makeup lately (which is how I found my current favorite Too Faced Snow Bunny Bronzer which I blogged about here). I recently rediscovered Maybelline Dream Matte Mousse Foundation and had to share it with you today!


Why I Love It:

maybelline-dream-matte-mousse-review-leahtackles.jpeg

leahtackles-everydaydrugstorefoundation-leahtackles.jpeg

maybellinedreammattemousse-review-leahtackles.jpeg

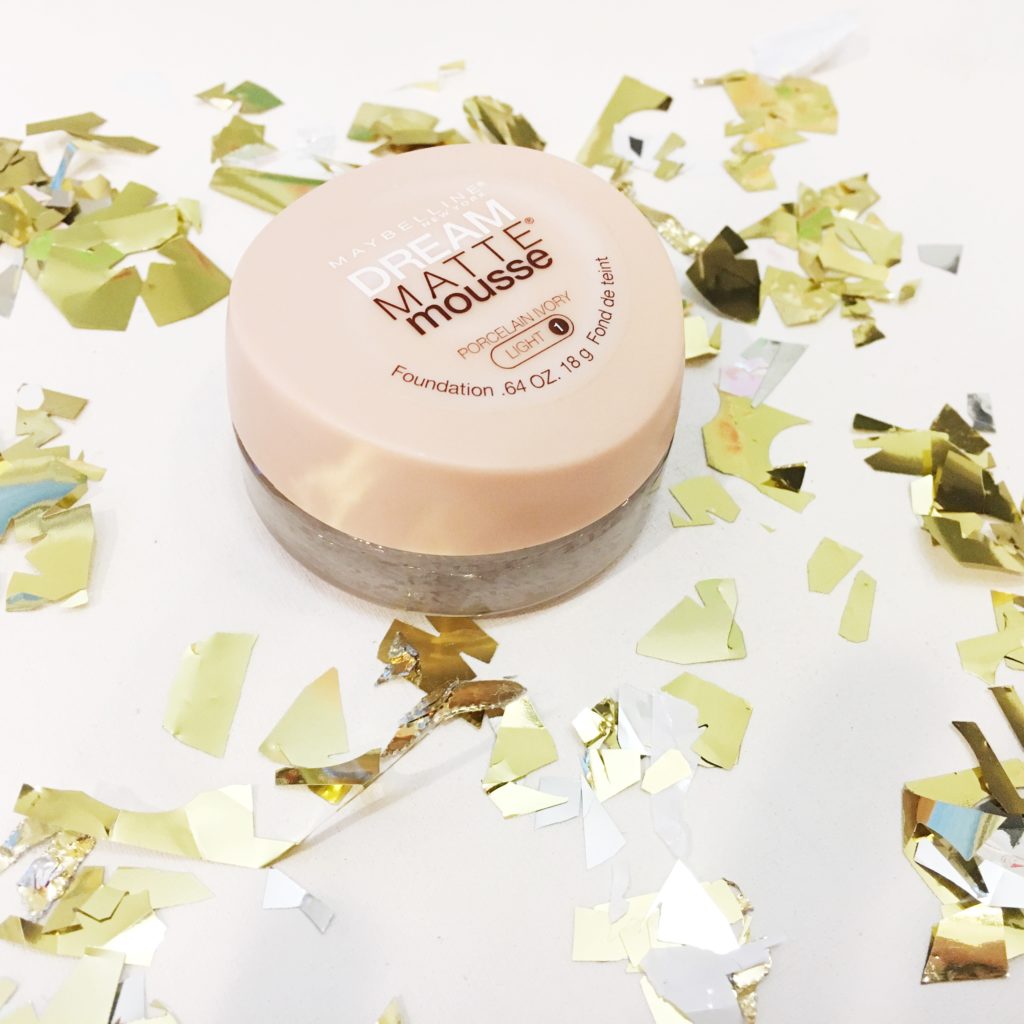
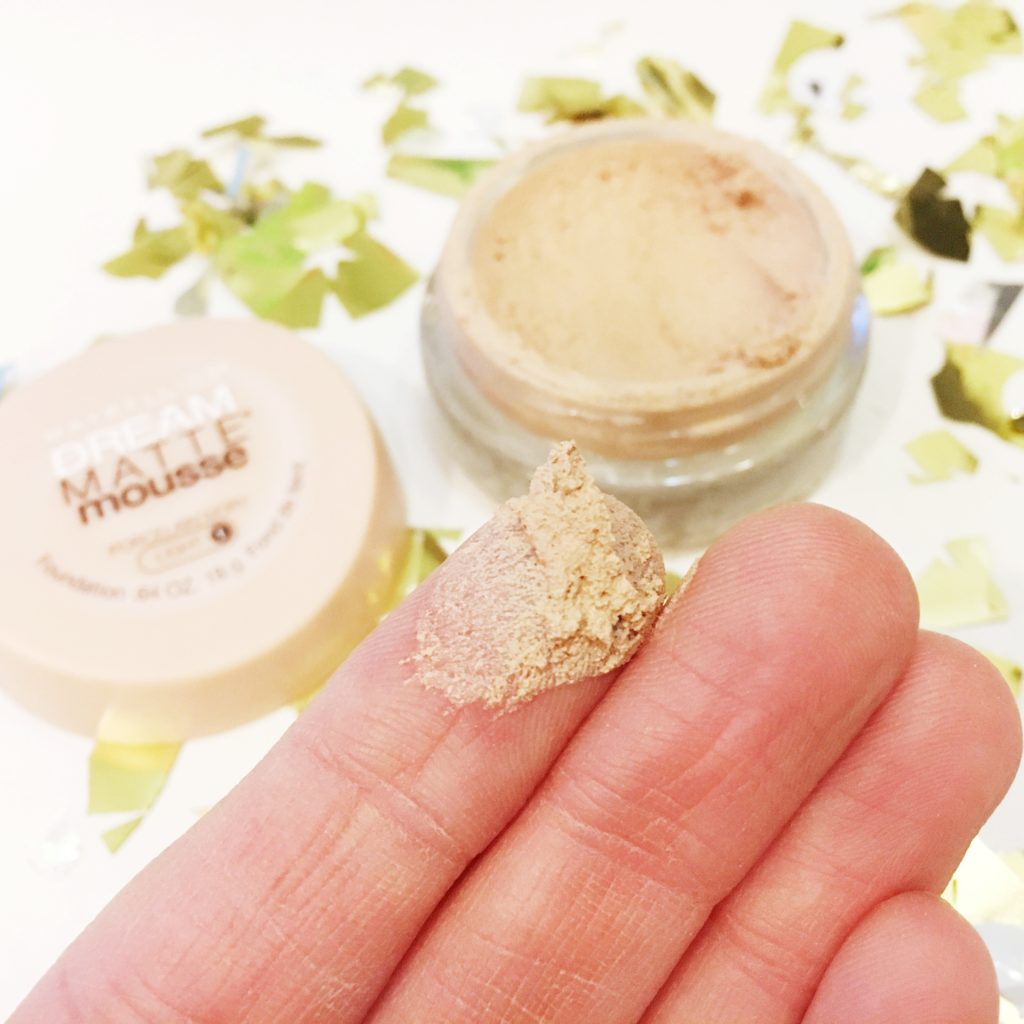
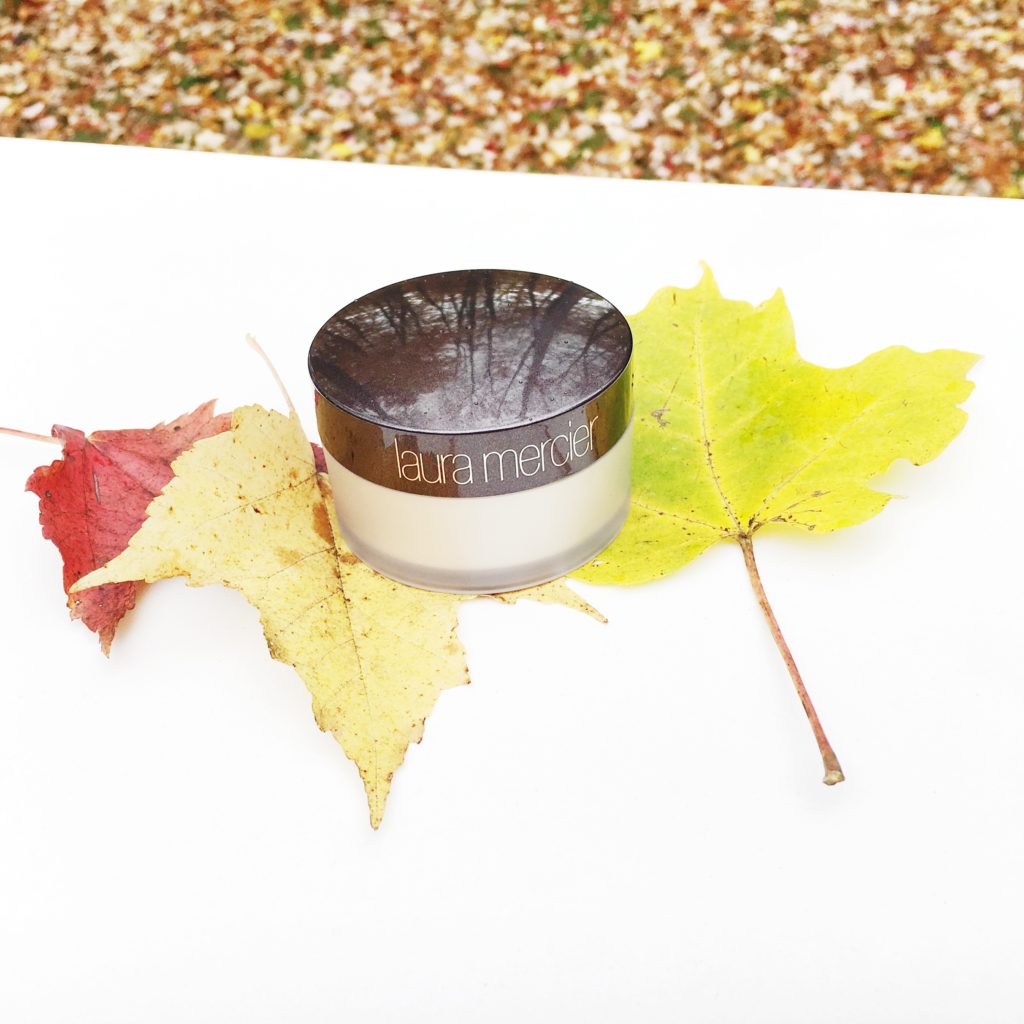
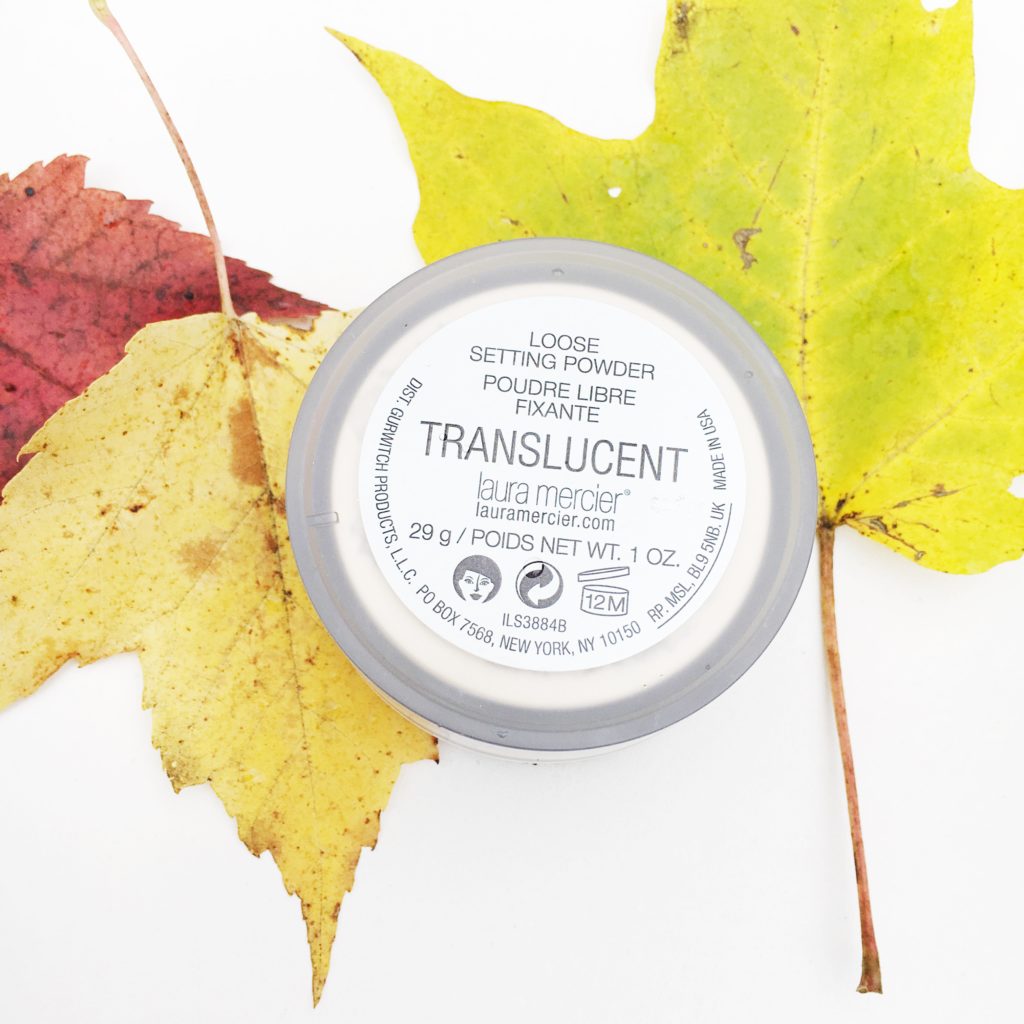
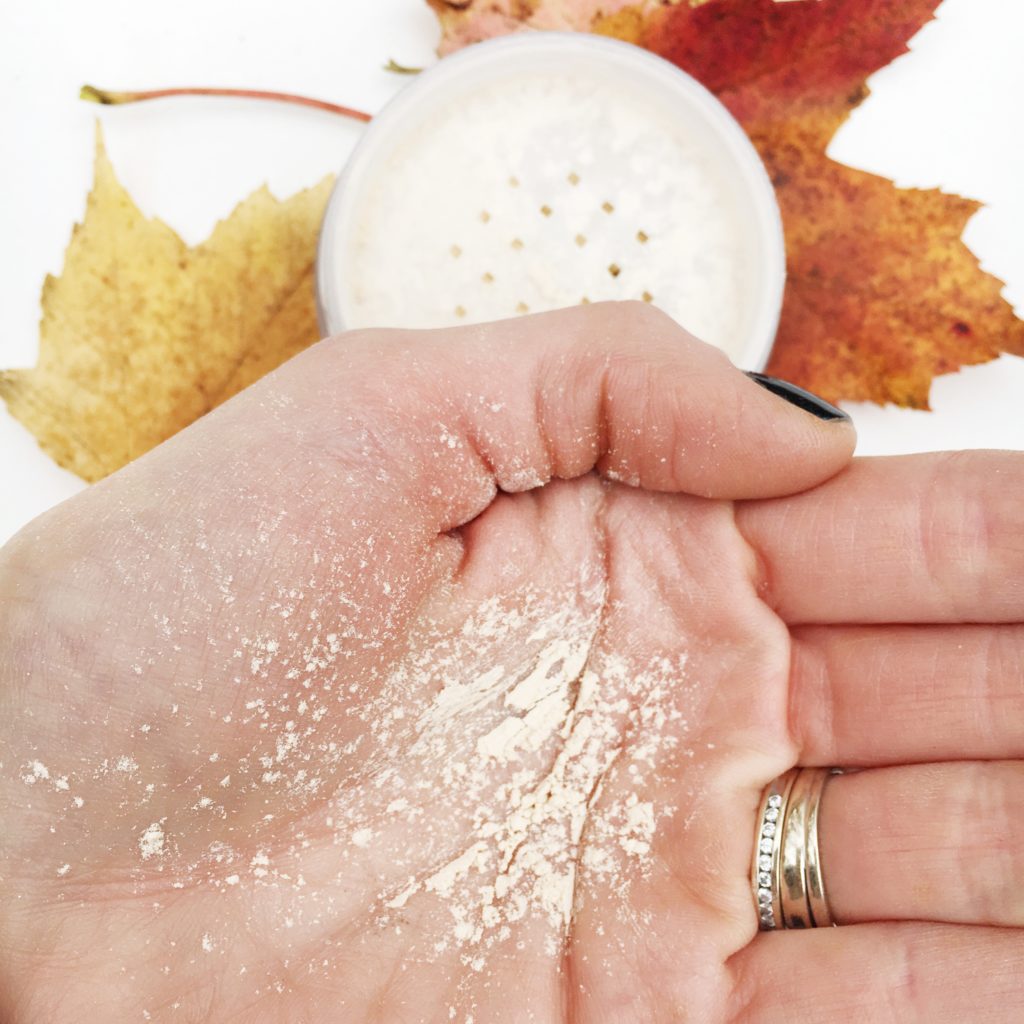
This foundation is one that I used years ago and had honestly forgotten about until I saw one of my most trusted beauty YouTubers, Emily Noel, mention it recently and I decided to give it another shot. This foundation gives me a great medium coverage without much work at all and I don’t mind the need to touch up much during the day. I will say that this isn’t as full coverage as some of my favorite foundations, but that is why I’ve been loving it lately…it’s EASY, no-fuss and looks very natural. I do like using a primer with this as I do all foundations, but I don’t find this to sink into my pores horribly if I do skip a primer. I do set this with a loose setting powder (my current favorite is the Laura Mercier Loose Setting Powder). I like applying this was an ever-so-slightly damp Beauty Blender, but it does also applying nicely with your fingers which is AWESOME when you’re in a rush or feeling a little lazy which is completely acceptable in these cold, dark months ; )

Please let me know your favorite easy, no-fuss foundation(s) in the comments! I LOVE trying new foundations, especially at awesome drugstore prices!! I hope that you have a VERY MERRY CHRISTMAS if you celebrate! Thank you so much for your support and love, it truly means the world to me! xx

FacebookTwitterEmailPinterestShare

Filed Under: Beauty Tagged With: beauty blogger, beauty tips, Beauty Vlogger, beauty youtuber, Dream Matte Mousse, Drugstore Foundation, drugstore foundation for combo skin, drugstore foundation for oily skin, easy foundation, Everyday Makeup, foundation for combo skin, Foundation Tips, leahtackles, leahtackles drugstore makeup, makeup blog, makeup tips, Matte Drugstore Foundation, Maybelline Dream Matte Mousse, maybelline dream matte mousse review, Mousse Foundation, natural foundation, simple makeup

BEAUTYCOUNTER SAFER SKINCARE and MAKEUP | A REVIEW

November 28, 2016 & Leave a Comment

Hi there! Happy Monday! And Happy Cyber Monday to all of you shoppers out there! ; )

I hope that you had a wonderful (and hopefully long!) weekend! Today I am going to be sharing a review of BeautyCounter which is a skincare and cosmetics company that doesn’t use harmful chemicals and sources safer ingredients for all of their products. My good friend, Nicole, is a senior consultant for BeautyCounter and sent me several samples that I used for review purposes. As always all opinions are completely my own and this is not a sponsored post. BeautyCounter also has incredibly gorgeous packaging and amazing kits available for the holiday season!! If you haven’t heard of BeautyCounter, you can check out Nicole’s BeautyCounter website here. You can also see lots of fun BeautyCounter news and enter contests on Nicole’s Beauty Counter Facebook Page.


Nourishing Cream Cleanser

beautycounter-cleanser-leahtackles.jpeg

I was excited to try this, because I prefer very gentle cleansers and thought this sounded like a great one. It reminded me a little bit of my Philosophy Purity which is my “holy grail” cleanser. I will say that this doesn’t lather much, which is common for more natural cleansers, but it does leave my face feeling clean. I really enjoyed this cleanser, and would definitely consider purchasing it.

 Nourishing Day Cream

beautycounter-bestseller-daycream-leahtackles.jpeg

This day cream felt great on the skin and didn’t take too long to absorb into the skin which is always a biggie to me when I’m rushing to get ready in the morning. Having “nourishing” in the name did make me nervous, but I really enjoyed this cream. It didn’t find it to be greasy on my oily/combo skin but I can’t speak about how it would work in the warmer summer months.

Nourishing Night Cream

beautycounter-nightcream-review-leahtackles.jpeg

 Of all the things that I was sent by Nicole to try, THIS is far and away may favorite! A little goes a long way, and this feels like such a luxurious cream. Also, if you purchase the 1.65 Fl. OZ. costs $47 which compared to other night creams, such as Advanced Time Zone Night Age Revising Creme by Esteé Lauder, that retails for $75 for 1.70 Fl. OZ this is a good value. I only had a small sample, so I can’t speak to how it effected my skin over time, but I did love the feeling of it.

Purifying Charcoal Mask

charcoalmask-beautycounter-leahtackles.jpeg

If you watch our Daily Vlogs you *probably* have seen me in a face mask, because I use them several times a week, so I was very excited to try this mask! I absolutely loved it! This mask is nice because you only need to wear it for 10 minutes, and then rinse with warm water. You can also use this as an overnight treatment. I love this because it helps to absorb excess oil

Tint Skin Foundation

beautycounter-skintint-review-leahtackles.jpeg

I tried a sample of this foundation in porcelain and I have high expectations when it comes to foundation so I was interested to see how this stacked up. I wore this a couple of times and I didn’t like it without primer underneath, but that said there are foundations that are some my absolute favorites that I don’t wear without primer because I don’t like the way they settle into my pores. However, when I used my Benefit Porefessional Primer and then applied this I loved it! It was light coverage, but I was able to build it up to a medium coverage in areas where I needed it.I found this to be easy to blend it, and it didn’t oxidize on my skin.  I think this would make an awesome every day foundation, and also a great pick for those who prefer BB Cream, CC Cream, or just a lighter look.

Nice Do Kids Shampoo

beautycounter-kidsshampoo-leahtackles-review.jpeg

I really liked this shampoo for my three kids! My husband, who is usually in charge of the kids bath time, said that this worked well and rinsed out easily. I love the way that it smells. I really appreciate knowing that this is a safe product without harmful chemicals for my kids, especially because one of my sons has extremely sensitive skin.

Kids Not a Knot Conditioner

kidsnotaknot-beautycounter-leahtackles.jpeg

This stuff smells so awesome!! I love it for both  my daughters long hair that is constantly in tangles, and for my son who has very dry hair. I would definitely keep repurchasing this!

Have you tried any goodies from BeautyCounter? Do you try to shop for less harsh skincare and beauty products? Let me know your thoughts in the comments! Also, you can now find BeautyCounter displays at select Target stores! I saw one recently and was very excited! Thank you for reading and have a beautiful day! xx

FacebookTwitterEmailPinterestShare

Filed Under: Beauty Tagged With: beauty blog, Beauty Counter, Beauty Counter Day Cream, Beauty Counter Skin Tint, beauty review, beauty tips, Beauty Vlogger, beauty youtuber, BeautyCounter Kids Line, BeautyCounter Kids Shampoo, BeautyCounter Makeup Review, BeautyCounter Night Cream, BeautyCounter Not a Knot, BeautyCounter Review, BeautyCounter Skincare Review, leahtackles, makeup blog, Natural Makeup, Natural Skincare, simple beauty, skincare blog, skincare review

LAURA MERCIER TRANSLUCENT LOOSE SETTING POWDER REVIEW

October 24, 2016 & 3 Comments

Hi there! Happy Monday!

I hope that you had a wonderful weekend! Today I want to share a review on a popular, but pricy, translucent loose setting powder. If you have any questions, don’t be shy!! Ask me in the comments : ) Also, let me know you’re favorite setting powder in the comments!

LAURA MERCIER TRANSLUCENT LOOSE SETTING POWDER:

lauramercier-translucentsettingpowder-leahtackles.jpeg

lauramercierloosepowder-review-leahtackles.jpeg

lauramerciertranslucentloosepowder-review-leahtackles.jpeg

Cost: $38

This powder contains French cashmere talc, and claims to leave you with a natural finish that also blurs imperfections and fine lines while it also gives a soft focus to your skin.

Why I Love It

I have combo/oily skin, but get very oily on my nose and this powder keeps my skin looking matte but without looking cakey or flat. This is super fine and feels weightless on the skin.

How To Use It

You can purchase the Laura Mercier Velour Puff or use another cosmetics puff to lightly roll and press the powder into your skin. I also like using a medium sized powder brush to tap this into my skin. I like to apply this after applying my foundation and concealer to set my entire face and then apply lightly to my T-zone once all of my makeup is done.

Can You “Bake” Your Foundation or Concealer With This?

Yes! You can bake your foundation or concealer using this powder! However, keep in mind that this powder has a fairly high price point, so you may want to use a lower cost loose powder since a lot of that product does get wasted!

*Note: Baking your foundation or concealer means letting a translucent powder sit on your face for several minutes to allow the heat from you skin to set your foundation and/or concealer and then you dust off the powder with a brush to unveil a creaseless and flawless look. If you are confused about baking or would like to see a blog post dedicated to it, please let me know in the comments!

I hope that you found this helpful! If you did PLEASE share! It truly makes my entire day! And don’t forget to subscribe!! : ) Thank you so much for reading! xx

FacebookTwitterEmailPinterestShare

Filed Under: Beauty Tagged With: 20s makeup, 30s makeup, beauty blog, beauty review, beauty tips, combo skin, Laura Mercier Loose Translucent Powder, Laura Mercier Powder, laura mercier powder for oily skin, Laura Mercier Review, Laura Mercier Velour Puff, leahtackles, makeup blog, Mom Makeup, Oily Skin Power, oily skin tips, skincare, Youtuber

SIMPLE BEAUTY FOR SICK DAYS WHEN YOU CAN’T STAY IN BED!

September 28, 2016 & Leave a Comment

Hi there! Happy Wednesday!

I hope that you are having a great Wednesday! Cheers to being halfway through the week! I, unfortunately, have a cold that has me extremely thankful for DayQuil at the moment :X So, I thought I would use this as an opportunity to share my go-to beauty tips for when I’m sick but can’t stay in bed.

GO HEAVY ON CONCEALER BUT LIGHT ON FOUNDATION:

 Apply a lot of primer to your nose and use a good concealer because when you’re sick your nose tends to look red fast. I like to also go heavy on the under eye concealer, because my under eye circles tend to be worse when I’m sick. I often skip foundation when I’m sick, or use a light mineral or powder foundation because if you’re dehydrated foundation can look cake-y very fast.

BRIGHTEN YOUR COMPLEXION:

I like to use a bronzer with a hint of shimmer to warm up my face. I use a little bit of blush but skip highlighter because I don’t want to draw extra attention to my tired eyes or skin.

NEUTRALIZE YOUR EYES:

I pat a neutral brown color all over my kid or do a very natural look without shimmer when I’m not feeling well that helps cover any redness or unevenness on my lids . I don’t want sparkle or shimmer to draw too much attention to my tired or red eyes. I apply a lot of mascara to my top lashes but just a tiny bit (if any) to my lower lashes to help keep the focus away from my under eye area.

PAMPER YOUR POUT:

Lips can be tricky because if you have a nasty cough, you may want to stick to a simple balm or gloss to avoid a lipstick mess. I like to wear a bright colored lip balm or balm stain because it helps moisturize my lips, it is low maintenance, and it makes my face look brighter and more healthy.

SOME OF MY MAKEUP FAVORITES FOR SICK DAYS:

makeupforsickdays-lookgoodwhenyourefeelingsick-leahtackles.jpeg

The PoreFessional Primer

Estee Lauder Double Wear Waterproof Concealer

Tarte Amazonian Clay Full Coverage Airbrush Foundation

Too Faced Sweethearts Bronzer in Sweet Tea

Maybelline Color Tattoo Eye Shadow

CoverGirl Lash Blast Super Sizer Mascara

Maybelline Baby Lips Lip Balm

I hope that you found this post helpful! Hopefully you *won’t* be needing to use these tips, but if you do I hope that they help you function until you can rest and get better!

FacebookTwitterEmailPinterestShare

Filed Under: Beauty Tagged With: beauty tips, beauty tips for sick days, covergirl lash blast super sizer mascara, Drugstore Makeup, Estee Lauder Double Wear Waterproof Concealer, high-end makeup, leahtackles, look good when you're sick, makeup for when you're sick, makeup tips, maybelline baby lips lip balm, maybelline color tattoo eye shadow, Mom Makeup, mom style, SIck Day makeup, Tarte Amazonian Clay Full Coverage Airbrush Foundation, the porefessional primer

MAKEUP SETTING SPRAYS: WHY & HOW TO USE THEM!

August 24, 2016 & Leave a Comment

Hi there! Happy Wednesday!

I hope that you’re having a great week so far! One makeup item that I use daily, but up until now have only casually mentioned on my blog or YouTube channel is makeup setting spray! So, today I thought that I would share the basics of why you may want to consider trying a makeup setting spray if you haven’t already, and how to use them. If you like these types of posts, please comment so that I know and can keep it up : ) Your comments always make me smile ; )

urbandecayallnightermakeupsettingspray-leahtackles.jpeg

WHAT IS A MAKEUP SETTING SPRAY?

Just like a makeup primer (*Note: my favorite is the Benefit Porefessional) is used to help keep your makeup in place, a setting spray is used to help keep you makeup in place. A primer is used before you apply your makeup, and a  setting spray is used after you’ve applied your makeup.

WHY YOU SHOULD USE THEM:

Just like you would use a protective coat when painting your nails or Mod Podge on a craft project, you should apply this final step after working hard on your makeup! Makeup setting sprays should not change the look or texture of your makeup. Makeup setting sprays are sold by both drugstore brands and high end brands and also just like foundation they have different formulas for different skin types. Setting sprays can also help if you’ve gone a bit overboard on powder products and help get you back to a more natural look while helping lock your makeup in place.

HOW TO USE THEM:

I like to spray about 8-10 inches away from my face first make a “T” formation and then an “X” formation. If I just have a regular, casual makeup day I will do one “T” and one “X” but if I am getting ready for a big event or a dinner date I will do each one twice for a total of four sprays.

MAKEUP SETTING SPRAY SUGGESTIONS:

FOR OILY SKIN:

Urban Decay All Nighter

(*Note: My holy grail setting spray!)

FOR DRY SKIN:

NYX Setting Spray Dewy Skin

FOR ALL SKIN TYPES:

Laura Geller Spackle Mist 

Thank you so much for reading! If you would “Pin” this to your Pinterest you would totally make my week ; ) And don’t forget to susbcribe! xx

FacebookTwitterEmailPinterestShare

Filed Under: Beauty Tagged With: all day makeup, beauty blogger, Beauty Reviews, beauty tips, BEAUTY TUTORIALS, Beauty Vlogger, beauty youtuber, How To Use Makeup Setting Spray, KwapisFamilyTackles, laura geller spackle mist, leahtackles, make your makeup last all day, makeup, makeup primers, Makeup Reviews, makeup setting spray how, makeup setting spray why, makeup tips, nyx setting spray dewy skin, setting spray, skincare, urban decay all nighter, what is makeup setting spray

SUNLESS TANNING TIPS TO GIVE YOU A PERFECT APPLICATION EVERY TIME!

August 10, 2016 & Leave a Comment

Hi there! Happy Wednesday!

I have very fair skin, and while I’ve learned to embrace the pale these days I didn’t always feel that way! I started getting spray tans in high school, and I still love a great spray tan but those can be extremely pricy! I also will admit to the fact that I have used tanning beds (very minimally but still it makes me cringe!) in the past but haven’t been in one in about 6 years. Even though I’ve embraced my naturally fair skin, I do love how a bit of a tan makes my skin appear a bit more even, my muscles more defined, and overall just a nice healthy glow.  And my favorite way to get a little glow going? Without any hesitation, at-home sunless tanning! I have been using sunless tanning products at home for about half my life now, and I have made plenty of sunless tanning mistakes along the way, but now I have some tips up my sleeve that really help me get a natural looking tan every time.


sunlesstanningsecrets-leahtackles.jpeg

Exfoliate:

Okay, I know you’ve probably heard before that it is important to exfoliate before you tan you skin, but I of course have to throw that in because it is an important first step! I love my Caress Evenly Gorgeous Burnt Brown Sugar & Kartie Butter Exfoliating Wash! The name may be a mouthful, but this stuff smells incredible and works as well as higher end exfoliating products for me.

Skip Shaving:

If you shave you legs in the shower and then get out and immediately apply self tanner the tanner will go into the hair follicles you’ve just opened up and then you will have little dark spots visible all over your legs which isn’t as lovely as the slimming, flaw covering tan you can get if you wait 20 minutes or alternate your shaving and sunless tanning days. I like to shower at night, so I usually will shave one night and then the next night apply sunless tanner and just rotate nights to keep up on both my shaving and my summer glow.

Start Down and Work Up:

This sounds simple, but begin with your feet and legs and work your way up so that you’re not behind over to get your legs and creasing the sunless tanner that you’ve already applied to the rest of your body.

How To Apply To Your Back Without Help:

I LOVE using the St. Tropez Applicator Mitt for reaching hard to get places, like my back, and it also helps to get a nice even application without any awkward zebra stripes! You can also, if you’re reasonably flexible, put a little bit of your sunless tanner onto the front and back side of you hand and reach behind to tackle that challenging middle section of back. I also have been known to use a sunless tanning mist for my back, but I actually prefer lotion (loving the Banana Boat Summer Color right now!) for the rest of my body.

Use a Makeup Sponge or Makeup Brush:

This is my BIGGEST TIP! For years and years I always dreaded the telltale sign of a fake tan that stopped at your wrists, or the awful look of sunless tanner all over your fingers, but now I have finally found a way around it! After I’ve finished tanning the rest of my body and washed my hands throughly (get between those fingers!) I use a stippling makeup brush like the Sigma F50 or a cheap makeup sponge to apply a tiny half-of-a-pea-sized amount of sunless tanner to the tops and sides of my hands, fingers, and wrist! You want just the ever so slight amount to help blend some color onto those areas without having horribly obvious self tanner faux pas. Seriously, this is LIFE CHANGING!!

Fix a Goof:

If you get streaky try using a mix of lemon juice and baking soda for a small streak, and if you get a big orange disaster somewhere like your palms or between your fingers try a whitening toothpaste or a little bit of an acetone based nail polish remover.

I hope that you found this post helpful! If you did please considering sharing it using my share buttons below or hovering over the picture to “pin” it to your Pinterest! Thank you! Have a wonderful weekend!! xx

FacebookTwitterEmailPinterestShare

Filed Under: Beauty Tagged With: Banana Boat Summer Color, beauty blog, beauty tips, Caress Evenly Gorgeous, daily vlogger, fashion blogger, Fix Sunless Tanning Mistakes, How-To Sunless Tan Flawlessly, KwapisFamilyTackles, leahtackles, Lifestyle Blogger, makeup blogger, mommy blogger, skincare tips, St Tropez Applicator Mitt, Sunless Tan with makeup brush, Sunless Tan Your Hands, Sunless Tanning Tips, Sunless Tanning with Makeup Sponge, tanning tips

MAKEUP AT WALT DISNEY WORLD! WHAT I PACKED + MY SECRET BEAUTY WEAPON!!

January 6, 2016 & Leave a Comment

Hi there! Happy Monday!

So, just like people debate on wearing makeup while in labor, people debate whether or not you should wear makeup at Disney. Now, I think it’s fine to wear makeup, and it’s fine to go bare faced, the choice is yours! However, this is a makeup blog, and I did chose to wear makeup on our recent trip to Disney. We did go in December, so while it was around 80 degrees every day, it wasn’t super hot, so that did make the decision to wear makeup easier. I want to share what I wore for those who want an idea for what makeup holds up in the Florida heat.


MAKEUP I TOOK & WORE TO DISNEY:

disneymakeuppicks-leahtacklesdisney.jpeg

Benefit Pore Fessional Primer 

Bare Minerals Matte Foundation with Broad Spectrum SPF 15 

Estée Lauder Double Wear Stay-in-Place Flawless Wear Concealer

Tarte Amazonian Clay Cheek Palette

Maybelline Eye Studio Eye Shadow Quad 

Maybelline Eye Studio Color Tattoo 24 Hour Eye Shadow 

Anastasia Beverley Hills Brow Wiz 

Mally Brow Gel

NYX Butter Gloss 

EOS Lip Balm

Urban Decay All Nighter Makeup Setting Spray

And the very best, my secret weapon and the ONLY thing I carried around with me besides lip gloss:

Peter Thomas Roth Oily Problem Skin Instant Mineral Broad Spectrum SPF 30 Sunscreen Translucent Brush On Titanium Dioxide & Zinc Oxide Powder

That is quite the name, huh? But this stuff is incredible! Matte finish, oil absorbing, and sun protection! I love that the brush retracted and it was an easy way to stop shine or sunburn on my nose and face. This is the best thing I packed on the trip for myself!

In case you’ve missed it, here is my most recent Disney video:

 I hope that you found this post helpful! If you did, please SHARE IT, PIN IT, and SUBSCRIBE!!! I appreciate all of you so much! I hope that you’re all having a wonderful 2016 so far!! Go make it happen!! xx

FacebookTwitterEmailPinterestShare

Filed Under: Beauty Tagged With: Anastasia Beverly Hills Brow Wiz, beauty tips, Covergirl Clump Crusher Mascara, Disney World Haul, Disney World Tips, EOS lip balm, KwapisFamilyTackles, leahtackles, Makeup at Disney, makeup favorites, Makeup I Wore At Disney, Mally Brow Gel, Maybelline Color Tattoo, Maybelline Eye Studio Eye Shadow Quad, NYX Butter Gloss, Peter Thomas Roth Oily Probloem Skin Instant Mineral Powder, Skincare Favorites, Urban Decay All Nighter Setting Spray

YOUR BEAUTY QUESTIONS ANSWERED! FIRST EVER LEAHTACKLES BEAUTY Q&A!

December 30, 2015 & Leave a Comment

Hi there! Happy Wednesday!

I have never done a question & answer blog post, and I do get friends and readers asking me questions on a fairly regular basis (and I’m honored every time!), so I decided to do my first ever LeahTackles Q&A! This one is beauty related, but feel free to ask any questions you have for me in the comments for my next Q&A! You can also ask me on social media, or via email if that makes you more comfortable. This first handful of questions is from my sweet friend Tammy who sent me an email with a big list, some of which I’ll tackle today. I do have more questions, but I don’t want this to be too long, so I’ll save them for the next time.


firsteverBeautyQandA-LeahTackles.jpeg


1. Do you have tips for applying Younique 3D Fiber Mascara? I always seem to get fibers in my eyes! How many coats of the gel and lashes do you suggest I use?

2. How much should I tip my hair stylist? What about for facial waxing?

I always tip my stylists, and anyone who I tip, 20%.

3. How should I clean my hair brushes?

This is SUCH a great question! For years I was guilty of just pulling out the hairs and that was that. Hair brushes harbor grease, dust, and dirt which then you re-deposit back onto you hair every time you use a dirty brush! Um, YUCK!!? If the brush is plastic, I  remove the hair (you can use a teasing comb pick if it’s really stuck) and then soak in in a baking soda mixture bristle side down in a bowl. If it’s really bad, I make a little mix of water, baking soda, and shampoo and then brush with a toothbrush. If the brush is made of wood, you want to be careful about soaking it! If you don’t mind the smell, you could use a few drops of Tea Tree oil mixed with water to clean the brush.

4. Do you suggest a pencil or powder for brows?

My absolute favorite brow product of all time is the Anastasia Beverley Hills Brow Wiz eye brow pencil. I was terrified of brow pencils until trying this one, and it’s a miracle worker!! I also like the It Cosmetics Universal Eyebrow Pencil now, too. To answer the pencil vs. powder debate, I’m going to cheat. On a day when I have time, or for a special occasion, I use both! I use the powder by my nose where my brows start for a more natural look for those baby hairs, and then use a pencil to define the arch and finish the tail of the brow. But everyday? I use one or the other! I also like to set my brows with a clear brow gel.

5. I’ve always had the problem where my under eye area gets dark & smudgy looking after only an hour or two of wearing eye makeup. Am I applying the wrong products?

After apply foundation and concealer, I like to set my makeup with a powder. I also usually set my under eye concealer with a brightening powder. E.L.F Studio High Definition Undereye Setting Powder is a great drug store option, and Laura Mercier Secret Brighting Powder a fantastic one as well and something that lasts a very long time. I always start with either an eye shadow base or an eye shadow primer when doing my eye makeup, even if I’m only swiping one color on my lids that day. I am a HUGE fan of the Maybelline Eye Studio Color Tattoo 24 Hour Shadows! I wear them alone all the time, or as a base for my eye shadows. M.A.C Paint Pots are also great for this. I also always, always, always wear waterproof or water resistant mascara! I like to curl my lashes (on days when I’m not rushing so much) and then apply a coat of Covergirl Clump Crusher Mascara in water resistant. I know a lot of people aren’t fans of how hard it is for water proof mascara to come off at night, but I don’t have a big issue with this and love the security of my makeup not running. I often will put waterproof on both my upper and lower lashes, and then add a coat of another mascara to my top lashes. As for eye liner, I always use liquid eye liner! My absolute fav is Kat Von D Tattoo Liner in Trooper, but also have great luck with e L’oreal Lineur Intense.

Thank you so much for reading!! I appreciate it so much more than you know : ) Don’t forget to ask me questions!  I hope that you all have a safe, happy, and healthy 2016!! Cheers!

FacebookTwitterEmailPinterestShare

Filed Under: Beauty Tagged With: Anastasia Beverly Hills, beauty blogger, beauty Q & A, beauty questions answered, Beauty Reviews, beauty tips, beauty videos, Beauty Vlogger, E.L.F Cosmetics, KwapisFamilyTackles, Laura Mercier Cosmetics, leahtackles, Lifestyle Blogger, makeup basics, makeup help, Makeup Reviews, maybelline, skincare tips

IPSY GLAM BAG | OCTOBER 2015

October 19, 2015 & 2 Comments

Hi there! Happy Monday!

The middle of the month always means the same thing, IPSY TIME! I was so excited to rip open this months bag and decided to do it as a blog post instead of a video. If you’d like to see my Ipsy videos you can here on my YouTube channel. If there is a subscription service you would like for me to review or share with you, please let me know in the comments!


IPSY GLAM BAG OCTOBER 2015:

ipsybagoctober2015-leahtackles.jpeg

Theme:

Alter Ego

Bag:

It isn’t my favorite, but it’ll get the job done and I will use it. I do love these bags, they are handy for so many things when organizing or traveling.

Delectable Ultra Nourishing Hand Cream in Coconut Cream:

I was thrilled when I saw this because I needed a new hand cream now that it is getting to be colder and my hands are extra dry. This smells amazing and is really thick and feels pretty luxurious. I will have to see how it works though, because I’ve only used it once.

Aurora Gel Effect Nail Lacquer in Inky Dinky:

I have been wanting to try more gel formula nail polishes, and I love this deep navy color! And how cute is the name?! I believe this is full size too, which is fantastic. I think that there is also a gel top coat that you are supposed to use as a second step, which I don’t have, but I will test it out with a clear top coat.

Dr. Brandt Microdermabrasion:

I love Dr. Brandt Pores No More primer, and I’ve also tried this Microdermabrasion before and enjoyed it. It’s a decent sample, and I’ll be able to get 5 or more uses out of it.

The Balm Meet Matt(e) Hughes Long Lasting Liquid Lipstick in Committed:

thebalm-liquidlipstick-committed-leahtackles.jpeg

I LOVE The Balm!! It is the makeup that the salon used for my wedding over five years ago, and ever since I’ve been hooked. I also am loving this liquid lipstick trend, and think that this color is a really great nude for fall. I think this is a very wearable color, and has a little bit of that 90’s lip trend going on, which I am a fan of.

Emite Make Up Tweezers:

emitemakeup-tweezers-leahtackles.jpeg

I tested these out and they seem to work really well! I love that they have a little case, and it’s a lot sturdier than the cases that other tweezers I have are packaged in, but the lid doesn’t seem to stay on : ( I think mine is maybe just broken, but it’s a tiny bummer.

Overall:

I love this month! If you are interested, you can find out more about Ipsy here!  I am thinking of canceling my Ipsy bag so that I can get Nature Box to open with Stephan : ) Let me know what you think!! Have a great start to your week! Don’t forget I post every Monday and Wednesday!


FacebookTwitterEmailPinterestShare

Filed Under: Beauty Tagged With: Aurora Gel Nail Polish, beauty blogger, Beauty Reviews, beauty tips, Beauty Vlogger, Delectable Hand Cream, Dr Brandt Microdermabraion, dr. brandt, Emite Makeup, Ipsy Glam Bag October 2015, Ipsy Review, leahtackles, makeup blog, makeup blogger, The Balm Cosmetics, The Balm Liquid Lipsticks

TOP SINGLE EYE SHADOW PICKS FOR ONE SHADOW LOOKS

October 7, 2015 & Leave a Comment

Hi there! Happy Wednesday!

I wear makeup most days, and sometimes I only can spend a few minutes on my makeup, so I love having my favorite single eye shadows that I can swipe on my lids for a really easy look. If you have a favorite single shadow, please let me know what it is! I love comments!! ; )


bestsingleeyeshadows-singleeyeshadows-leahtackles.jpeg FullSizeRender (3)

1. M.A.C Paint Pot in Bare Study

This cream shadow makes a gorgeous base for eye shadows, but I also will swipe it on my lids for a super easy look. I have to always have this with me when I travel, too.

2. Maybelline Color Tattoo 24 Hour Eye Shadow in Inked in Pink

I use this alone on my lids ALL the time! I actually had this on the day before Logan was born, and it survived a drug-free labor ; ) I am planning to buy several more of these before our Disney trip so that I can wear a little makeup but only spend a few minutes doing it.

3. Elf Long-Lasting Lustrous Eyeshadow in Toast

How stunning is this color?! BAM! The texture of these eye shadows remind me of the Bouncy Blushes from Maybelline, and it’s again a very easy, very pigmented eye shadow.

4. L’Oreal Paris 24 Hour Infallible Eye Shadow in Iced Latte

The Infallible shadows are hugely popular, and for good reason! This might be my absolute favorite single shadow, and you can usually find them for buy one get one 50% off.

5. Urban Decay Single Shadow in Free Love

I just hauled this gorgeous metallic-y peach eye shadow in my Big Sephora Haul video, and I have worn it for almost a week straight! I love putting this into my crease with a fluffy brush for a look that looks like you spent a lot of time, but actually only took a minute!

If you liked this style of post, please let me know! I hope that you have a fantastic rest of your week and weekend! xx

FacebookTwitterEmailPinterestShare

Filed Under: Beauty Tagged With: beauty blogger, beauty tips, Beauty Vlogger, Drugstore Makeup, easy makeup, Elf Long Lasting Lustrous Eyeshadow, Fast Makeup Looks, high-end makeup, Infallible Eye Shadows, KwapisFamilyTackles, Leah Tackles Beauty, leahtackles, Loreal Infallible in Iced Latte, M.A.C Paint pot, M.A.C Paint Pot in Bare Study, Makeup Reviews, Maybelline Color Tattoos in Inked in Pink, Quick Eye Shadow Tutorial, Single Eye Shadow Look, skincare tips, urban Decay Free Love, Urban Decay SIngle Shadow

« Previous Page
Next Page »

SUBSCRIBE

Leave your email to subscribe!

SEARCH

SPONSORS

ARCHIVES

GRAB MY BUTTON


copy & paste code

site design by The Kinch Life Design & development by Olive & Ivy Design