Leah Tackles

  • Home
  • About
  • Policy
  • Beauty
  • Fashion
  • Cooking
  • Exercise
  • DIY Projects
  • Decor
  • Book Club
  • Family

INEXPENSIVE SPRING/SUMMER OUTFIT IDEAS AND STYLING PART ONE!

May 12, 2014 & 1 Comment

Hi there! Happy Monday!

Happy Belated Mother’s Day to all of the moms out there! And if you aren’t a mom, I hope that you got to enjoy the day celebrating your own mom or other women who are an important part of your life! I didn’t get to see my mom, but I was sending love her way! Happy Mother’s Day, mom! I love you! I had a sweet day with my little loves and my big love! We slept in (you know, 8:30! haha), went to church, spent a little time outside with my in-laws, and ordered out for dinner! My kids just happened to know two pieces that I wanted for my gallery wall (thanks to my husband, Steph, for helping with the gifts ; ) ) I am a very lucky mom and wife!

Today I want to share Part One of my two-part Inexpensive Spring/Summer Outfit Ideas and Styling. I want to apologize now before you get to the pictures….it looks like autumn not spring, but that’s the weather we have had lately! Luckily, it seems to finally be warming up, so hopefully the next time I do an outfit post outside, it will look a little happier and brighter! These are simple, affordable outfits that are comfortable and easy to throw together, but still stylish!


Outfit #1


inexpensive-spring-styling.jpeg

j-crew-necklace.jpeg

 spring-outfit-ideas.jpeg

Dress: Forever 21

Belt: Target

Shoes: Target

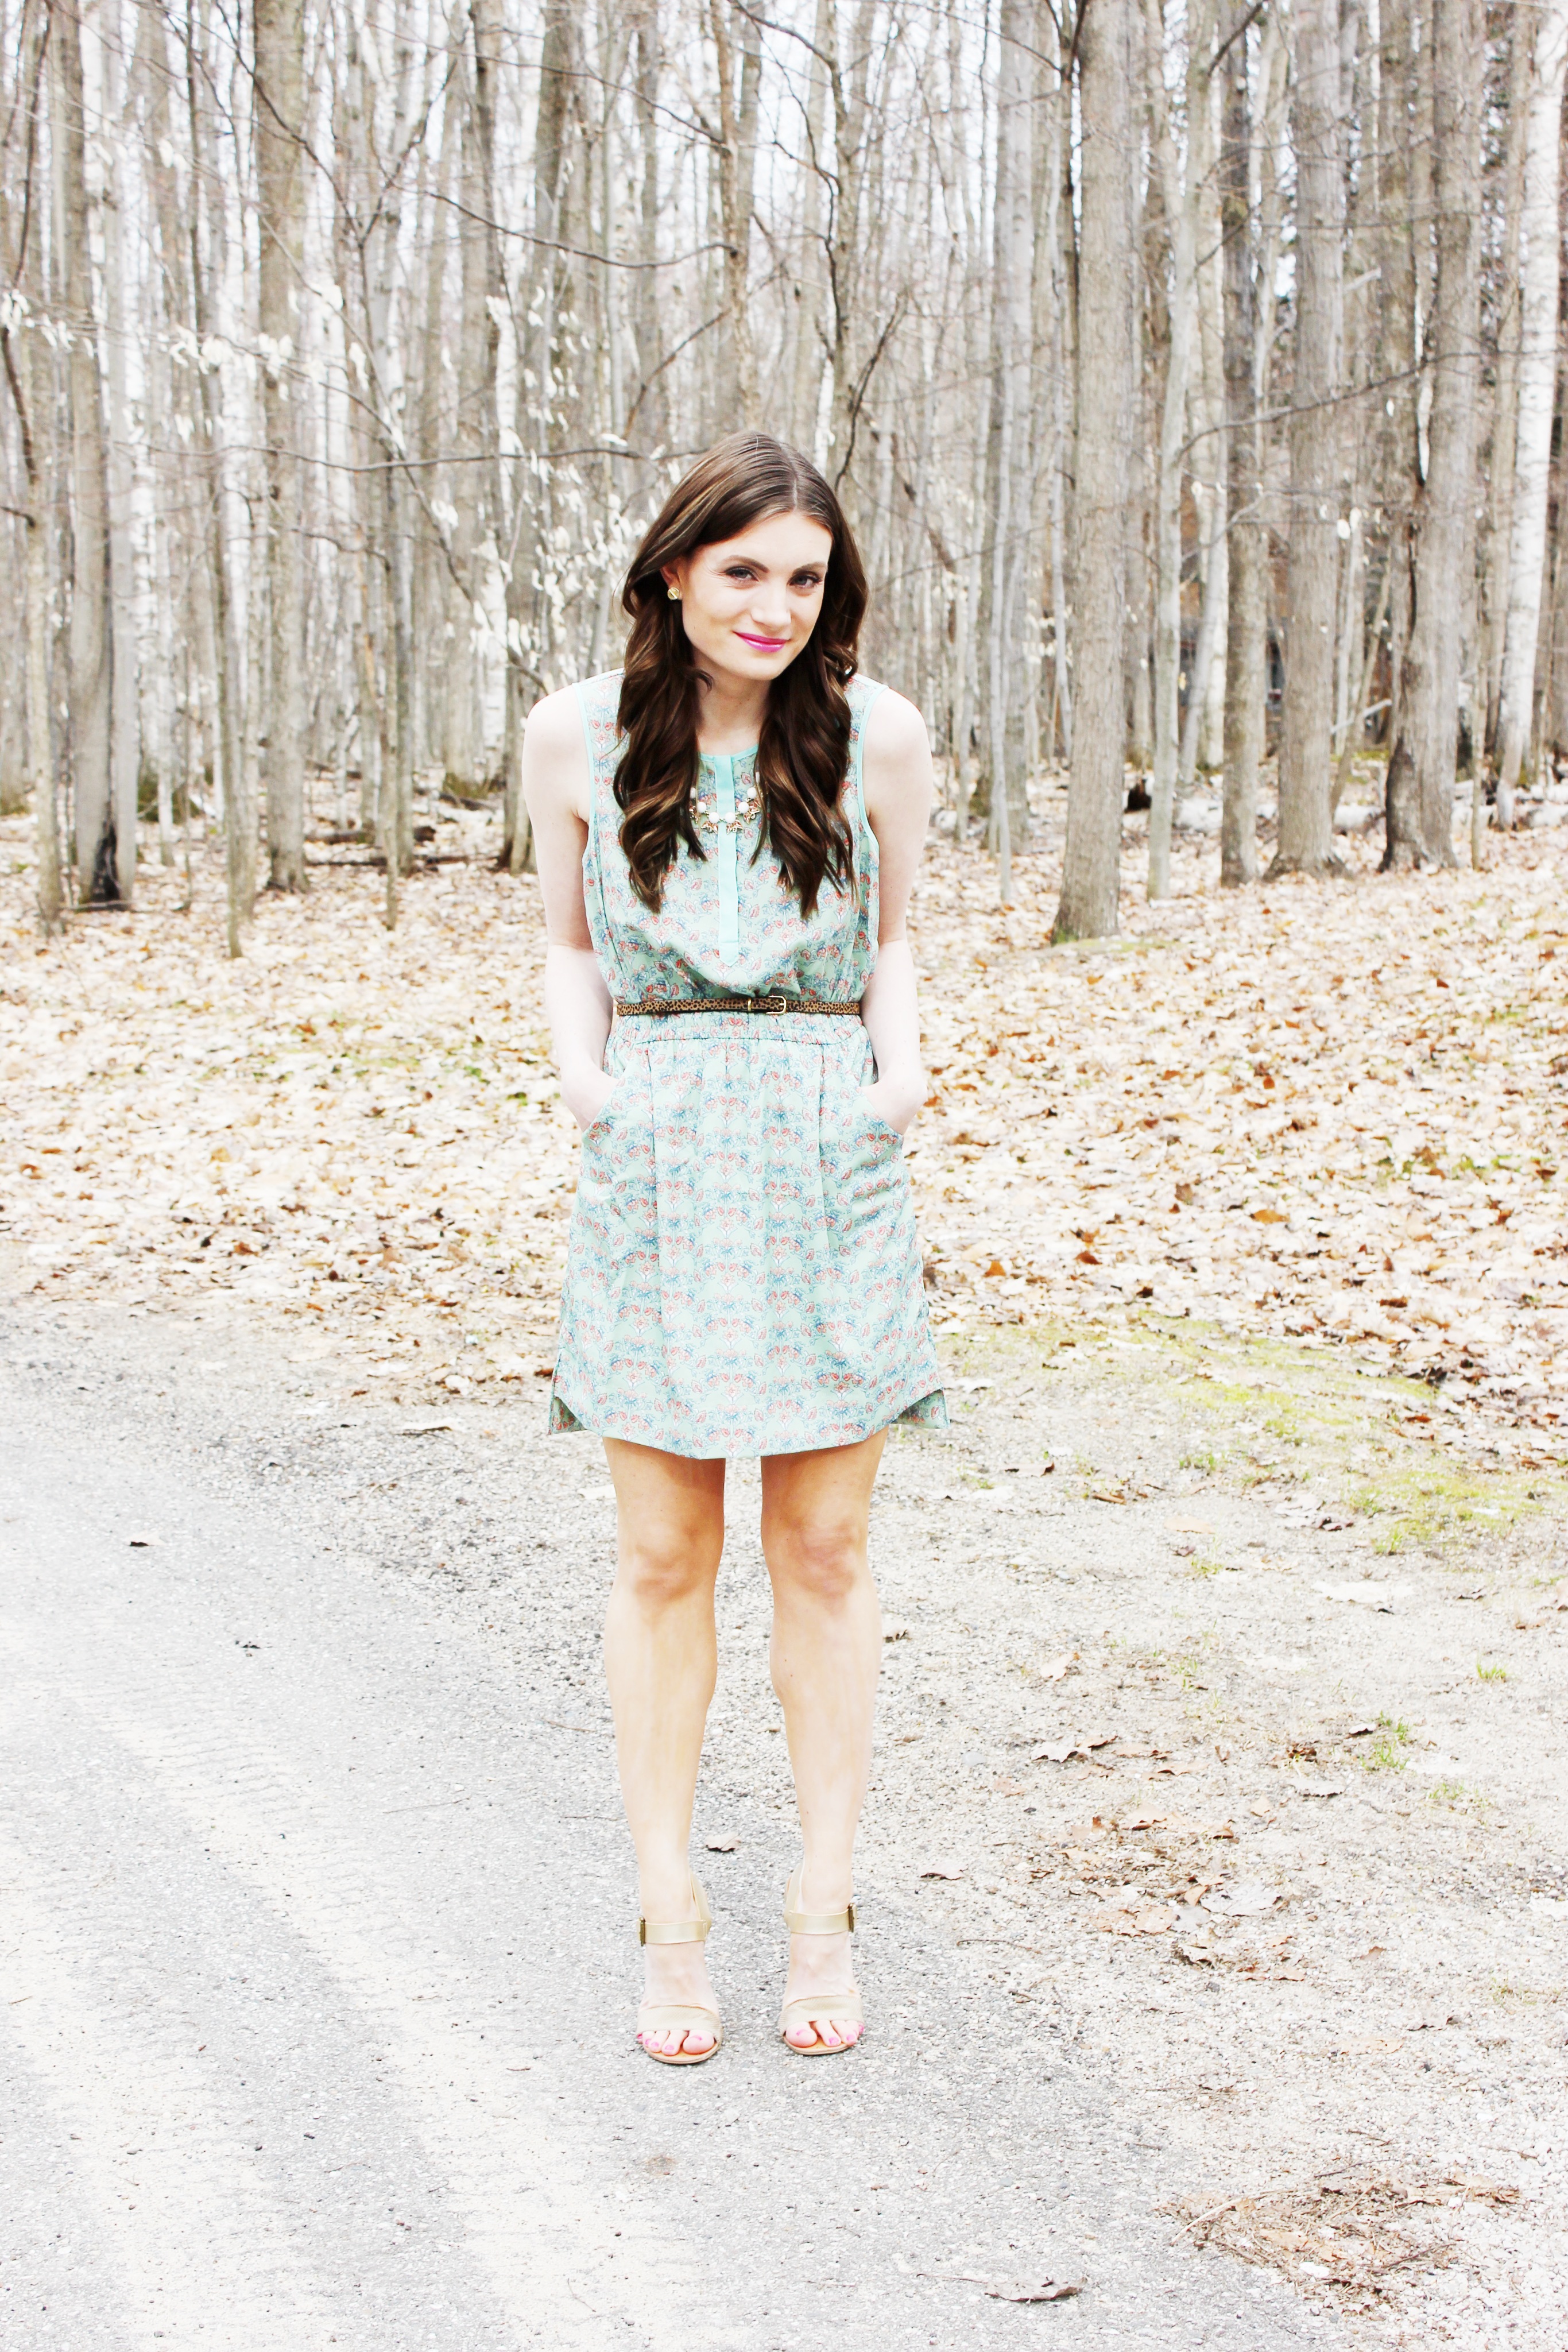
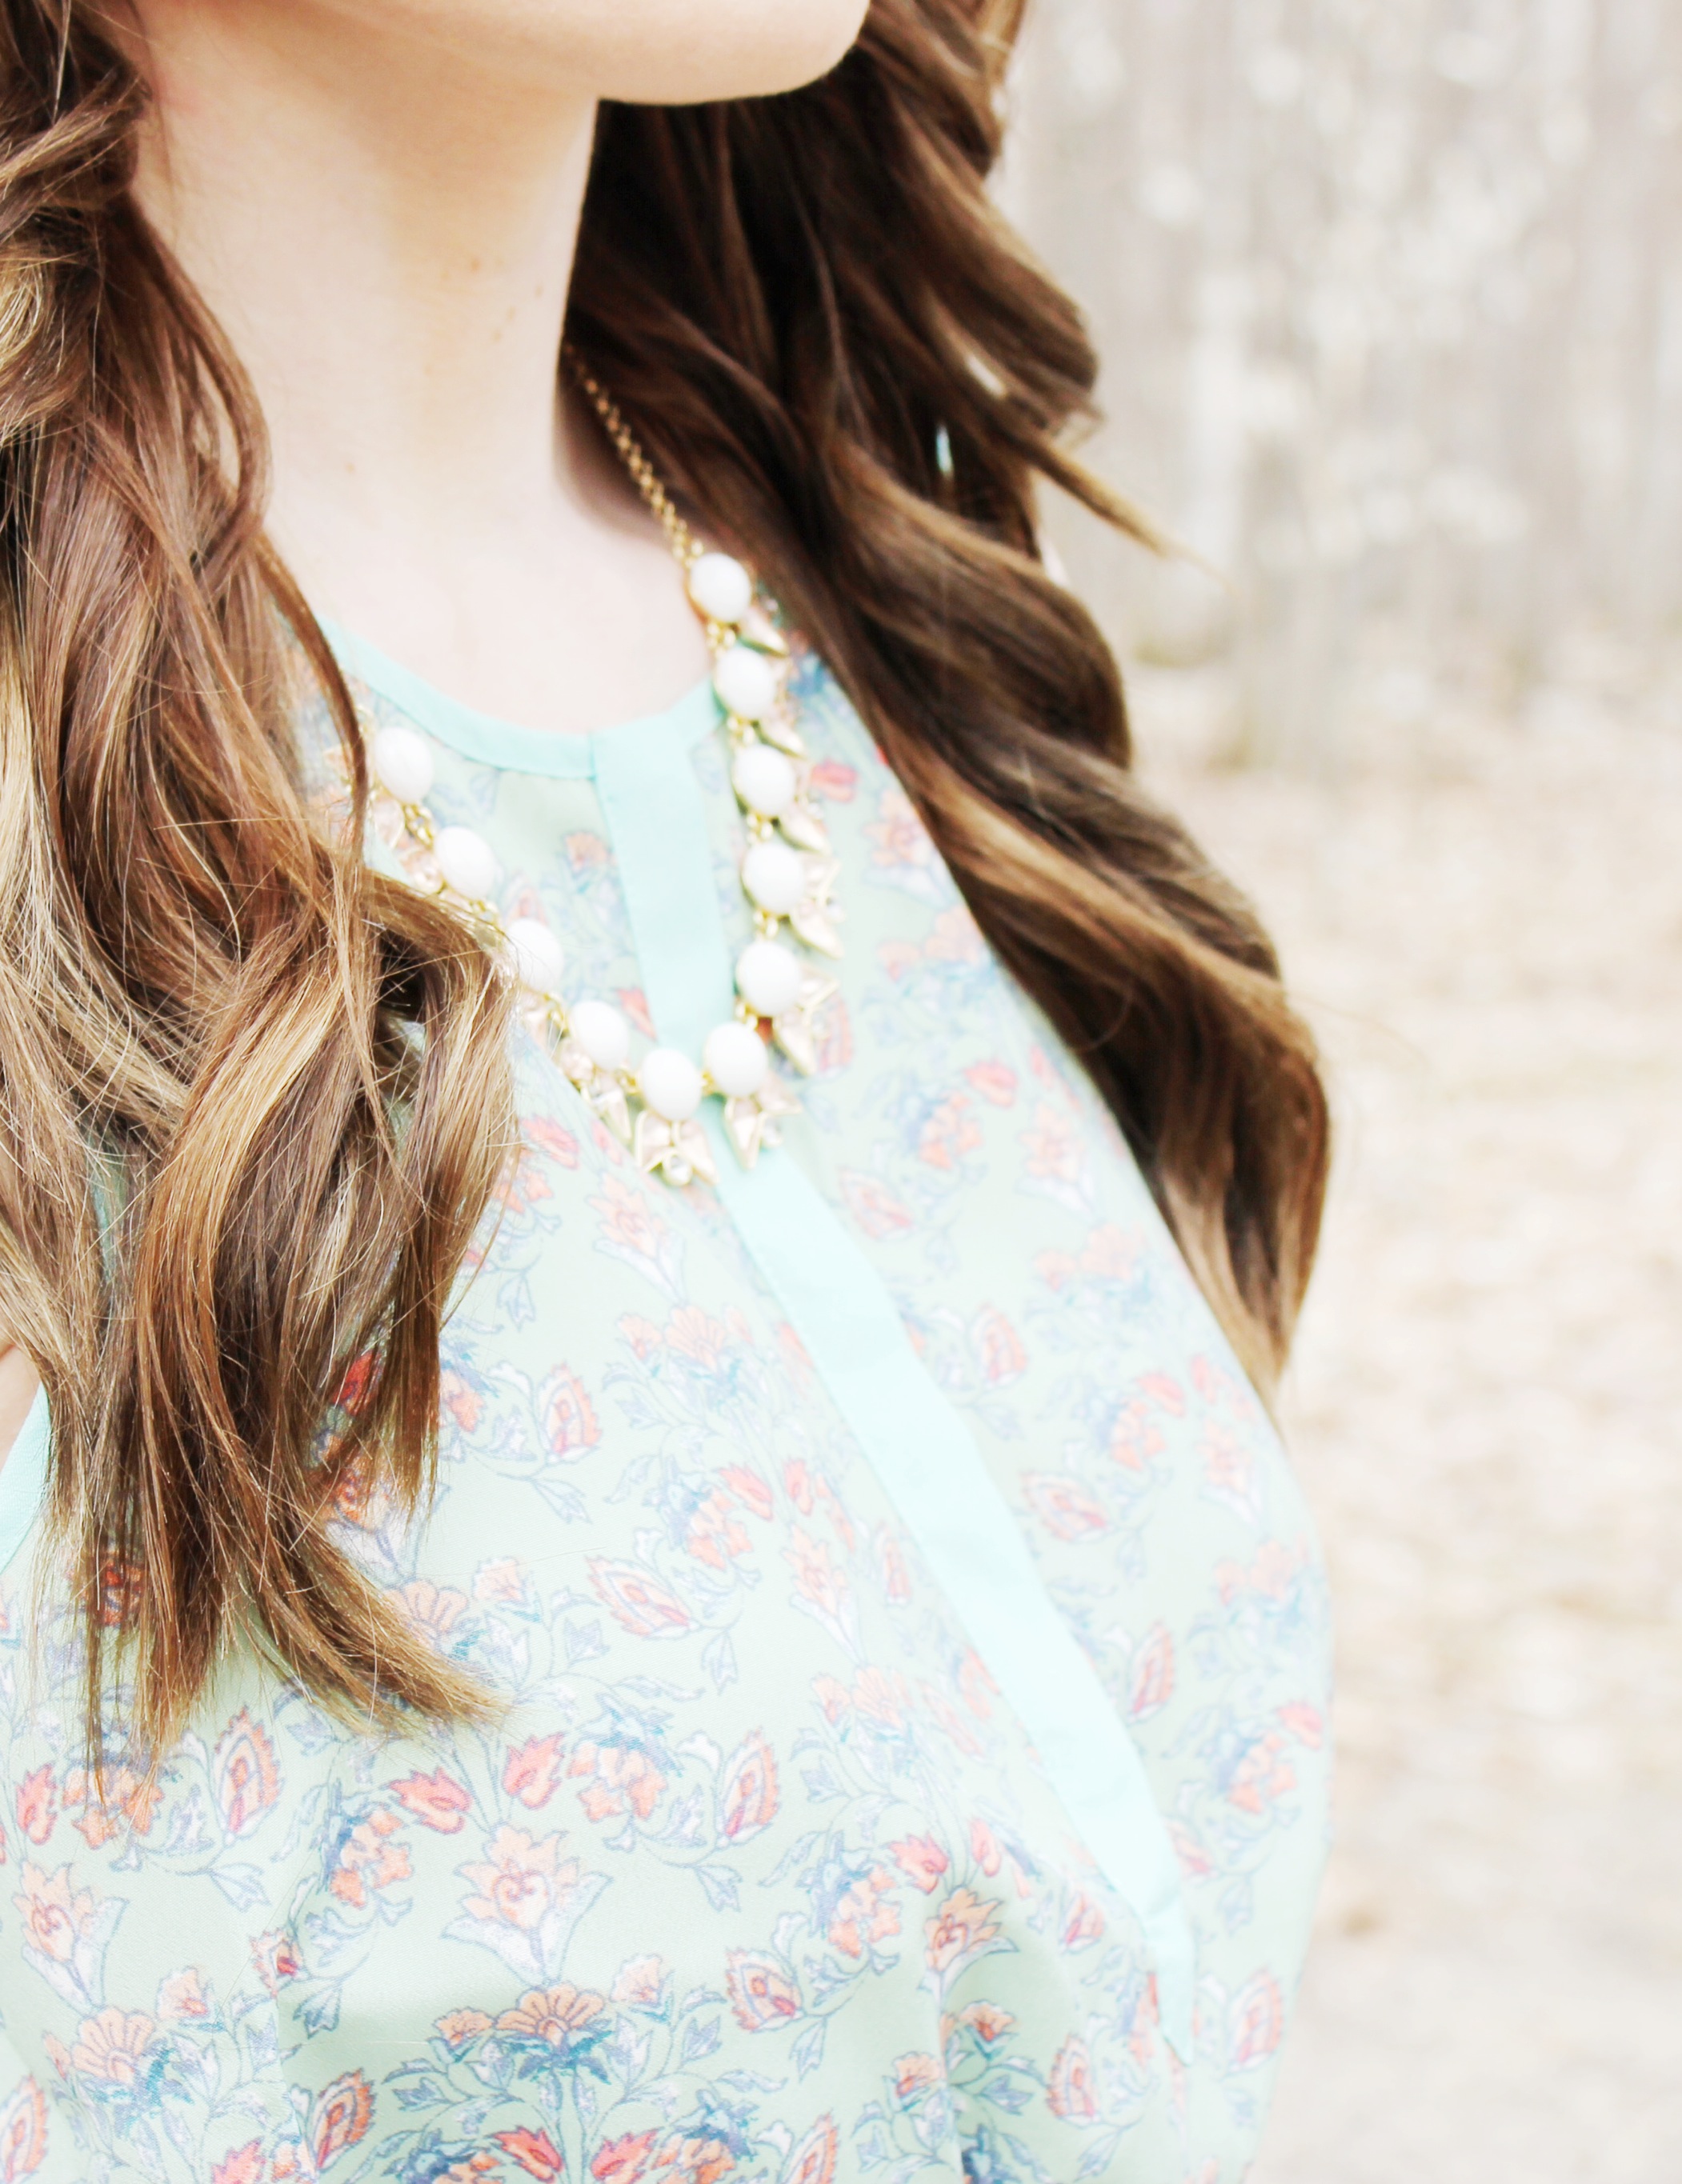
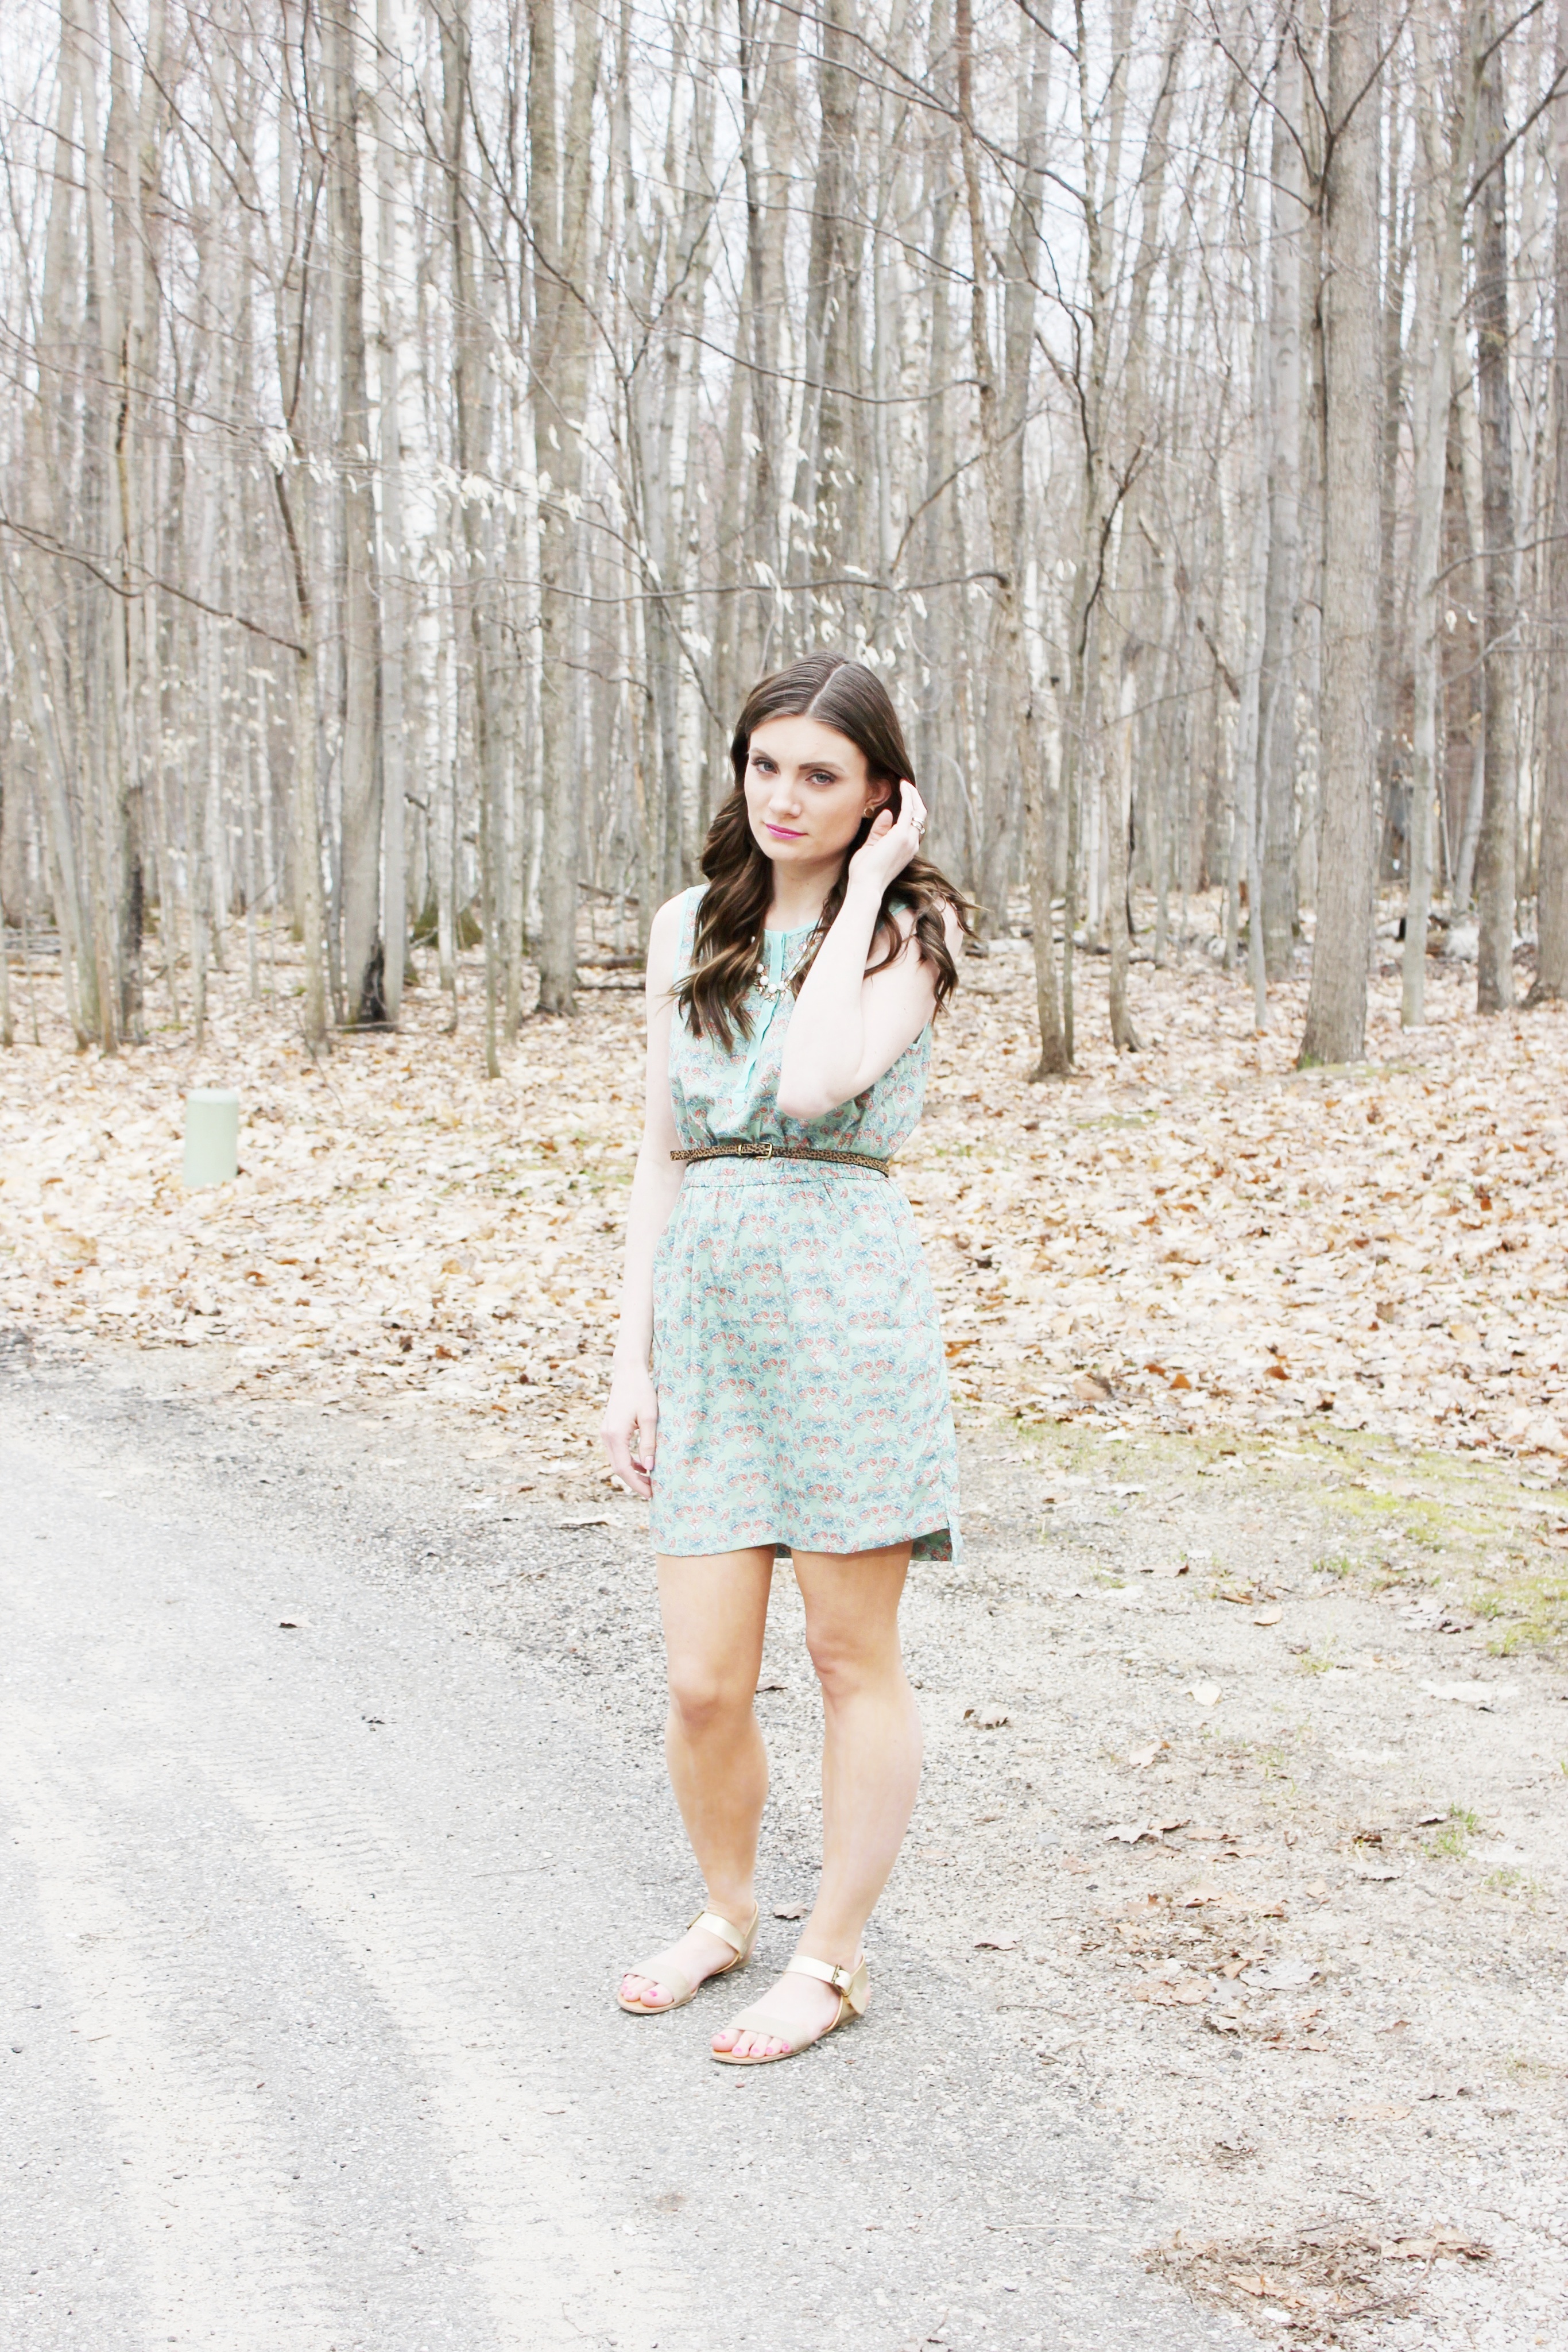
Necklace: J. Crew (*Similar)

Earrings: Bauble Bar (*Similar)


Outfit #2


spring-outfit-ideas-2014.jpeg

spring-outfits.jpeg

Romper: Target

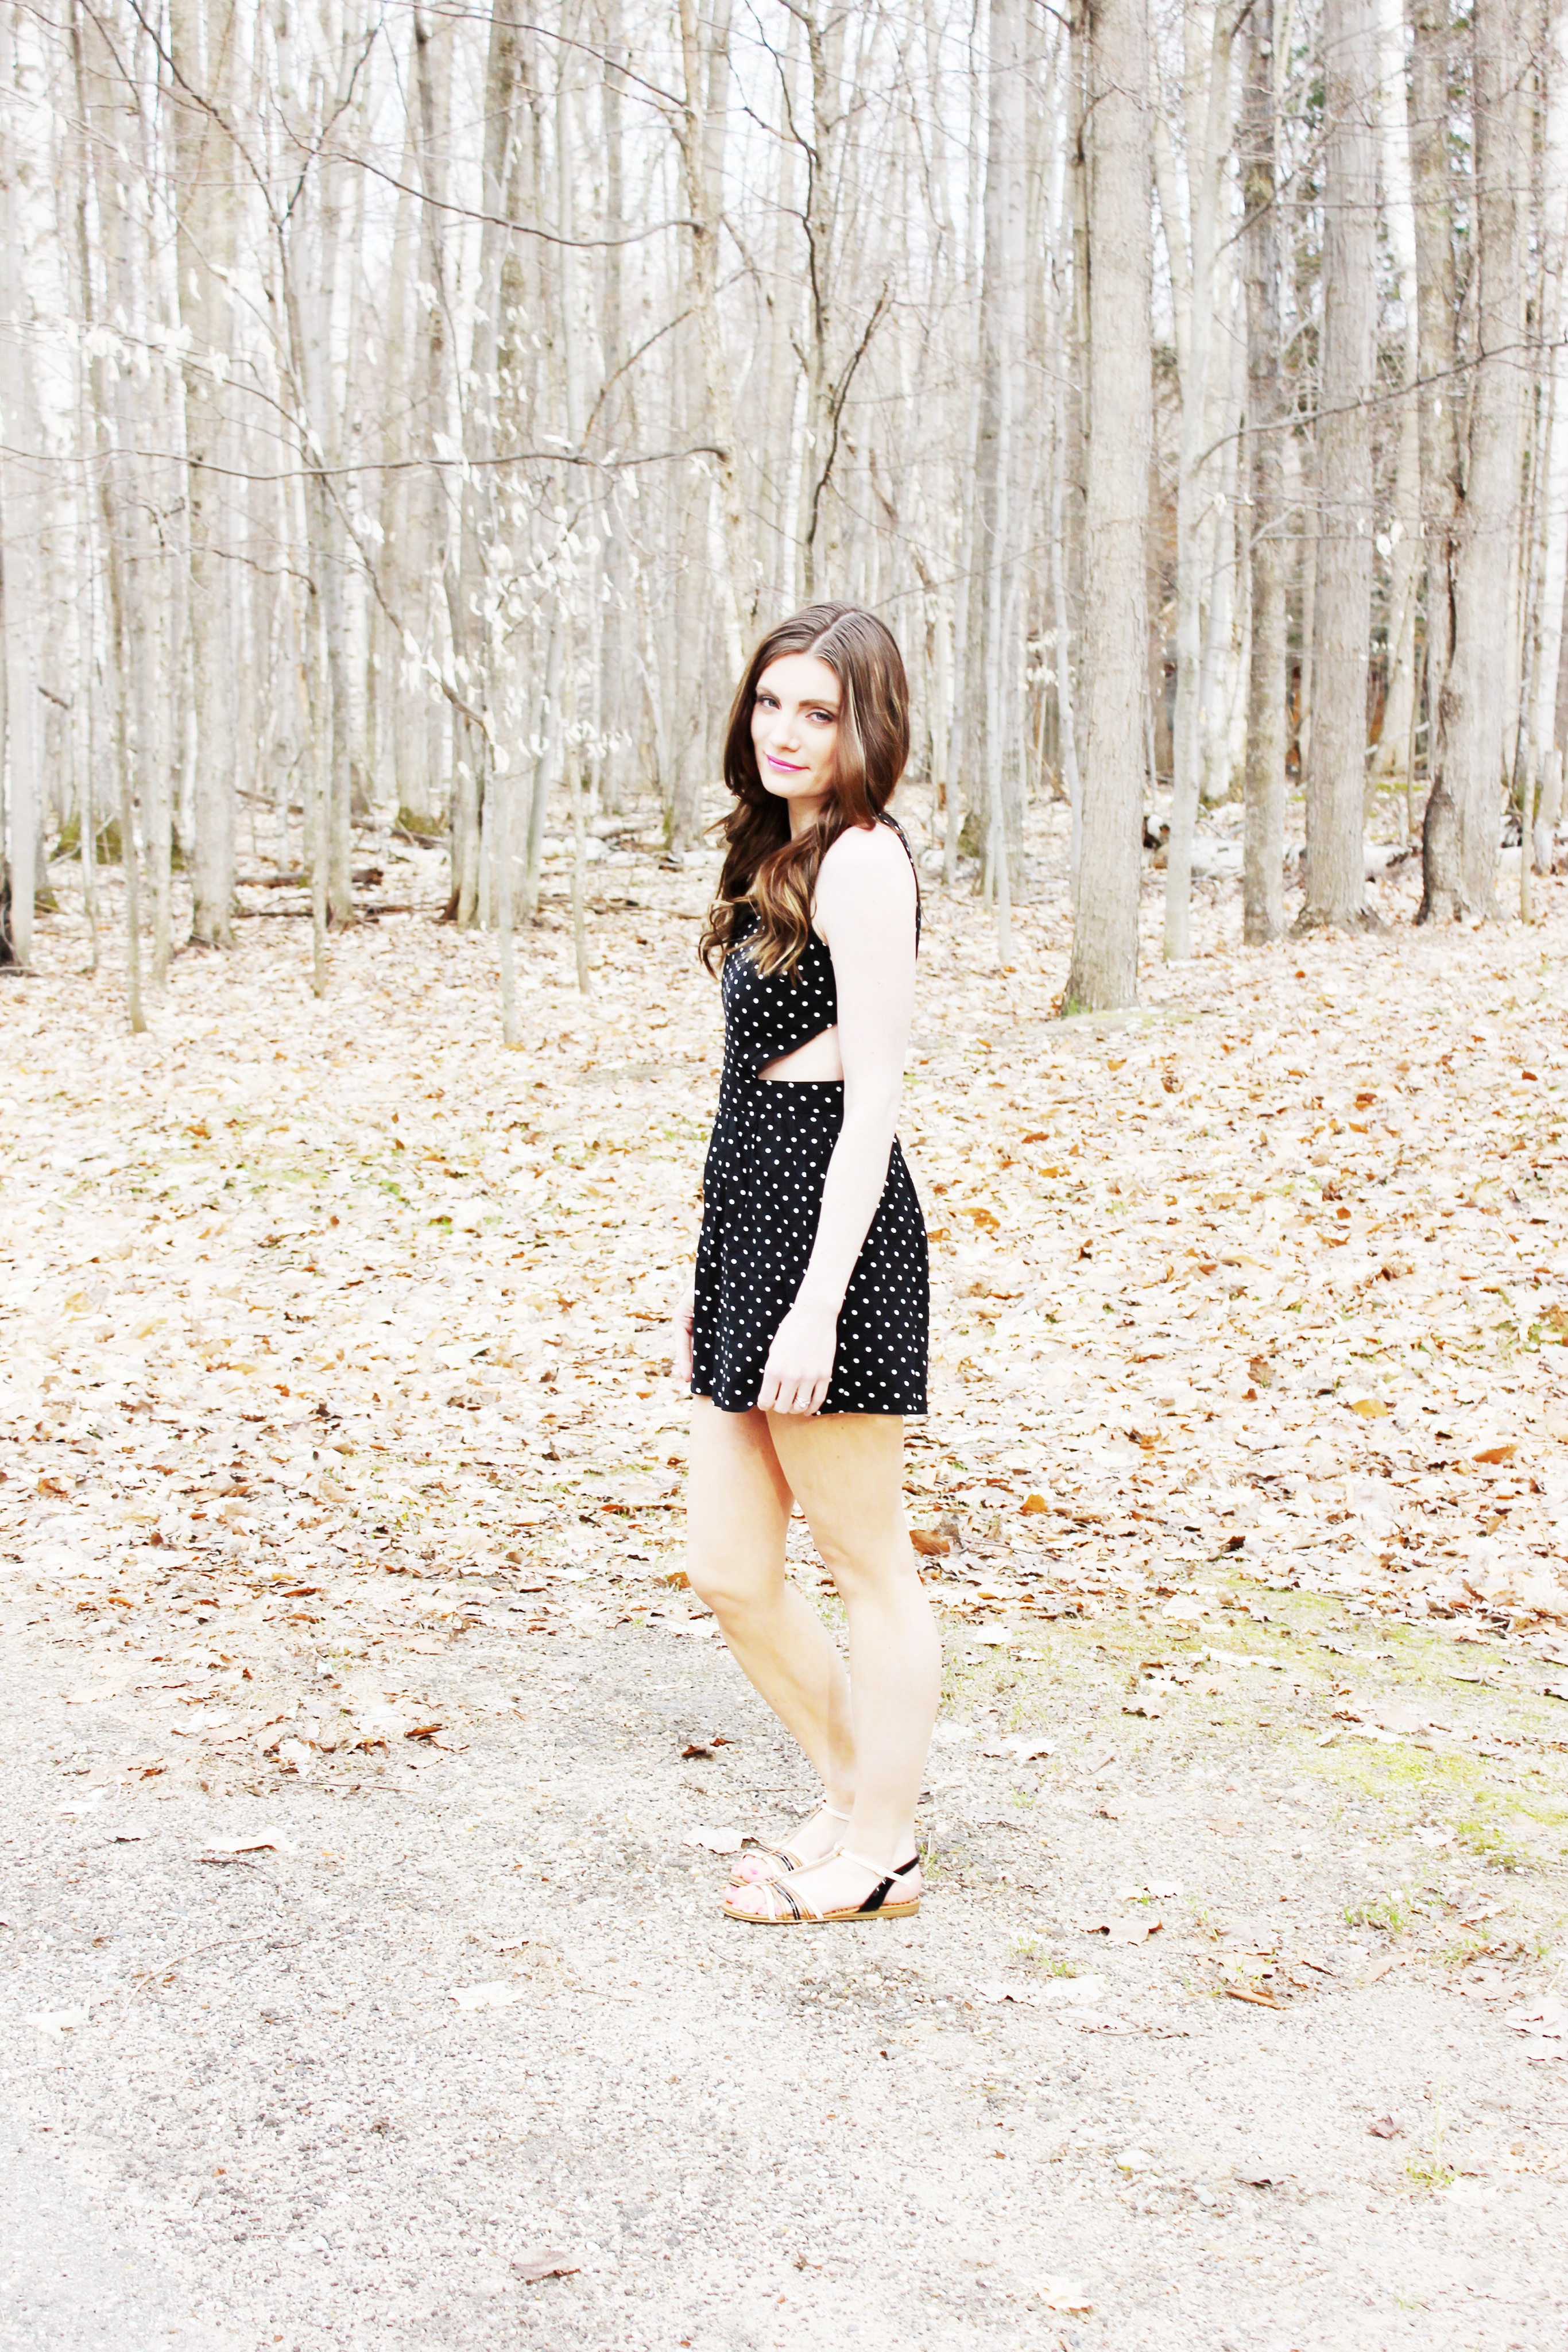
Sweater: Forever 21(*similar)

Shoes: Jessica Simpson Collection(*Similar)

Necklace: J. Crew

Earrings: Bauble Bar(*Similar)


I hope that you enjoyed this post! Where do you like to shop for affordable clothes? Is there a certain trend or style you are excited about for spring or summer? Let me know by commenting (click the link by the title of this post) or find me on Facebook, Twitter, or Instagram! Part Two of this series will go up Wednesday. Don’t forget to subscribe and have a wonderful week!


FacebookTwitterEmailPinterestShare

Filed Under: Fashion Tagged With: bauble bar, beauty blogger, easy outfit, fashion, forever 21, inexpensive spring outfit ideas, j crew, jessica simpson collection, leah tackles, leahtackles, Lifestyle Blogger, macys, on tread, outfit ideas, spring fashion, spring fashion 2014, spring outfit ideas, spring outfits, spring styling, styling, styling post, stylish outfit, target

MY E.L.F COSMETICS COLLECTION AND MINI REVIEWS

May 9, 2014 & 2 Comments

Hi there! Happy Frrrrrriday!

A few weeks ago someone asked me if I had used E.l.f Cosmetics products and mentioned that she had really good luck with the brand. E.l.f (eyes lips face) cosmetics is an extremely affordable drugstore makeup brand that carries products at $1, $2, $3 and $6 price points! I first stumbled upon some E.l.f cosmetics in either late high school or early college (shortly after the brands 2004 launch) but hadn’t used any of the products from the line consistently until the past couple of years. After being asked about what I had tried from the brand, I decided to pick up a few more things and do a post today on all of my e.l.f products and my thoughts. I have been seeing e.l.f products popping up in more stores lately, too!

Let’s get started…


MY E.L.F COSMETICS COLLECTION:


elf-cosmetics-collection.jpeg


Brushes:


*NOTE: The first three brushes will be pictured together underneath the third brush overview/review!


Eye Shadow Brush

This is a really great eye shadow brush for packing on color and I haven’t had issues with hairs falling out. At $1 you really can’t beat this for a basic everyday brush.

Blending Eye Brush

I have had this brush for over a year and get quite a bit of use out of it. It works well for blending, and I also use it sometimes for the outer V of the eye. The brush head did seperate off of the handle, but for a $1 brush it has defintely lived up to my expectations.

Concealer Brush

I actually do not use this for concealer! I use it with nail polish remover to clean up nail polish that gets around my cuticles or skin by my nail beds. I need to pick up another one of these and see how it works for its intended purpose ; ) But, it is AWESOME for cleaning up around your nails because it is such a small brush, and it doesn’t leave fuzzies like Q-tips. Just make sure once you use it on your nails, you only use it on your nails.

 elf-brushes.jpeg


Small Stipple Brush

This is such a great little brush! I like it for stippling on concealer, cream highlighters, and cream blushes! I want to pick up a couple of these! I highly suggest picking this brush up! It is a lot smaller than any of my other stippling brushes, so I showed it next to my Real Techniques Stippling Brush for comparison.


elf-small-stipple-brush.jpeg


Kabuki Face Brush

This brush is SO soft! I just picked this brush up, but I really like it for buffing and blending in powders. I washed it once just to see how it handled after a wash, and it did well with no fallout.


elf-kabuki-brush.jpeg


Face:


Blush in Candid Coral

This blush is SO soft! It feels wonderful!! It is a sheer, very light coral color that can be built up to a blush or used as a gorgeous highlight. It is light, but I think that this would be beautiful on lots of skin tones. This is one of my favorite e.l.f products and I want to pick up more colors! I also want to try the baked blushes! Have you tried e.l.f blushes? Do you like them? I would love to hear from you! Comment (click on the link by the title of this post) or find me on Facebook, Twitter, or Instagram!


elf-candid-coral-blush.jpeg


Studio Contouring Blush and Bronzing Powder in St. Lucia

This is another item that I just recently picked up because I thought it looked perfect for traveling. I love the blush color! It blends beautifully. The contouring bronzer is a tad more orange than I like and it does contain a very subtle shimmer, so I wasn’t sure if I would like it as a contour. As a bronzer, it is very pretty!!! I actually can use it as a contour if I use a very light hand and  really blend it into the skin. This has been compared to Nars Blush/Bronzer Duo in Orgasm/Laguna…so for $3 what a fun dupe to try out : )


elf-contouring-st-lucia.jpeg


Eyes:


Long-Lasting Lustrous Eye Shadow in Toast

This is a super soft mousse texture that blends beautifully! This color is very sparkly, but I was able to sheer it out to a wearable look for me. I wore this as a base to make my other eye shadows *pop* and it held up very well. I really want to try the new  e.l.f smudge pots that are being compared to M.A.C Paint Pots and Maybelline Color Tattoos.


elf-super-lustrous-eyeshadow.jpeg


Liquid Eyeliner in Black

This is eyeliner is SO black! The brush isn’t my favorite, but for $1 it is completely worth it to grab this and apply with an eyeliner brush! You can use the wand that it comes with, and I find that it works okay for a simple thin line.


elf-black-eyeliner.jpeg

elf-black-eyeliner.jpeg


Skin Care:

Moisture Stick

This is something that I always have in my bag!! It is fantastic to have on hand! I like to use it under my eyes if my concealer begins to crease (I got this idea from the amazing Emily Noel of BeautyBroadcast.net ) but you could for sure use this for dry spots on your hands, elbows, or knees as well!


elf-moisture-stick.jpeg


My e.l.f collection is pretty tiny, but overall I am very impressed with the quality of the products! I have yet to try any eye shadows or lip products from elf, so if you have any recommendations let me know!


Thank you so much for reading this!  If you have tried e.l.f products let me know your thoughts by commenting or finding me on Facebook, Twitter, or Instagram! If you have already subscribed, thank you! If you haven’t yet and you enjoy my blog, please subscribe! It’s easy, just enter your email in the box on the right and you’ll only get emails when I post something new  : ) Have a beautiful weekend loves!

FacebookTwitterEmailPinterestShare

Filed Under: Beauty Tagged With: affordable makeup, beauty, beauty blogger, cosmetics, drugstore dupes, drugstore haul, drugstore reviews, e.l.f, elf, elf cosmetics, elf makeup, eyes lips and face, eyes lips face, leah tackles, leahtackles, makeup, makeup collection, my elf cosmetics collection, my elf cosmetics haul

EASY WINE GLASS DECORATING DIY

May 7, 2014 & Leave a Comment

Hi there! Happy Wednesday!


wine-glass-decorating-DIY.jpeg


I hope that you’re having a great week so far! Today I have a really easy DIY project for you, and there is a good chance you have all of the materials at your house already. When my husband and I got married, we received lots of glassware, and so we have no shortage of wine glasses! I decided to make a couple of fun ones and I think they’ll be so cute when my girlfriends come to visit. I kept these ones pretty basic, but now I am itching to get out some stencils, rhinstones, and glitter for my next set (if I make more complex ones I will share them:) ) These make such cute gifts for bachlorette parties, birthdays, sorority events, or for a girls night ! You could also easily change this into a kid-friendly gift by switching to regular glass cups from the dollar store. NOTE: The top picture I made using glitter nail polish and stickers!


WINE GLASS DIY:


What You’ll Need:


wine-glass-DIY.jpeg


Wine glasses (or other glassware!)

Nail polish in colors of your choice (TIP: if you don’t want to use your expensive brands or favorites, pick up a few cheapie polishes! I have a crazy amount of nail polish, so I didn’t mind using some from my regular stash)

Clear nail polish top coat

Optional: Stickers


Step 1:

Wash and dry your glasses.


Step 2:

Paint your wine glasses however you choose. Be sure to not do very thick coats because it will cause the polish to run! It is better to go back over it with a second coat to build the color. If you are doing a complicated design, wait a little bit as each part dries. When you have the design how you like it, let it dry completely! Add stickers too if you’d like!


wine-glass-diy.jpeg


 wine-glass-decorating-easy-diy.jpeg


Step 3:

Paint over any part of the glass you painted or put stickers on with a coat of clear nail polish top coat.


wine-glass-tutorial.jpeg


Step 4:

Dry COMPLETELY, and then enjoy a nice glass of wine ; ) NOTE: Be sure to HAND WASH these glasses!


easy-DIY-wine-glasses.jpeg


I hope that you enjoyed this tutorial! If you liked it, please pin it onto your Pinterest account by hovering over any of the pictures and clicking the “pin” button. Thank you so much for taking the time to read this! It means so much to me! Don’t forget to subscribe (it’s easy!!! just enter your email into the subscribe box on the right of this page)! Have a wonderful day!! : )


FacebookTwitterEmailPinterestShare

Filed Under: DIY Projects Tagged With: bachlorette, birthday, crafty, diy, easy diy, girls night, leah tackles, leahtackles, pinterest, simple craft, sorority, sorority DIY, wine, wine glass decorating DIY, wine glass DIY

DELICIOUS KALE CHIP RECIPE!

May 5, 2014 & 3 Comments

Hi there! Happy Monday!

In my April Lifestyle Favorites and Big Announcement post on Friday I mentioned kale chips as a food favorite…they’re so so good! So today I want to show you how to make them! I found this recipe from Tayzerfun (she is hilarious!!) and I just added one additional seasoning to mine. If you enjoy this recipe, you can pin it onto your Pinterest account by clicking the “pin” button that shows up when you hover over any of the pictures in this post. Even if you have never eaten kale in your life, I really suggest trying these! They are so delicious, and you can change up the seasoning to your liking.


Kale Chip Recipe


Ingredients:


kale-chips-recipe.jpeg


1 bunch of fresh kale (TIP: I originally bought a box of kale but had better luck with a fresh bunch of kale because the pieces of kale were larger. The kale cooks down a lot so the smaller pieces make very tiny chips, but they were still yummy!)

Olive oil

Seasoned salt

Dill weed

Smoked paprika

Ground nutmeg


Directions:

Preheat your oven to 350 degrees. Wash your kale and then dry it COMPLETELY! If it is at all wet the kale will steam and not make a nice crunchy snack. Remove the kale from the stems. Lay the kale onto a cookie sheet with a small rim. Lay your kale out onto the cookie sheet, but be careful not to layer the kale or it will steam (a.k.a be soggy and not a crispy chip!). Drizzle the kale with a little bit of olive oil and toss to evenly coat. Season with seasoned salt, dill weed, smoked paprika, and a tiny ground nutmeg. The seasoning will be more concentrated as the chips will cook down, so be careful and don’t go too crazy unless you want to…! I don’t take my own advice at all, but I love heavily spiced things! Bake for about 9-12 minutes.


 kale-chips-recipe.jpeg


kale-chips.jpeg


Thank you for reading this and I hope that you enjoyed this recipe! If you try this out, or there is another recipe you would like me to make, comment (click the link by the title of this post) to let me know! You can also find me on Facebook, Twitter, or Instagram! I’m LeahTackles on all social media. I hope you are having a great start to your week!

FacebookTwitterEmailPinterestShare

Filed Under: Cooking Tagged With: blogger, easy kale chips recipe, easy recipe, easy snack, foodie, healthy chips, healthy snacking, homemade kale chips, kale, kale chips, kale chips recipe, leahtackles, recipe, yum

APRIL LIFESTYLE FAVORITES AND BIG ANNOUNCEMENT!!!!!!!!

May 2, 2014 & 1 Comment

Hi There! HAPPY FRIDAY!! : )

ANNOUNCEMENT!!!!!
I am THRILLED to announce that I am going to be writing a bi-weekly column for Pearls and Pastries Shop blog!! I wrote a guest post, Guest Blogger-Leah Tackles, and am so excited to be a part of it regularly now! My column is called Leah’s Friday Five, and my first post went up today! I will still be posting on the same Monday-Wednesday-Friday schedule on Leah Tackles. Please check out my column as well as the rest of Lauren’s blog and her AMAZING Pearls and Pastries Shop on Etsy!

Now today as promised I want to do a quick and to the point post on my lifestyle favorites for the month of April!

APRIL LIFESTYLE FAVORITES:


iPhone App:

Groovebook

This app costs $2.99/month and you can print up to 100 photos from your phones photo albums! I love this for scrapbooking and because I am horrible about not printing photos for months at a time!!


TV Show:

Hart of Dixie

I have loved Rachel Bilson since her days on The O.C (I bonded with my college roommates instantly over that show!) and she is just as lovable in this. The show is about a doctor, Zoe (Rachel Bilson), from NYC who ends up living in a tiny town in Alabama…hilarity ensues ; ) But my favorite part of the show is the fashion! Oh my goodness I love it!! I want it all!


Book:

The Happiness Project by Gretchen Rubin

I am in the middle of listening to this on Audible.com and I think it’s such an awesome idea! Even if you only take a way a few pieces of advice or ideas, I think it’s worth a listen. The book is about her journey each month working on different aspects of her life over the course of a year to make her life happier.


Girl Power Favorite:

Gretchen Rubin

She is the author of The Happiness Project, and I just think it’s pretty gutsy for someone to admit that they are happy but could be happier : )


Workout:

C25K iPhone App

I did the Couch to 5K early last year and loved it! I recently had been trading in my 30 minute runs for walks and needed a way to get back into running! And this app works! I hadn’t been running since having my daughter in 2011 and when I first used this app I was skeptical. I love it!


Song:

Dark Horse by Katy Perry

I.Can’t.Stop.Singing.This!


Movie:

Frozen

My 3 year old just got this for her birthday! HOW CUTE! I already loved the songs, now I am hooked on the movie too! It’s SO good!


Food:

Blue Diamond Natural Oven Roasted Almonds in Dark Chocolate


blue-diamond-chcolate-almonds.jpeg


One of my best friends sent me some of these in a care package over a year ago and I have been hooked ever since! I like chocolate at night, and these really do the trick! I count out servings (yes, seriously) most of the time so I don’t go too crazy…but you really don’t need to because a few go a long way!


Kale Chips:

Oh my goodness! These are amazing! I have made 3 batches since last week! I am a nighttime snacker! Stephan and I usually stay up pretty late getting things done and getting some kiddo-free time while they are sleeping, so I always want a snack after dinner! I am going to make a kale chip recipe post soon!! : )


Home:

King Cube Tray


king-cube-tray.jpeg


This is a silicone ice cube tray that makes giant ice cubes! It is suggested for use in cocktails, but can also be used iced tea or soda. It’s awesome because it doesn’t dilute your drink nearly as much as traditional ice cubes.


Copper Milagro Heart


milagro-miracle-heart.jpeg


This is a beautiful rustic copper heart that we got recently as a gift from my mom (thank you!!). The Spanish word “Milagro” means “Miracle” and it’s a beautiful handmade reminded of the miracle of love. I am going to be hanging this over my desk on my gallery wall.


Favorite Moments:

1) My son, Connor, walking!
2) My daughter, Hailey, blowing out her birthday candles!
3) Watching Frozen with my hubster, Steph, while the kids were asleep!


Okay, that’s it : ) I hope that you have a wonderful weekend!! If you have any questions or comments, please let me know! What have been your lifestyle favorites lately? I would love to hear about them! You can comment by clicking the link by the title of this post, or find me on Facebook, Twitter, or Instagram! And if you enjoyed this post, please subscribe!

FacebookTwitterEmailPinterestShare

Filed Under: Book Club, Cooking, Decor, Exercise, Family Tagged With: april favorites, april lifestyle favorites, audible, blue diamond almonds, c25k, chocolate almonds, copper heart, couch to 5k, decor, exercise, family, favorite moments, frozen, groovebook, hart of dixie, home, katy perry, king cube tray, lifestyle, lifestyle favorites, milagro heart, movie, the happiness project, tv, workout

April Beauty Favorites!!!

April 30, 2014 & Leave a Comment

Hi There! Happy Wednesday!!

I cannot believe that April is already ending! Didn’t we just celebrate Valentine’s Day?! Time is FLYING by, as usual! Because it is the end of the month, I want to share my beauty favorites today! I will also be sharing my “lifestyle” favorites (a.k.a my everything-that-isn’t-beauty-related favorites) this Friday. Be sure to comment (click on the link by the title of this post) or find me on Facebook, Twitter, or Instagram to tell me what YOUR favorite products have been for the month of April! I would LOVE to hear from you! I also, as usual, have created a Luvocracy collection if you’d like more information on any of these products, or would like to shop online. I’m feeling chatty today, so I’ll stop myself before I ramble on and just get started ; )


LEAH’S APRIL BEAUTY FAVORITES:


april-beauty-favs.jpeg


Lips:


Smashbox Be Legendary Lipstick in Pretty Social


smashbox-prettysocial.jpeg

smashbox-pretty-social.jpeg

This lipstick is long wearing, feels nice on the lips, and has very sleek matte packaging. To me this is a perfect light cool toned pink, it’s light but not TOO light…yet light enough that I can easily wear this without a lip liner or constant touch ups. This is neutral enough that I can wear it with a lot of different make-up looks.


Maybelline Color Sensational Lipstick in 915 Blushing Beige


maybelline-color-sensational.jpeg

maybelline-color-sensational-nude.jpeg


This is one of the nude colored tube lipsticks from the Maybelline Vivid line. I LOVE the formula of the Maybelline Vivid lipsticks: it is very moisturizing, and feels very comfortable on the lips. I love this color because it is a very wearable, slightly pink-y nude and it looks great with everything.


EOS Lip Balm in Summer Fruit


eos-lip-balm.jpeg


I love this lipbalm! I use them under lip color or by itself. It is always in my bag!


Cheeks:


Maybelline Master Glaze Blush Stick by FaceStudio in 20 Pink Fever


maybelline-master-glaze.jpeg

maybelline-master-glaze-pink-fever.jpeg


This is a cool toned cream blush in a stick form. I like to stipple this on with a brush or blend a very tiny amount on my fingers. It blends easily and lasts on my combination/oily skin. This color IS intense, but blends out to be a stunning color.


Maybelline Master Hi-Light by FaceStudio Hi-Lighting Blush in 251 Natural


maybelline-master-hi-light.jpeg

maybelline-hilight.jpeg


This is part of the Dare To Go Nude Spring 2014 Limited Edition Collection from Maybelline. This is a golden highlight that is absolutely stunning! I have worn this every day since I bought it, and I know I will use it all summer! It works so well on my pale skin, but I think it would also look gorgeous on deeper skin tones. If you come across this, pick it up before it’s gone! I hate when they make colors like this limited edition!


FACE:


Laura Mercier Secret Brightening Powder 1


laura-mercier.jpeg


This is a setting powder that I use almost daily under my eyes! It brightens up the area, and doesn’t settle into any fine lines. This is my go-to under eye setting powder.


Estée Lauder Double Wear Stay-in-Place Makeup in 1C1 Cool Bone


estee-lauder-double-wear.jpeg


This stays all, covers everything, and makes my skin look perfect! I love this foundation for my combination/oily skin. It even stays on my nose area where foundation likes to come off of on me first. A little goes a long way with this foundation and it does set quickly, so work in sections on your face!


Estée Lauder Double Wear Brush-On Glow BB Highlighter in 1N Extra Light


estee-lauder-bb-concealer.jpeg


This is a beautiful brightening concealer for the under eye area! I like to dot it on with the brush it comes with, but then I use my own brush or my fingers to blend it out.


Estée Lauder DayWear


estee-lauder-daywear.jpeg


This is my favorite moisturizer for day and night! It never leaves my skin feeling oily (we will see how it does this summer!) and provides lots of moisture to nourish my skin.


EYES:


Anastasia Brow Wiz in Medium Ash


anatasia-brow-wiz.jpeg

brow-wiz.jpeg


This is my favorite eye brow pencil! I had always preferred powders until I found this pencil! It is a super fine point that allows you to make tiny strokes that look soft and natural. It also comes with a spooli on the other end, which is nice! Love this!


NAILS:


Nicole by O•P•I in Am I Making Myself Claire?


 nicoleopi-am-i-making-myself-claire.jpeg

This is from the Modern Family Collection by Nicole by OPI and is such a unique color that I’ve been loving for spring! It is a gray-ish lilac cream color, and the formula wears well on the nails.


Sally Hansen Xtreme Wear in 405 Coral Reef


sallyhansen-coralreef.jpeg


This is a GORGEOUS coral color for spring! It is just so bright and beautiful, and shockingly I didn’t have any coral shades like this in my collection! The price is right with this polish, and the formula is great.


Burt’s Bees Lemon Butter Cuticle Cream


burtsbees-cuticlecream.jpeg


I didn’t notice a difference with this immediately, but I kept using it every night for a few weeks and now I can see a big difference. I had this in my collection for so long just sitting unopened (it came with a set I believe that I had gotten for Christmas) but I am so glad I tried it. It smells great too! My one complaint would be that it can be slightly difficult to open.


RANDOM:


Warm Lemon Water!!


lemon-water-benefits.jpeg


I have been taking 2 minutes every morning to heat up some water in the microwave and squeezing a lemon into it because of the many heath and beauty benefits! I am no expert, I am just experimenting with it right now, so I will link one of the websites that I found that explains why lemon water is beneficial. I also brush my teeth BEFORE drinking the lemon water, because I read that if you brush immediately after it is actually worse for the enamel on your teeth. I do rinse my mouth out with water after drinking my lemon water.


Wow! Another long post : ) If you read all that, thank you! What products have you been loving this past month? I would love to hear about them! Comment (just click the link by the title of this post!) or find me on Facebook, Twitter, or Instagram! Please also let me know if you have any requests for things you would like to see on my blog! If you have enjoyed this, please subscribe! If you have already subscribed, thank you!!! Have a fantastic day!

FacebookTwitterEmailPinterestShare

Filed Under: Beauty Tagged With: Anastasia Brow Wiz, April 2014, April Beauty Favorites, beauty, beauty blogger, beauty favorites, blogger, Brow Pencil, Brow Wiz, Burts Bees, Burts Bees Cuticle Cream, Cuticle Cream, double wear, EOS, EOS Lipbalm, estee lauder, Estee Lauder Concealer, Estee Lauder DayWear, Favs, leah tackles, Lemon Water, Lemon Water Benefits, Lifestyle Blogger, Maybelline Buffs, Maybelline Color Sensational, Maybelline HiLight, Maybelline Limited Edition, Maybelline Master Glaze, Maybelline Master Hilight, nicole by opi, opi, sally hansen, Sally Hansen Xtreme Wear, Smashbox, Smashbox Pretty Social

Bonus Post! Pictures of Hailey’s 3rd birthday!

April 29, 2014 & Leave a Comment

Hi there! Happy TUESday!

There is another bonus post this week because we had another fun that I wanted to share with you! Our daughter, Hailey, turned 3 this past Saturday, and we had a wonderful day celebrating with family and friends : )

Happy 3rd Birthday Hailey Madison! We love you so!


leahtackles-haileymadison.jepg

leahtackles-hailey-is-3.jpeg

Hailey-is-3-leahtackles.jpeg

leahtackes-birthday.jpeg

leahtackles-haileys-3rd-bday.jpeg

I hope that you enjoyed this quick little peek into Hailey’s birthday party!! Let me know if you like these types of posts by commenting or finding me on Facebook, Twitter, or Instagram! Have a great day!!

FacebookTwitterEmailPinterestShare

Filed Under: Family Tagged With: 3rd birthday, birthday party, birthdays, family, friends, growing up, hailey, hailey is 3, hailey madison, hello kitty, hello kitty party, leah tackles, leahtackles, little love

HOW TO FIX BROKEN EYE SHADOW! QUICK TUTORIAL!

April 28, 2014 & Leave a Comment

Hi There! Happy Monday!

I hope that you had a wonderful weekend! Our daughter turned 3 on Saturday, and we celebrated with family and friends! It was a great party, and we were so happy that she had fun : ) In my April PopSugar Must Have Box my Too Faced eye shadow palette arrived with one of the shadows broken, PopSugar replaced it, but I wanted to repair my broken one too. Today I thought that I would show you a quick tutorial on how to repair broken eye shadow, blush, bronzer, or most powder makeup products. There are several ways to do this, and I have pinned several different techniques on my Pinterest, but I am going to show you my favorite method.


WHAT YOU’LL NEED:


How-to-fix-broke-eye-shadow.jpeg


Broken eye shadow or other powder product ; )

A pen

Aluminum foil

Scissors

Rubbing alcohol in a small spray bottle

Paper towel

Chapstick tube


STEP 1:

This step is only needed if your eye shadow is in a palette with other shadows. Use the aluminum foil to cover up the shadows that are not broken.


STEP 2:

Use the pen to smash the broken pieces powder until it looks like a finely milled loose powder.


how-to-fix-eye-shadow.jpeg


STEP 3:

Spray fairly heavily with rubbing alcohol.


how-to-fix-eye-shadow-tutorial-leahtackles.jpeg


STEP 4:

Wrap your chapstick tube in paper towel and press down onto the broken powder.


broken-eye-shadow-leahtackles.jpeg


STEP 5:

Allow to dry for several hours and Ta-Da! Your powder may not be as pretty as before it broke, but it should work just as well and be all in one piece!


tutorial-leahtackles.jpeg


I hope that this was helpful for you! Please feel free to pin this onto your Pinterest account by clicking the pink “pin” button that shows up when you scroll over any of the pictures. If you have any questions or comments, let me know by commenting (click on the link by the title of this post) or find me on Facebook, Twitter, or Instagram! Thank you so much for taking the time out of your day to read this, and I hope you have a wonderful week! Don’t forget to subscribe! : )

FacebookTwitterEmailPinterestShare

Filed Under: Beauty, DIY Projects Tagged With: beauty blog, beauty tips, beauty tutorial, eye shadow, fix eye shadow, how to fix makeup, how-to fix broken eye shadow, leah tackles, leahtackles, make up, makeup, makeup tips, makeup tutorial, Pop Sugar Must Have, quick makeup tip, too faced, tutorial

HAIR TUTORIAL-EASY EVERYDAY CURLS FOR BEGINNERS!!

April 25, 2014 & 5 Comments

Hi there! Happy Friday!!!

A couple of weeks ago I received a request on Instagram to show how I curl my hair. I love getting comments and thank you so much for asking! I have a few different irons that I use depending on the type of style or curl type I want, but I thought I would start with the style I do most often. I like to do loose, big curls that give you nice volume and soft waves because it’s a quick hairstyle that isn’t too fussy. I know some people are intimidated by curling hair, and I completely understand because I couldn’t curl my hair well until I was 25! NO joke!  In college my best friend would always have the most beautifully done curls, and she made it seem so easy! Then I would try and end up with a kink from the iron or curls that just didn’t look right. Finally, I got a new curling iron and practiced a few times and it was like all of a sudden I could curl my hair! And I haven’t looked back….now I curl my hair several times a week and absolutely love it.

ABOUT MY HAIR:

I have naturally straight hair, it doesn’t dry completely stick straight like it did before kids, but it’s still very straight naturally. I have very fine hair, but a lot of it. My hair can sometimes be dry at the ends, and I use dry shampoo in the roots to avoid any greasiness on second day hair.

PRODUCTS I USED:


curl-tutorial.jpeg


The “Wet” Brush

It’s a 10 Miracle Leave-In Product

Aussie Hair Insurance Split End Protector

Not Your Mother’s Beat The Heat Thermal Shield Spray

TeaZe by Phillips Rat Tail Comb

Large Hair Claw

Hot Tools 1 1/5 Inch Curling Iron (these are my favorite less expensive curling irons!)

Abba Pure Performance Hair Care Style Spray

It’s a 10 Miracle Styling Serum


STEP 1:

Apply leave-in conditioner and split end protector. Let hair air dry if possible (sometimes I do this overnight!) or blow dry. This is also a great time to put in a volumizing product, but I skip this step most days.


air-dry-hair.jpeg


STEP 2:

Spray you hair with a heat protector and then section your hair using a teasing combs pointed end and clip it up with a large hair claw. TIP: If you have very thick hair you can section it into more sections using sectioning clips like these, which is what I prefer to do when I have more time, but for a quick style, this works!


leahtackles-hair-tutorial.jpeg


STEP 3:

Take the bottom section of your hair and split it so that half over your shoulder on one side and the other half over the other shoulder. Then, take a 1 or 1 1/2 inch piece of hair from the back and hold it with the opposite sides hand (so your hand is up and over your head)and then open the curling iron and put the clamp so it faces front and the barrel faces back. Run the iron down to the bottom of your hair, leaving out a little bit at the ends, and turn the iron away from your face. Hold the iron for about 15 seconds and then release the curl. Be careful with your heat settings on the curling iron (if your iron has adjustable heat settings), especially if you have fine or thin hair.  I like to catch the curl with my hand and hold it for a few seconds to get the curl to set.


curling-hair-leahtackles.jpeg

curl-tip.jpeg


STEP 4:

Repeat this all the way until the front of the first side of your face and then continue to the next side starting again in the back working your way front. Be sure to switch hands and curl with the same hand as side that you are curling. It was very hard for me to get used to the idea of curling with my left hand when curling the left side of my head, I’m a righty, but it makes such a difference! (Thanks to my patient friend for teaching me that! Sorry it took me so long to “get” it! ; ) )


STEP 5:

Let down the top section of your hair and you’re done! JUST KIDDING!! Do NOT leave the house like this!! ; ) Do the same thing as STEP 4. You may find a few missed pieces, so feel free to curl or re-curl those (I almost always have at least one, right in the back of my head, of course!). Don’t worry if some curls are bigger than others, this is supposed to be casual and un-done.


easy-curls-tutorial.jpeg


STEP 6:

I like to finger comb through some of the curls (again, to make the style a little more un-done and casual), but be careful not to do it too much so you undo your pretty curls! I then finish it off with some hair spray and a little bit of oil or serum on the ends of my hair.


loosecurltutorial.jpeg


That’s it!! It really is a simple hairstyle, and with a little practice I promise anyone can do it! If you enjoyed this hairstyle, please subscribe to my blog (enter your email in the subscription box on the right and you’ll only get emails when I post something new!) or hover over a picture and click the “Pin” button to pin it on your Pinterest account. I will be wearing this type of hairstyle tomorrow for my daughters 3rd (!!!!!) birthday party, and if you rock a similar hairstyle please let me know by commenting or finding me on Facebook, Twitter, or Instagram! I would LOVE to hear from you!  I hope you have a great weekend : )

FacebookTwitterEmailPinterestShare

Filed Under: Beauty Tagged With: anyone can curl hair, big curls, curly, curly hair for beginners, curly hair help, curly hair tutorial, easy hair, easy hairstyle, hair, hair tutorial, happy friday, hot tools, leah tackles, loose curls, loose waves, with love and thanks

DIY LIPSTICK HOLDER AND ORGANIZER!

April 23, 2014 & Leave a Comment

Hi there! Happy Wednesday!

I love lip products, and even though I have large makeup storage drawers, my lip products are always sliding around and unorganized which I hate! I absolutely love the look of the acrylic lipstick holders that you can buy on amazon or other websites, and I will probably eventually get one of those to display my most used lipsticks on my vanity, but I needed something for all my other lip products. I recently came across a video tutorial from ItsKeerstin where she recreated and modified a super inexpensive and practical way to organize all of her lipsticks…it’s awesome and I wanted to share my own version as well! ItsKeerstin is  hilarious and I really enjoy her videos!! You can easily decorate it to make it fit your style, or keep it pretty simple like I chose to do since I will be keeping it in a drawer. If you like today’s tutorial, please considering hovering over any of the pictures until you see the pink “pin” button and pinning it to your Pinterest account… I appreciate it!!


SUPPLIES:


DIY-Lipstick-Holder.jpeg


3-in-1 Cotton Sets from Dollar Tree (I used 2 but you can get more for a bigger storage container. I have only seen these at Dollar Tree, but I did find the 3-in-1 Cotton Set on Amazon, although there is $4 shipping)

Thick cardstock, cardboard, or poster board in the color of your choice

Scissors or a paper cutter

Glue gun


COST:

Less than $10 (mine cost $2!)


STEP 1:

Empty out the cotton swabs, cotton swabs, and cotton balls from the Cotton Set box. Then, soak the box in hot water or use Goo Gone to remove the labels on the box.


STEP 2:

I cut out my poster board to fit 2 of the Cotton Set boxes ahead of time with a pair of scissors simply by tracing them with a pencil onto the paper.


STEP 3:

Cut the lid off of the Cotton Set box with a pair of sharp scissors (it was a lot easier to get a clean cut then I thought it would be!)


DIY-LIPSTICK-STORAGE.jpeg


STEP 4:

Be sure to have everything set up how you need it because hot glue sets quickly! Use your hot glue gun to put two lines of glue down the length of the poster board or cardstock for the first Cotton Set box and press it onto the glue. Do the same thing with the next Cotton Set box and so on. Be sure to have all of the boxes facing the same way if you are doing more than two boxes, otherwise the tab from where the lid would have snapped closed will cause the boxes to not line up perfectly.


lipstickstorage-diy.jpeg


STEP 5:

Carefully put a line of glue between the boxes and press together (you only have to do this at the very top, and you only need a tiny amount of glue because it’s more important to work fast then to get a perfect line).


lipstickholder-diy.jpeg


STEP 6:

Decorate the box if desired or leave so that it is clear on the sides like I chose to do.


lipstick-holder-diy.jpeg


STEP 7:

Fill the box with lots of lippies!!


lipstickholderdiy.jpeg


I hope that you enjoyed today’s quick and inexpensive DIY project! If you try this out for yourself or have any questions, please comment (click the link by the title of this post!) or find me on Facebook, Twitter, or Instagram! Thank you so much for reading this and thank you SO much to those of you who have subscribed to my blog! To subscribe, enter your email on the right side of this page in the “subscribe” box…it’ll make my day ; ) I hope you have a fantastic day and I will talk to you on Friday!!


FacebookTwitterEmailPinterestShare

Filed Under: Beauty, DIY Projects Tagged With: beauty blogger, blogger, diy, diy beauty, diy lipstick holder, diy project, do it yourself, dollar tree, leah tackles, lippies, lipstick, lipstick holder, lipstick organizer, lipstick storage, make up, makeup storage, organization

« Previous Page
Next Page »

SUBSCRIBE

Leave your email to subscribe!

SEARCH

SPONSORS

ARCHIVES

GRAB MY BUTTON


copy & paste code

site design by The Kinch Life Design & development by Olive & Ivy Design