Leah Tackles

  • Home
  • About
  • Policy
  • Beauty
  • Fashion
  • Cooking
  • Exercise
  • DIY Projects
  • Decor
  • Book Club
  • Family

DIY SNOWMEN HANDPRINT ORNAMENTS!

December 10, 2014 & Leave a Comment

Hi there! Happy Wednesday!

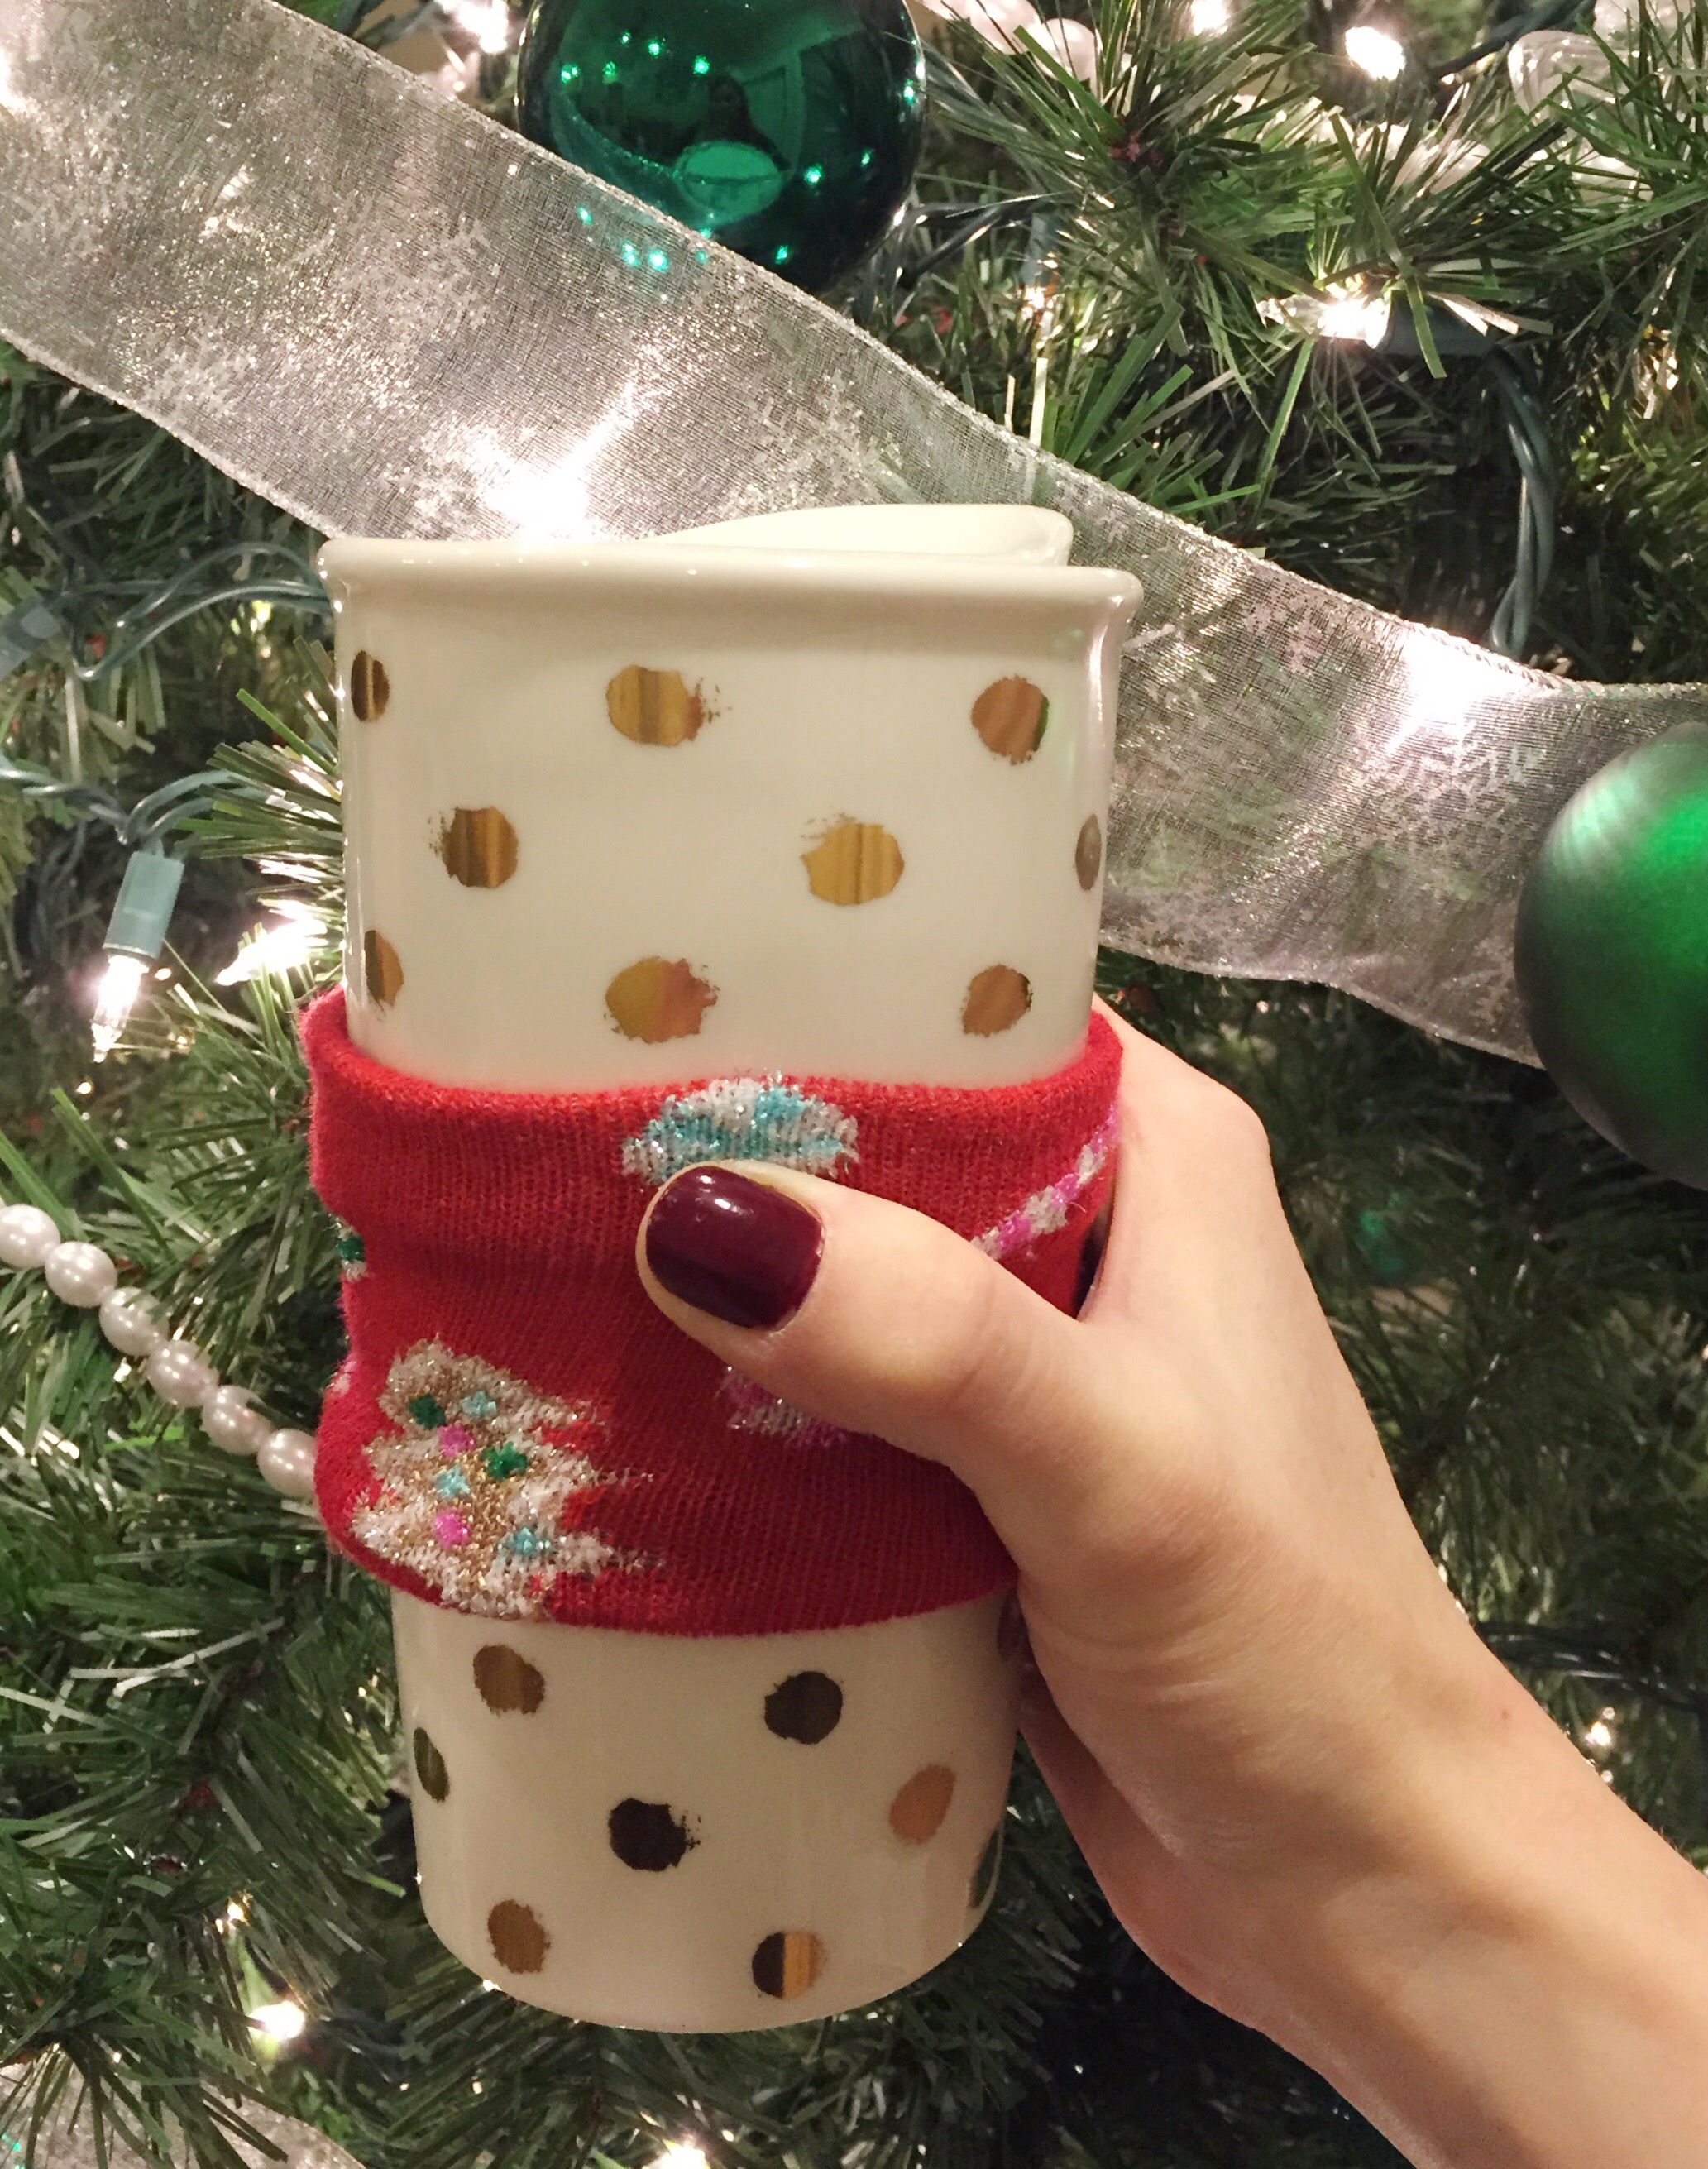
Thank you for stopping by my blog today!! I hope that you enjoy this post and will stay awhile : ) Last year for Christmas my kids, Hailey and Connor, made some of our friends and family some DIY ornaments, and they turned out so well that we decided to make a fun ornament this year as well. I haven’t decided if this will be our gift from them this year, but we did have fun making some for our house!


DIY SNOWMEN ORNAMENTS:

What You’ll Need:

snowmenornamentdiy-leahtackles.jpeg

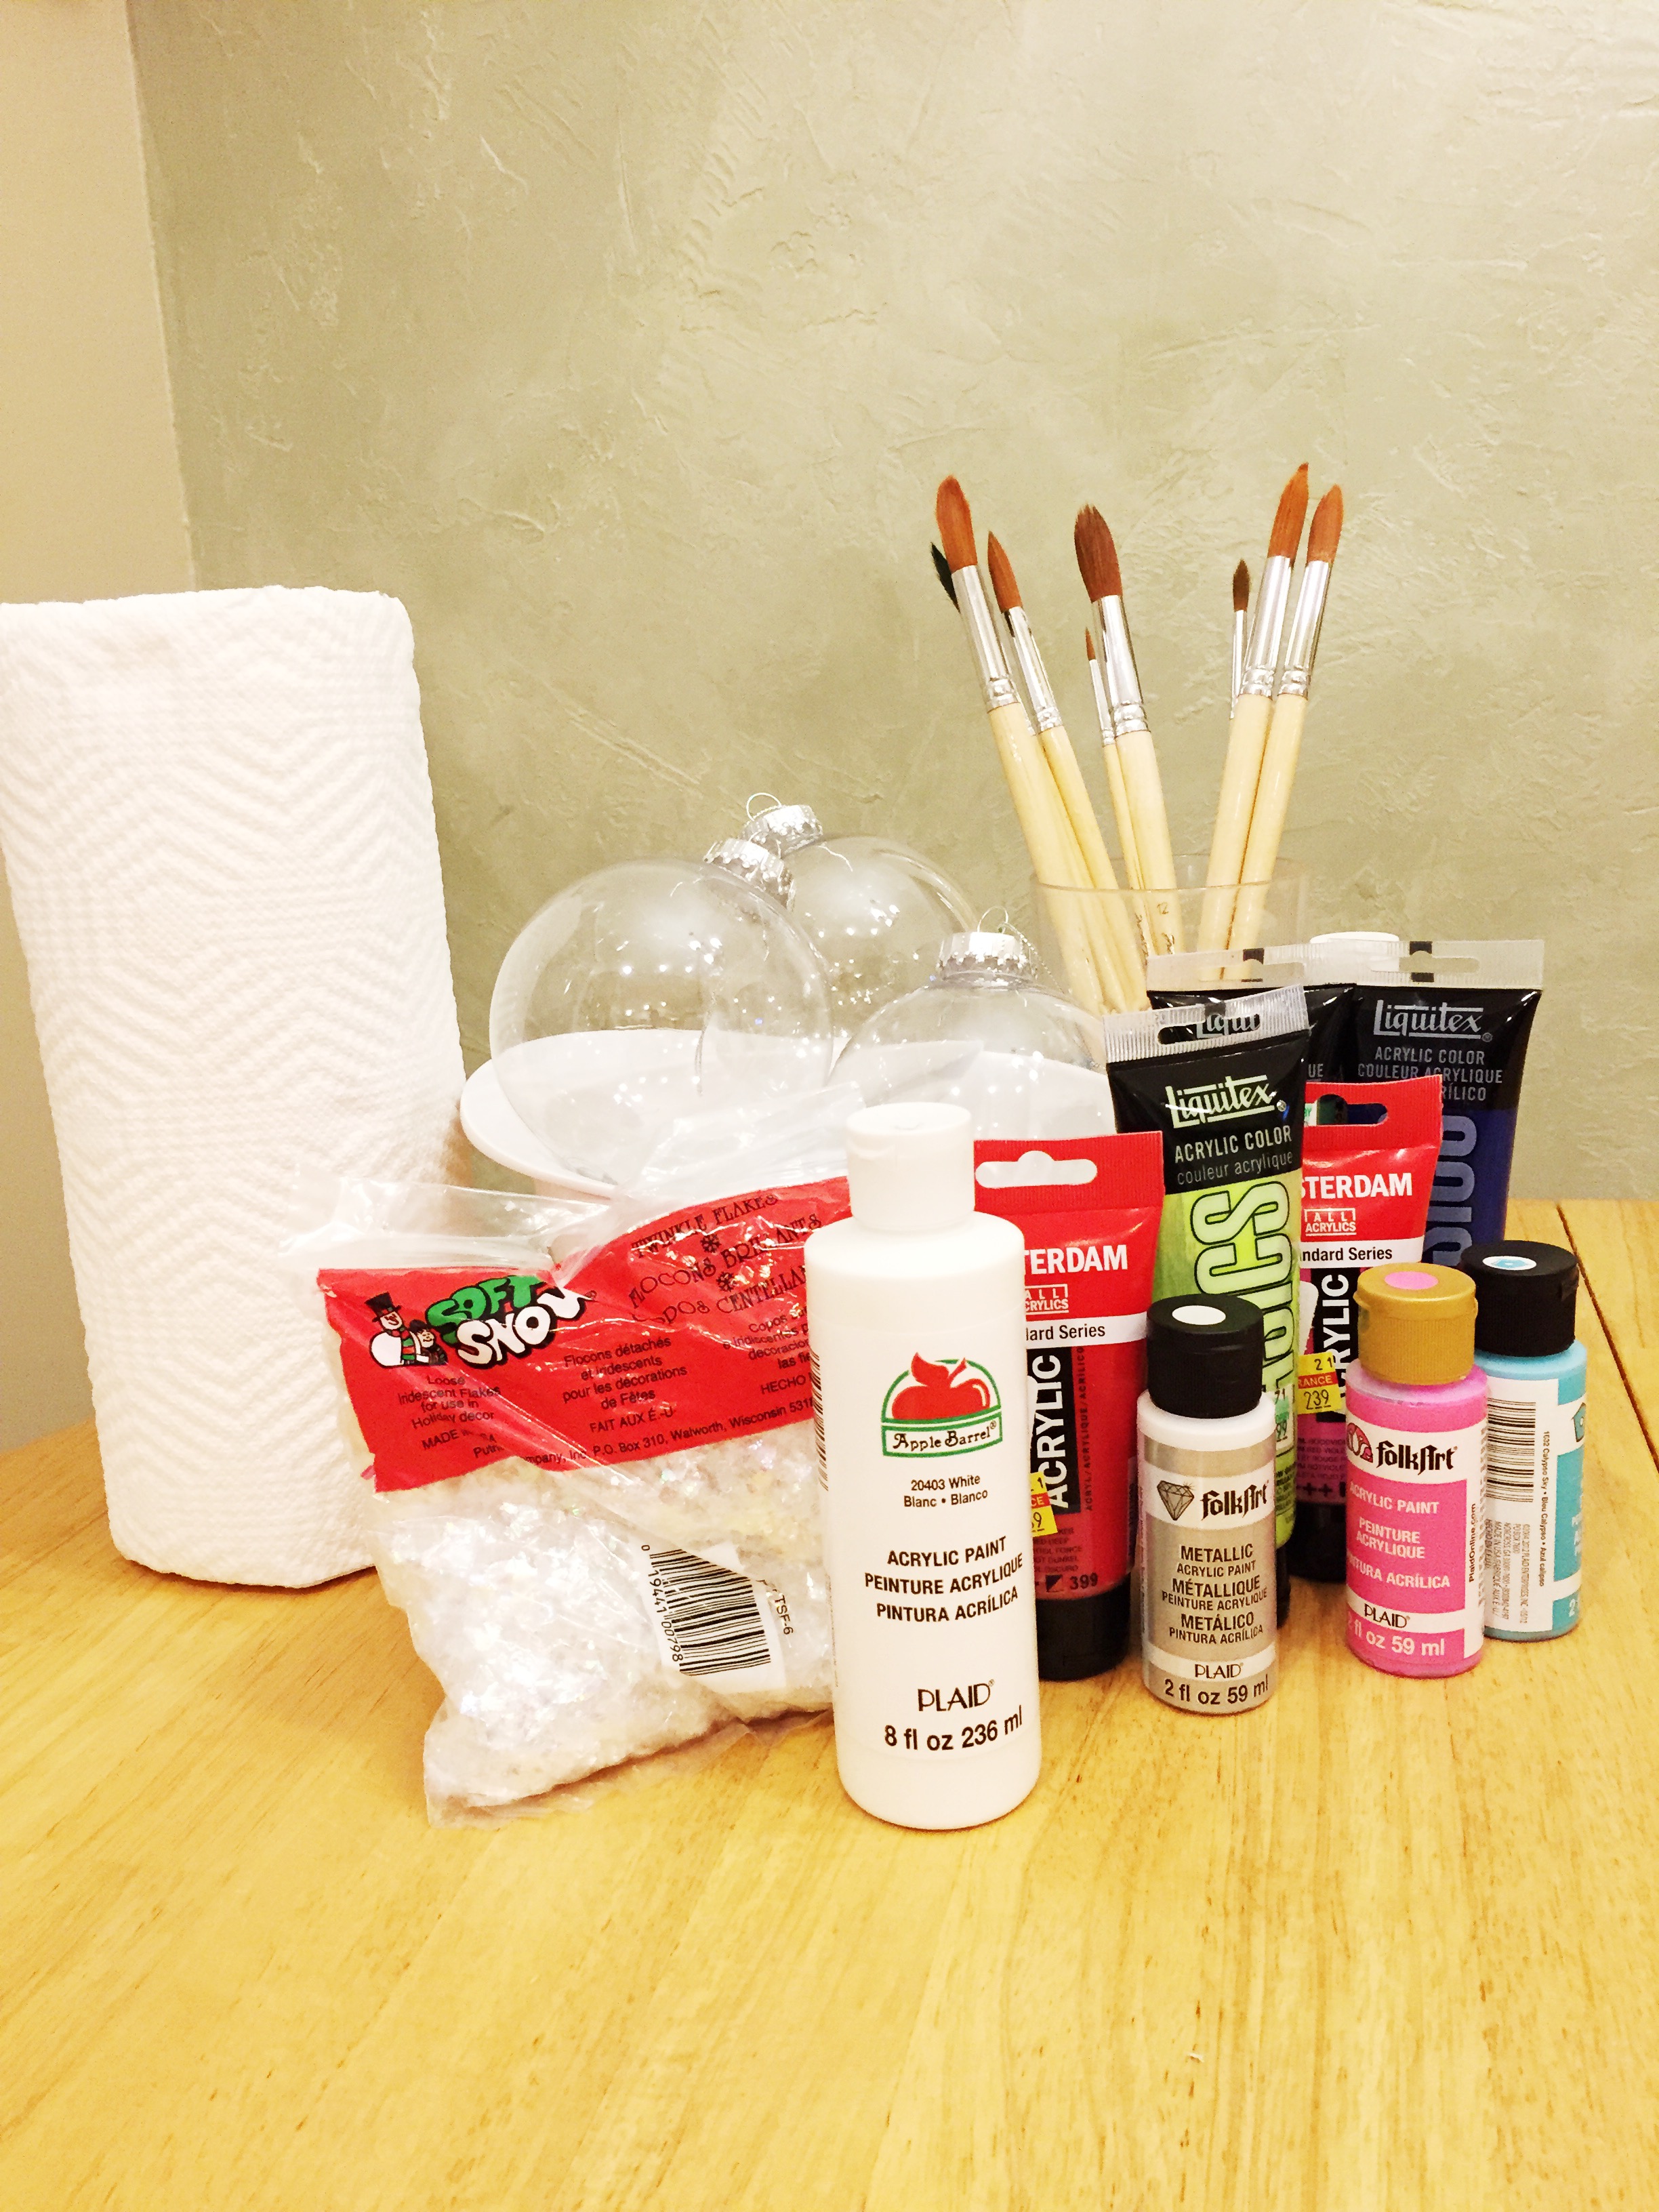
Large Clear Plastic Ornaments (*Tip: I found mine at Dollar Tree and Meijer, but most big box stores or craft stores will have these!)

Soft Snow Shimmer Flakes or whatever you choose to put inside your ornament (blue ribbon, glitter, or confetti would all be fun options!)

White Acrylic Paint

Assorted Acrylic Paint Colors

Paint Brushes (I used one medium sized one and one very small pointed one)

Step 1:

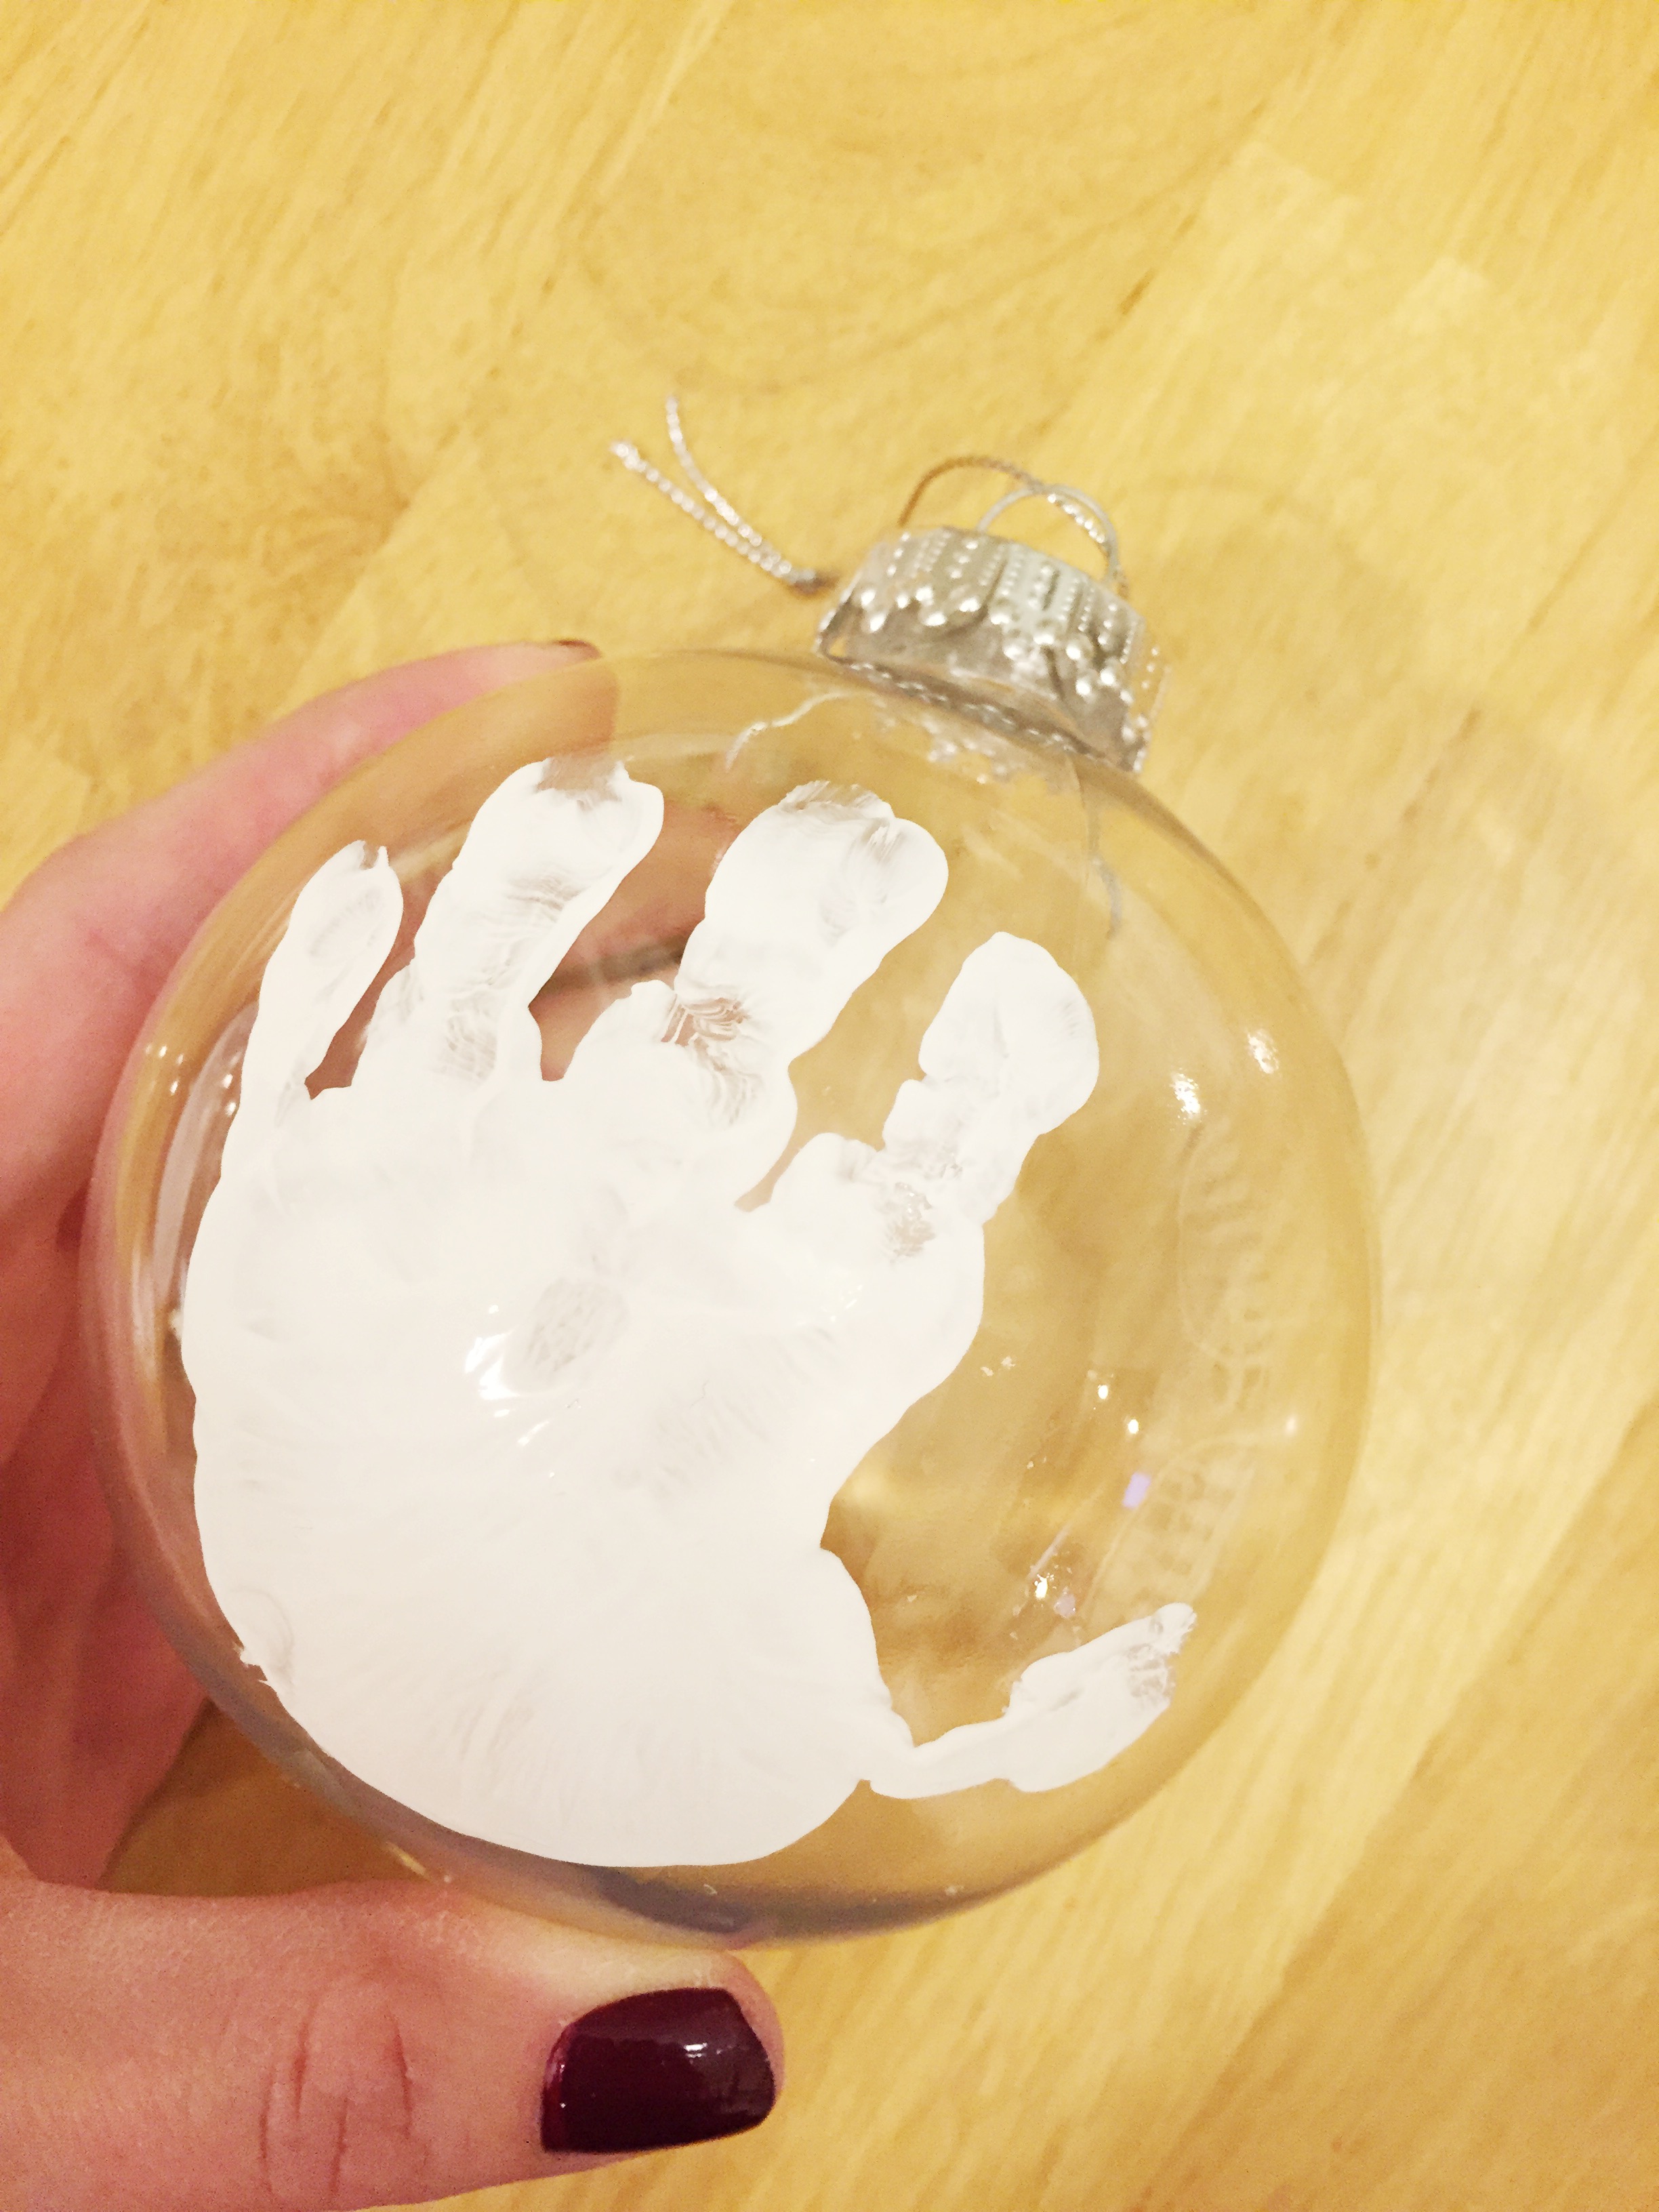
Paint your childs hand with the white paint and have them make a hand print on the bulb. For my 3 1/2 year old I just showed her how to put her fingers on the bulb and not wiggle them around, but for my almost 2 year old I found it easier to just hold his hand steady while pushing the ornament into his palm myself.

*TIP: If the fingers wiggle or the hand print doesn’t turn out I was able to quickly wash off the bulb, dry it, and redo the print!

snowmenhandprintornamentDIY-leahtackles.jpeg

Step 2:

Let the ornaments dry completely. I found that using small cups worked great for this so they wouldn’t roll.

Step 3:

Paint the details onto your snowmen! If you have an older child, they can do this part, or you can do it yourself. I had a lot of fun adding top hats, holly, earmuffs, scarfs, and of course that carrot nose! You could also use paint markers or permanent markers instead of paint to do this part if you prefer.

Step 4:

Let your ornaments dry completely!

Step 5:

Open the top of the ornament and put the snow flakes into the ornament. I found the using a funnel and a pen to shove the stubborn flakes down worked really well. You can put as much or as little in as you want, but I only filled mine up about 1/4 of the way.

Step 6:

Wrap to give away or hang on your tree!

snowmenornamentDIY-leahtackles.jpeg IMG_1601 IMG_1600

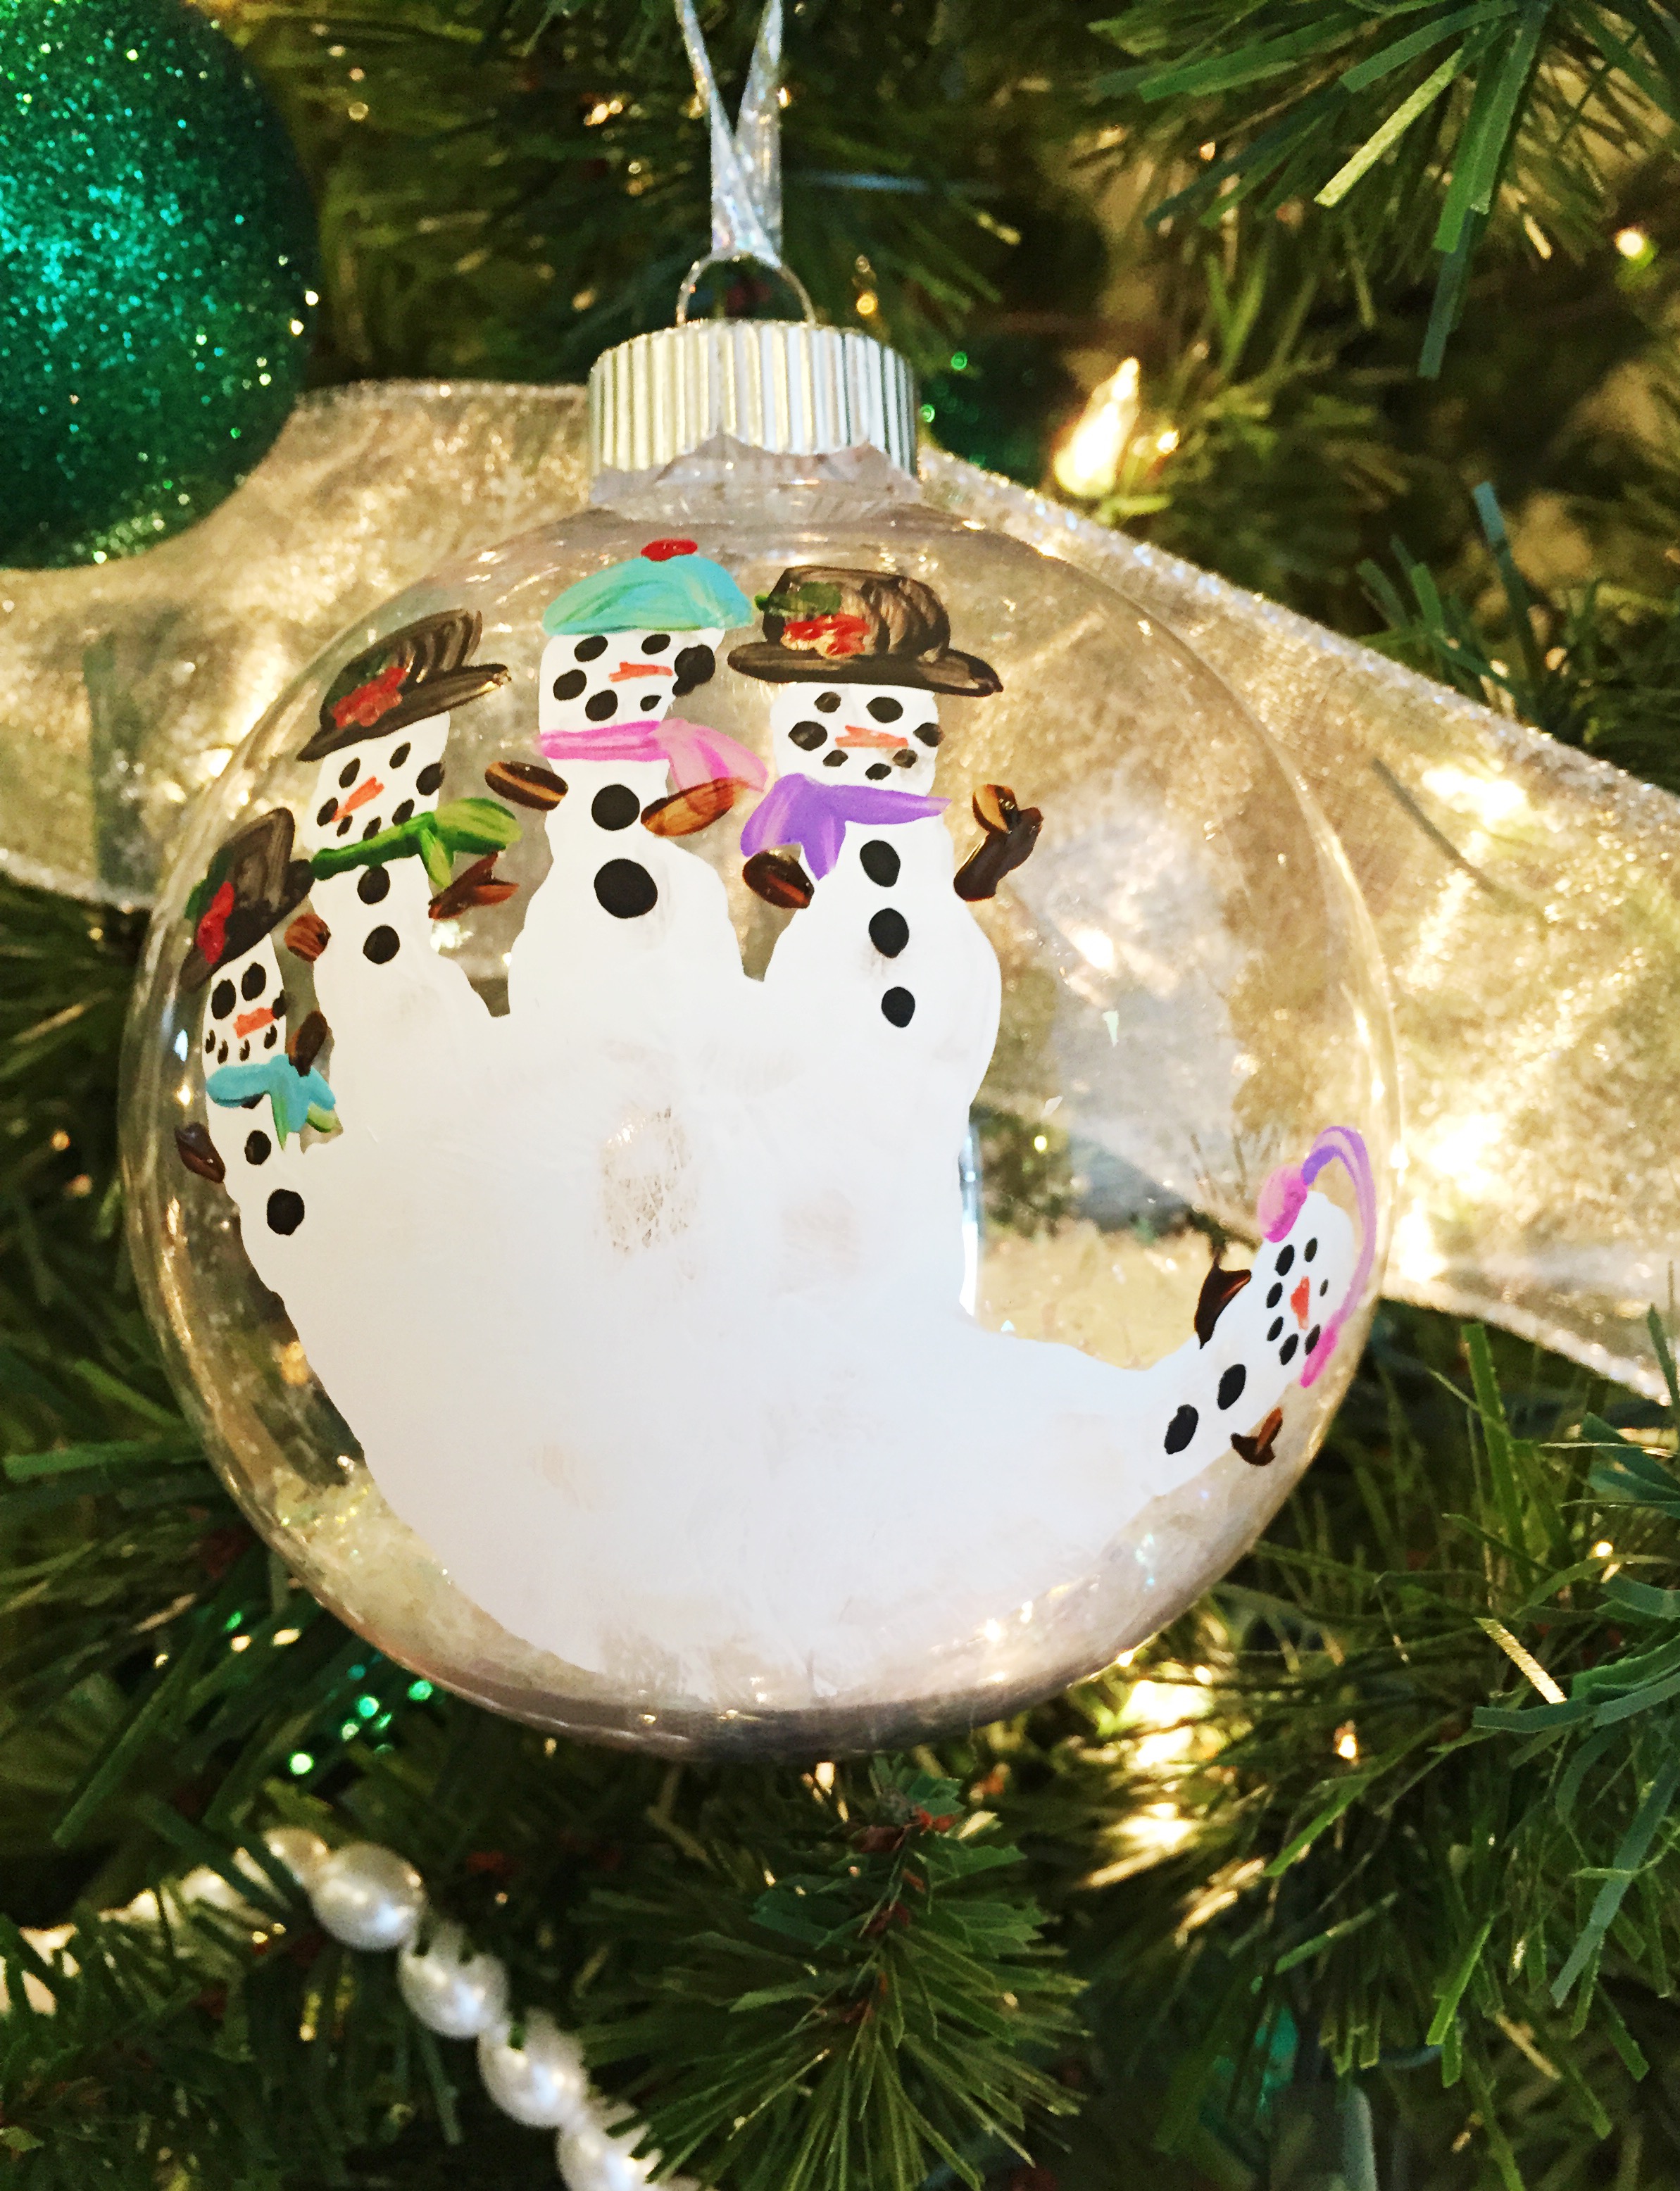
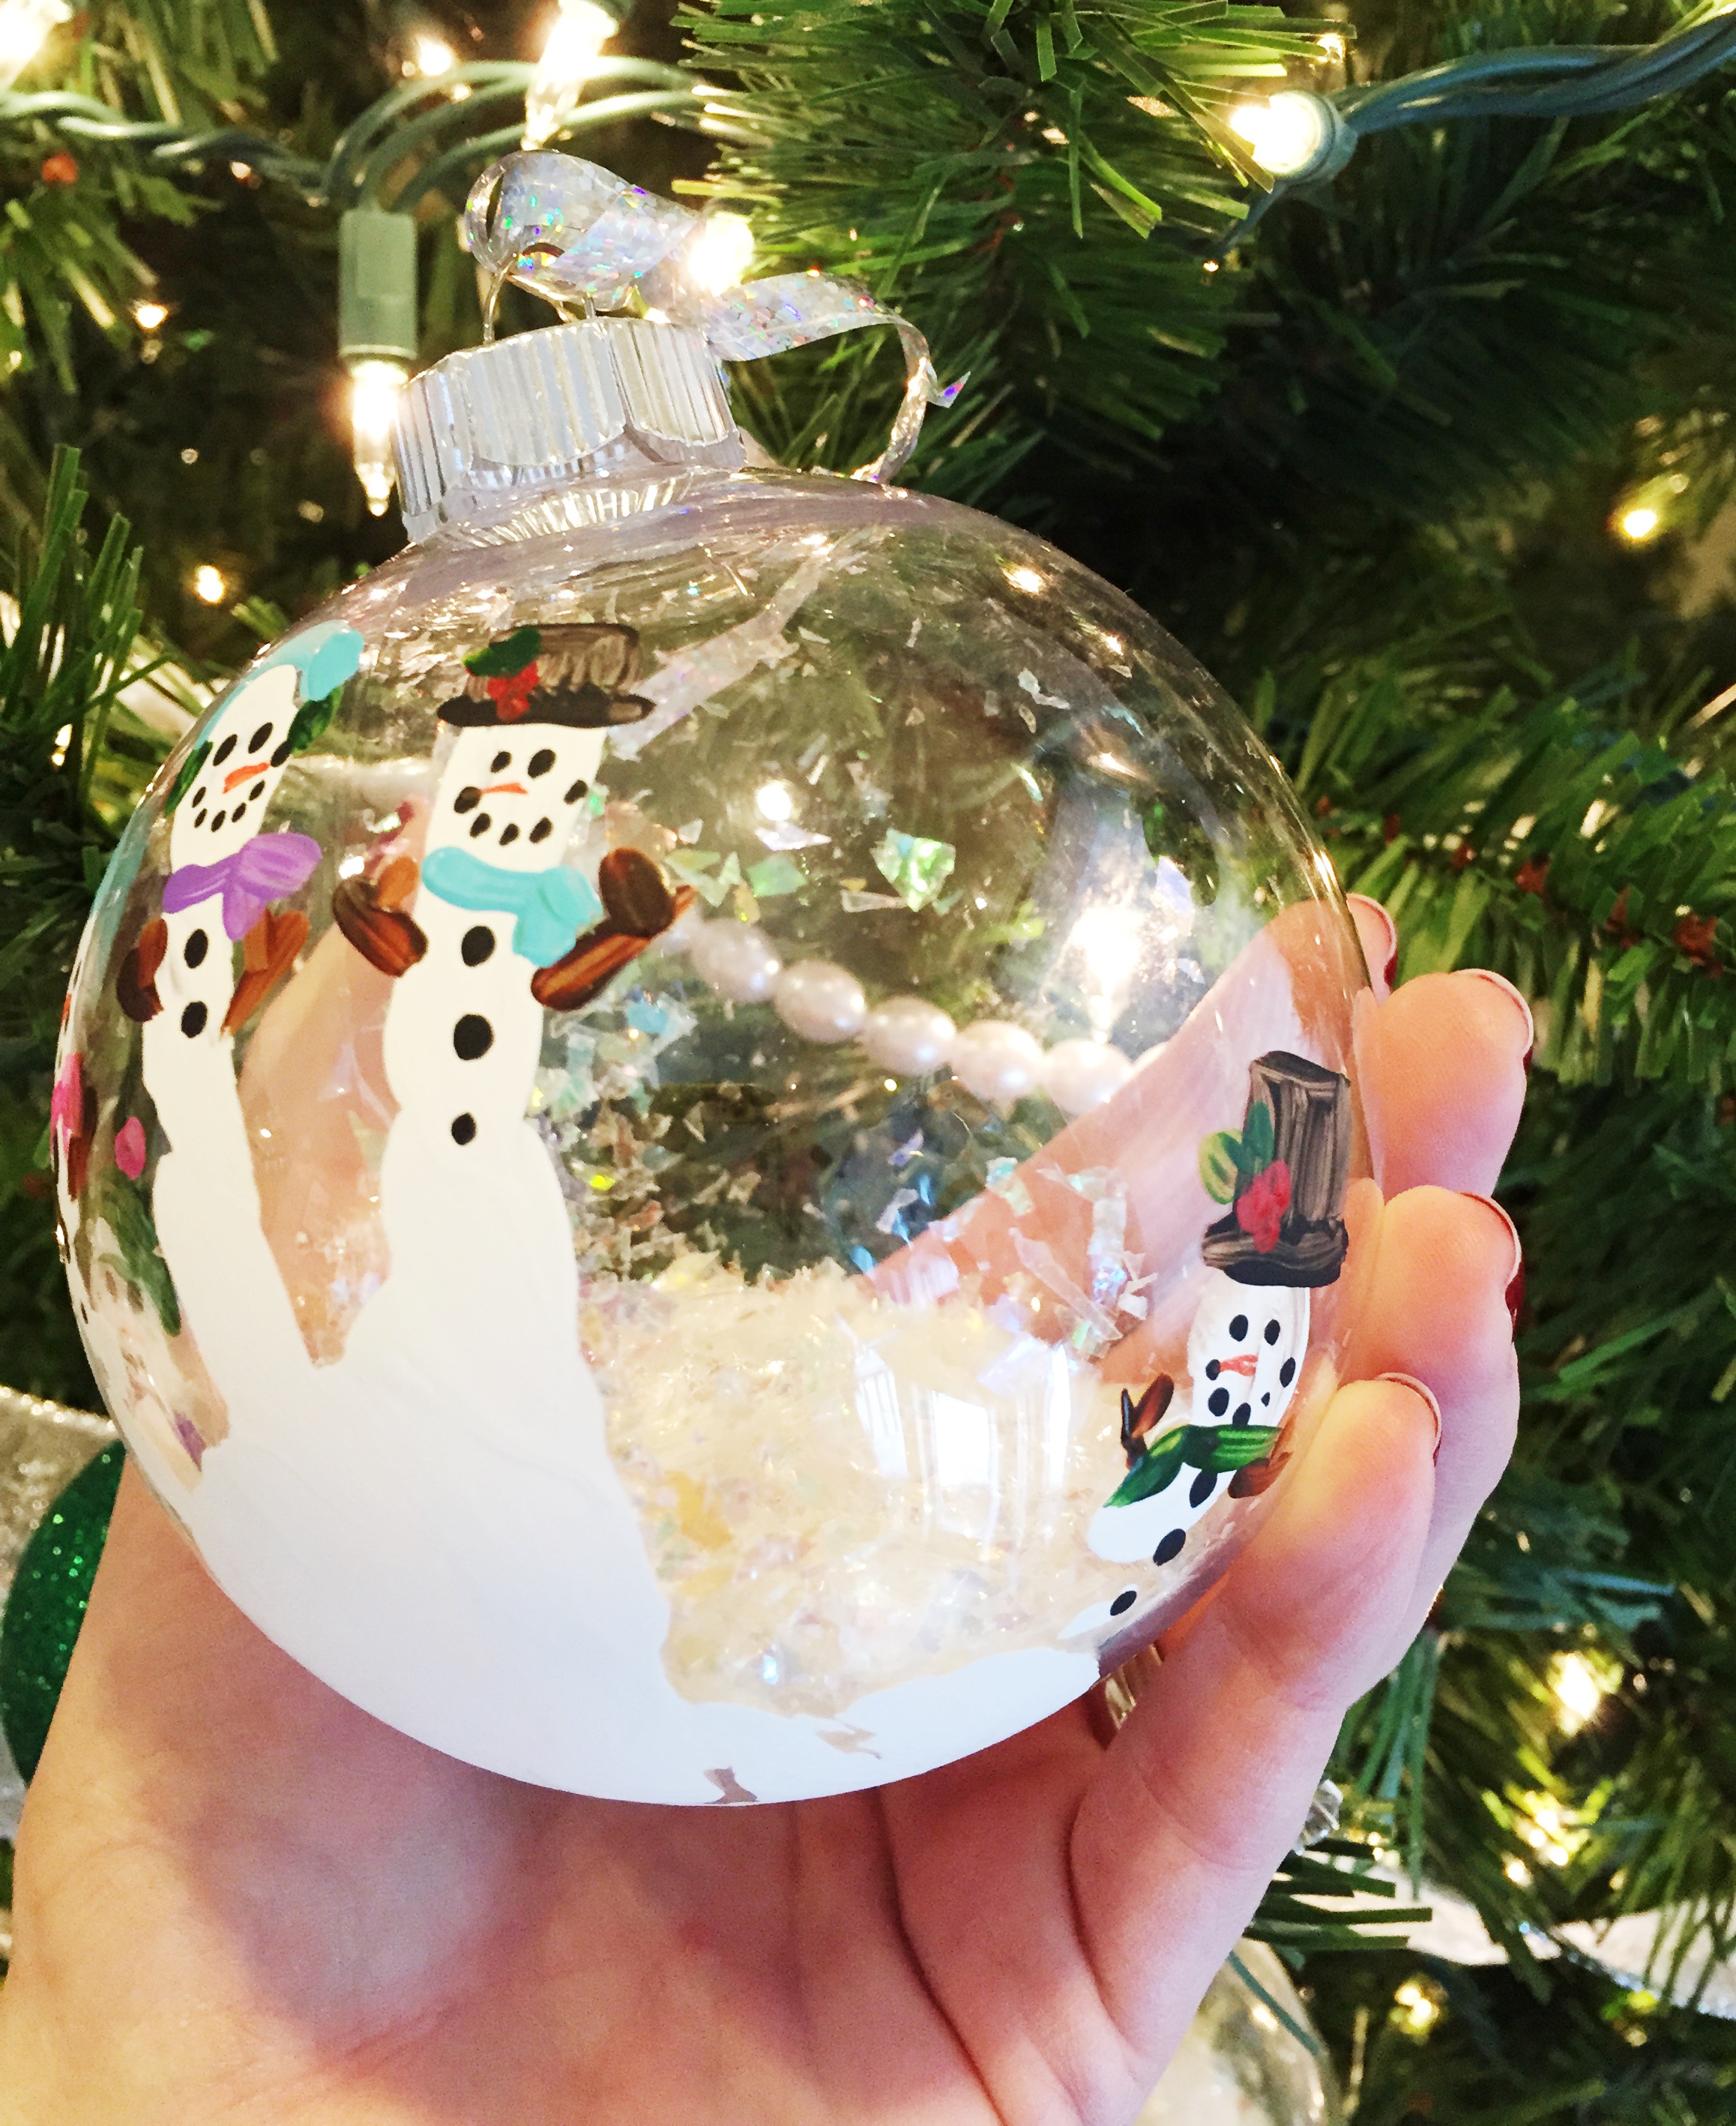
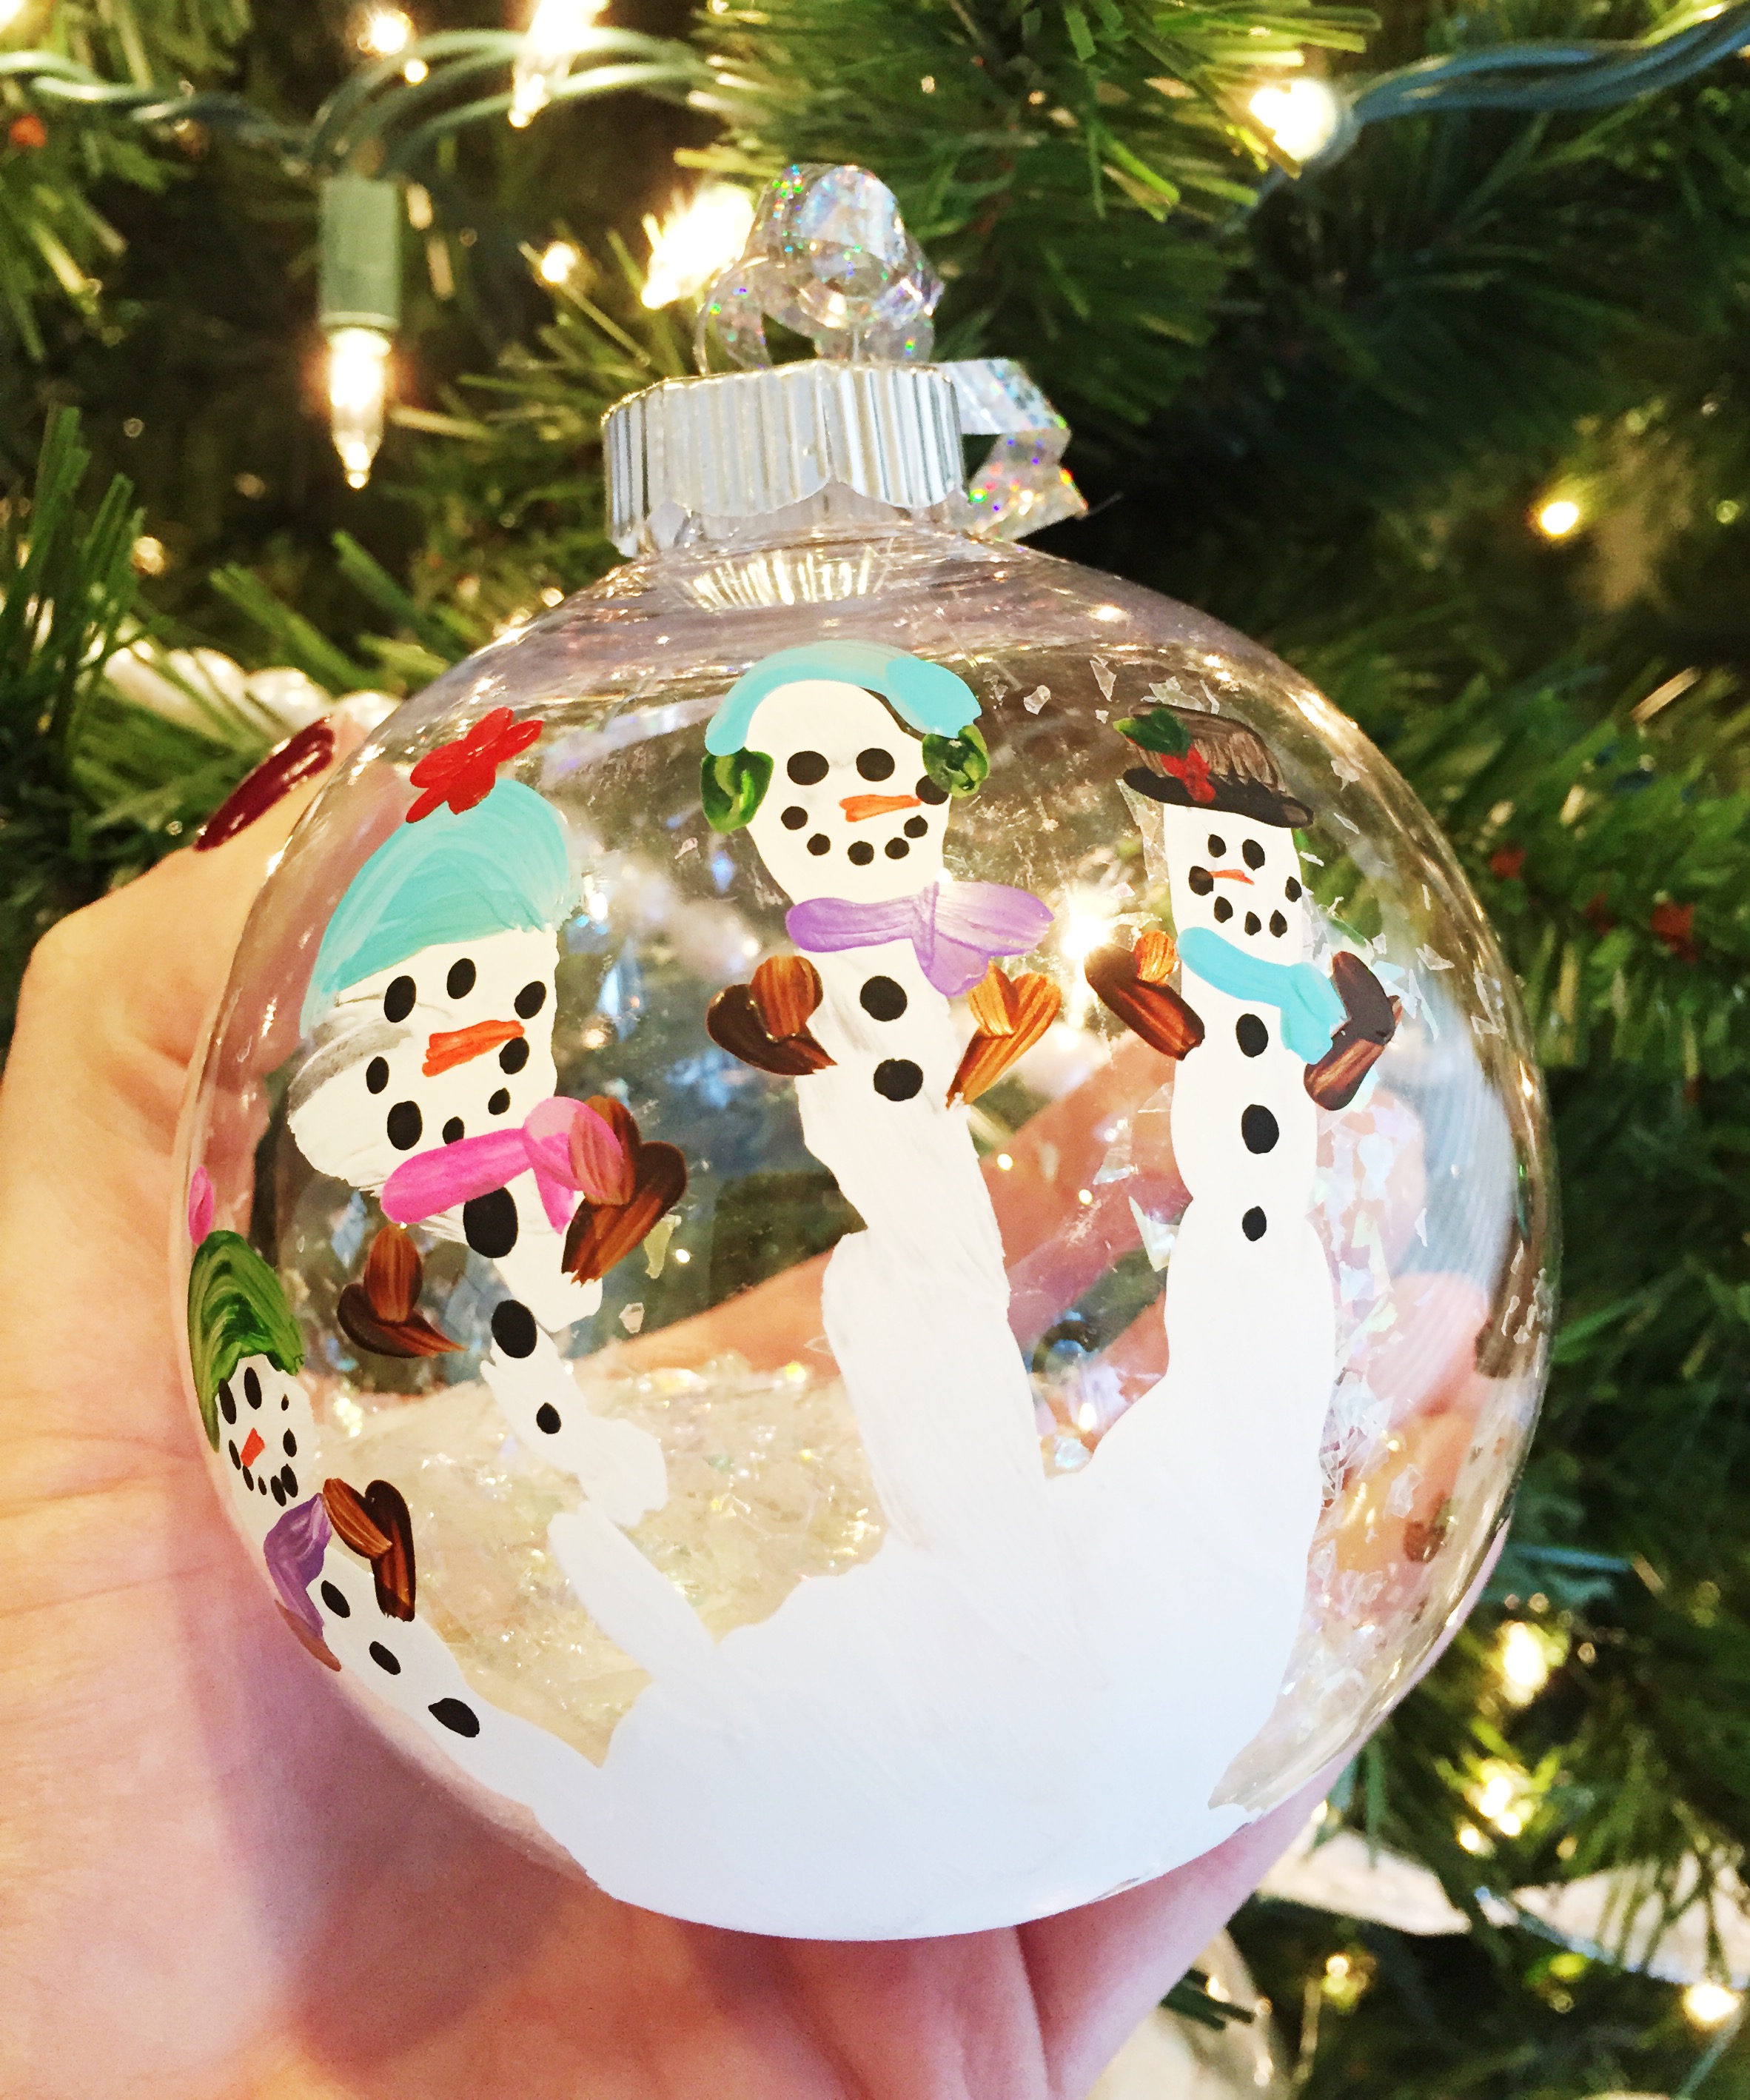
TOOT TOOT! Seriously sorry for tooting my own horn, really it’s just a proud mommy moment, but how cute are these?! I know this is a SUPER popular craft on Pinterest right now (speaking of, “pin” mine if you like it!) but I thought it would be nice to show a simple step-by-step that was not intimidating. This *won’t* be a “Pinterest fail”, promise : )

Again, thank you for reading and have a great weekend!! XO

FacebookTwitterEmailPinterestShare

Filed Under: DIY Projects Tagged With: christmas 2014, Christmas crafts for kids, christmas crafts for toddlers, christmas do it yourself ornaments, christmas projects, DIY Blogger, DIY Ornaments, DIY ornaments for kids, DIY snowmen hand print ornaments, DIY snowmen ornaments, leah tackles, Lifestyle Blogger, Mom Blogger, snowmen handprints

DIY CHRISTMAS GIFTS!!!

December 1, 2014 & 2 Comments

Hi there! Happy Monday!!

I hope that all of my American subscribers had a wonderful Thanksgiving with your friends and families! Can you believe it is DECEMBER?! I am having an especially hard time letting that sink in since it means my baby turns 2 this month, we have Christmas of course, and our newest addition is due in early January.

Because we have so much going on this month, I have been trying to get as much Christmas shopping and crafting done early as possible, and today I want to share two simple but adorable Christmas gift DIY projects.


Christmas Sock Coffee Cozy

I love this and am planning to keep one for myself! Too fun : )

What You’ll Need:

christmas-coffee-cozy-DIY-leahtackles.jpeg

A Pair of Christmas Socks

A Travel Coffee Mug (*Tip: Starbucks has the *cutest* holiday mugs this year!)

A glue gun or other strong glue of your choice

Optional: Chocolate to fill the cup with or a giftcard to hide inside : )

Step 1:

Cut the sock so it will be long enough to wrap around the mug (make sure to not use the heel part of the sock).

Step 2:

Glue the two ends of the piece of sock together so that you form a coffee cozy.

Step 3:

Put the cozy on the mug and fill the mug with chocolates, a giftcard, or whatever else you’d like!

christmas-coffee-cozy-DIY-leahtackles.jpeg

Pretty Nail Polish Gift Bag:

I love the way these turned out and plan on making several more!!

What You’ll Need:

DIY-Christmas-Nail-Polish-Gift-Bags-Leahtackles.jpeg

A Small Cellophane Bag

A Stapler

A Piece of Plain Paper or Christmas Scrapbook Paper

A Red Pen

Crinkle Paper or Confetti

Chocolate or Christmas Candy of Your Choice

Nail Polish

Step 1:

Fill the cellophane bag with the crinkle paper or confetti and then add in your chocolates and nail polish.

Step 2:

Measure the paper so it is the length of the top of the bag and fold it in half lengthwise so it will fit over the top of the bag, and then cut your paper. Write a note or greeting on the paper and then staple it to the top of the bag.

Step 3:

Pass out your cute little bags! These also make great stocking stuffers, and you can put other items like giftcards or lip gloss.

DIY-Christmas-nail-polish-giftbag-leahtackles.jpeg

I hope that you have enjoyed this post! Please “Pin” it to your Pinterest account! It’s easy, just scroll over any picture until the pink “Pin” button appears or use the share buttons at the bottom of this post. Have a wonderful start to your week and MONTH! It’s time to get holiday ready!!

FacebookTwitterEmailPinterestShare

Filed Under: DIY Projects Tagged With: beauty blogger, Christmas DIY Project, DIY Blogger, DIY Christmas, DIY Christmas Coffee Cozy, DIY Christmas Goodie Bags, DIY Christmas Nail Polish Gift Bag, DIY Christmas projects, DIY Coffee Cozy, leah tackles, Lifestyle Blogger, nail polish, Starbucks


SUBSCRIBE

Leave your email to subscribe!

SEARCH

SPONSORS

ARCHIVES

GRAB MY BUTTON


copy & paste code

site design by The Kinch Life Design & development by Olive & Ivy Design